
Window painting is the easiest Halloween decorating you’ll do all year. A few bottles of washable paint turn plain glass into bats, pumpkins and haunted houses the whole street can see, and it comes off with warm water when the season is over.
Below are 55 ideas, from five-minute corner designs to full-window scenes, silhouettes, stained glass and lettering. Each one lists the supplies and one tip that makes it easier. Decorating the mantel too? Our Halloween mantel decor ideas use the same colors.
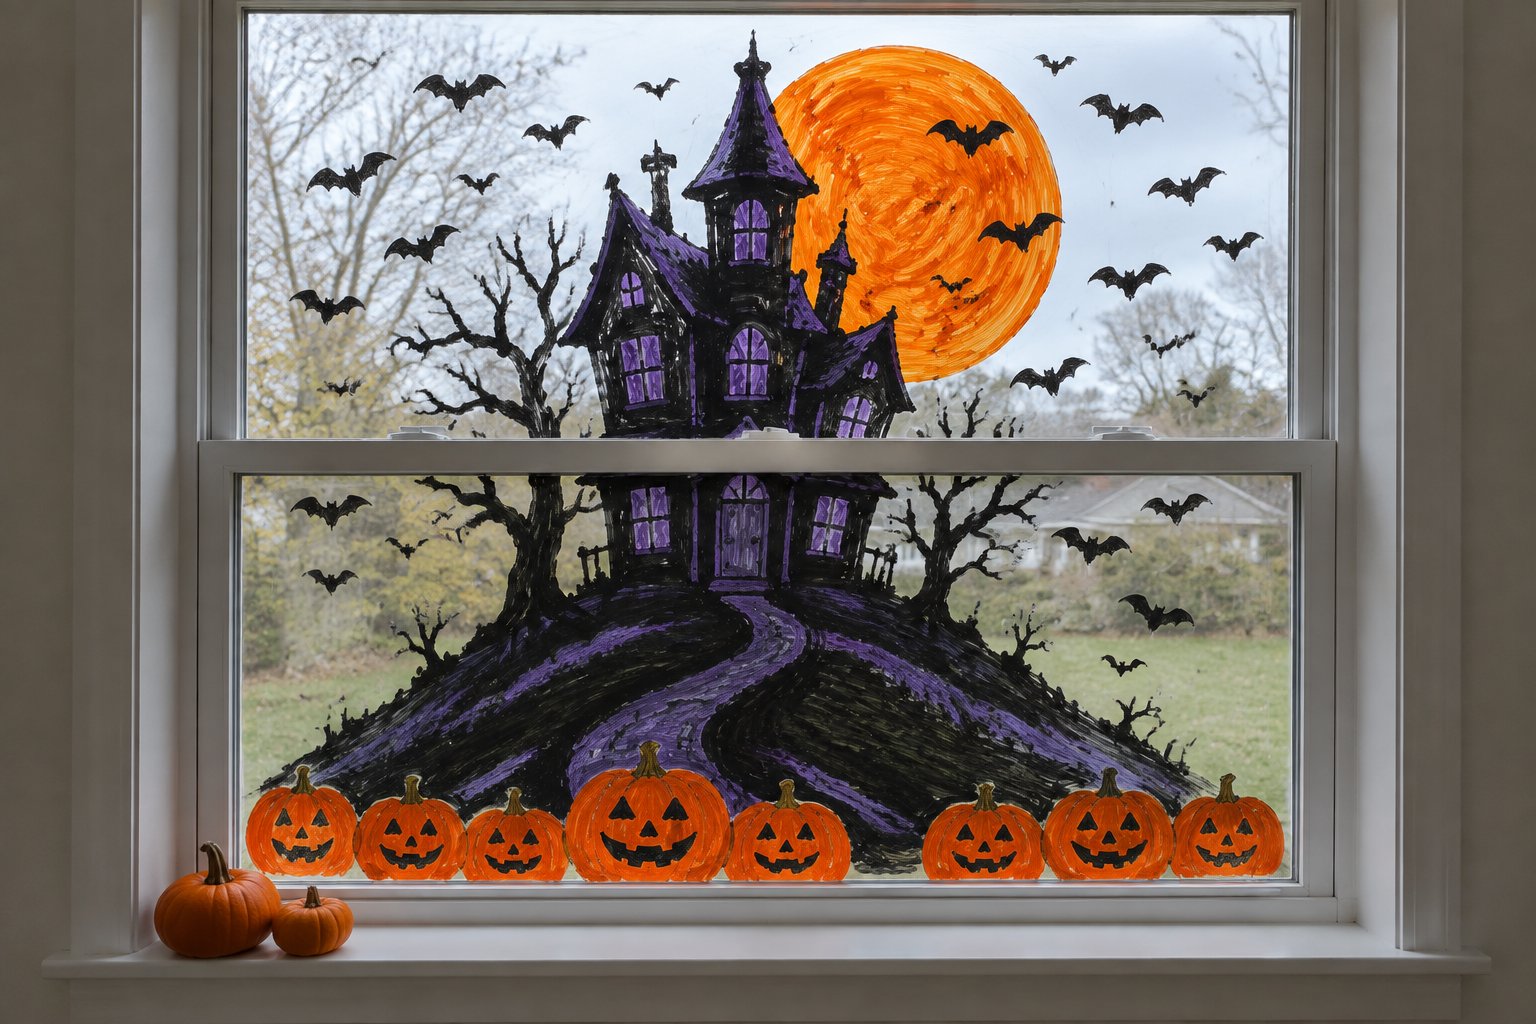
Easy Halloween Window Painting Ideas
1. Spider Web Corners
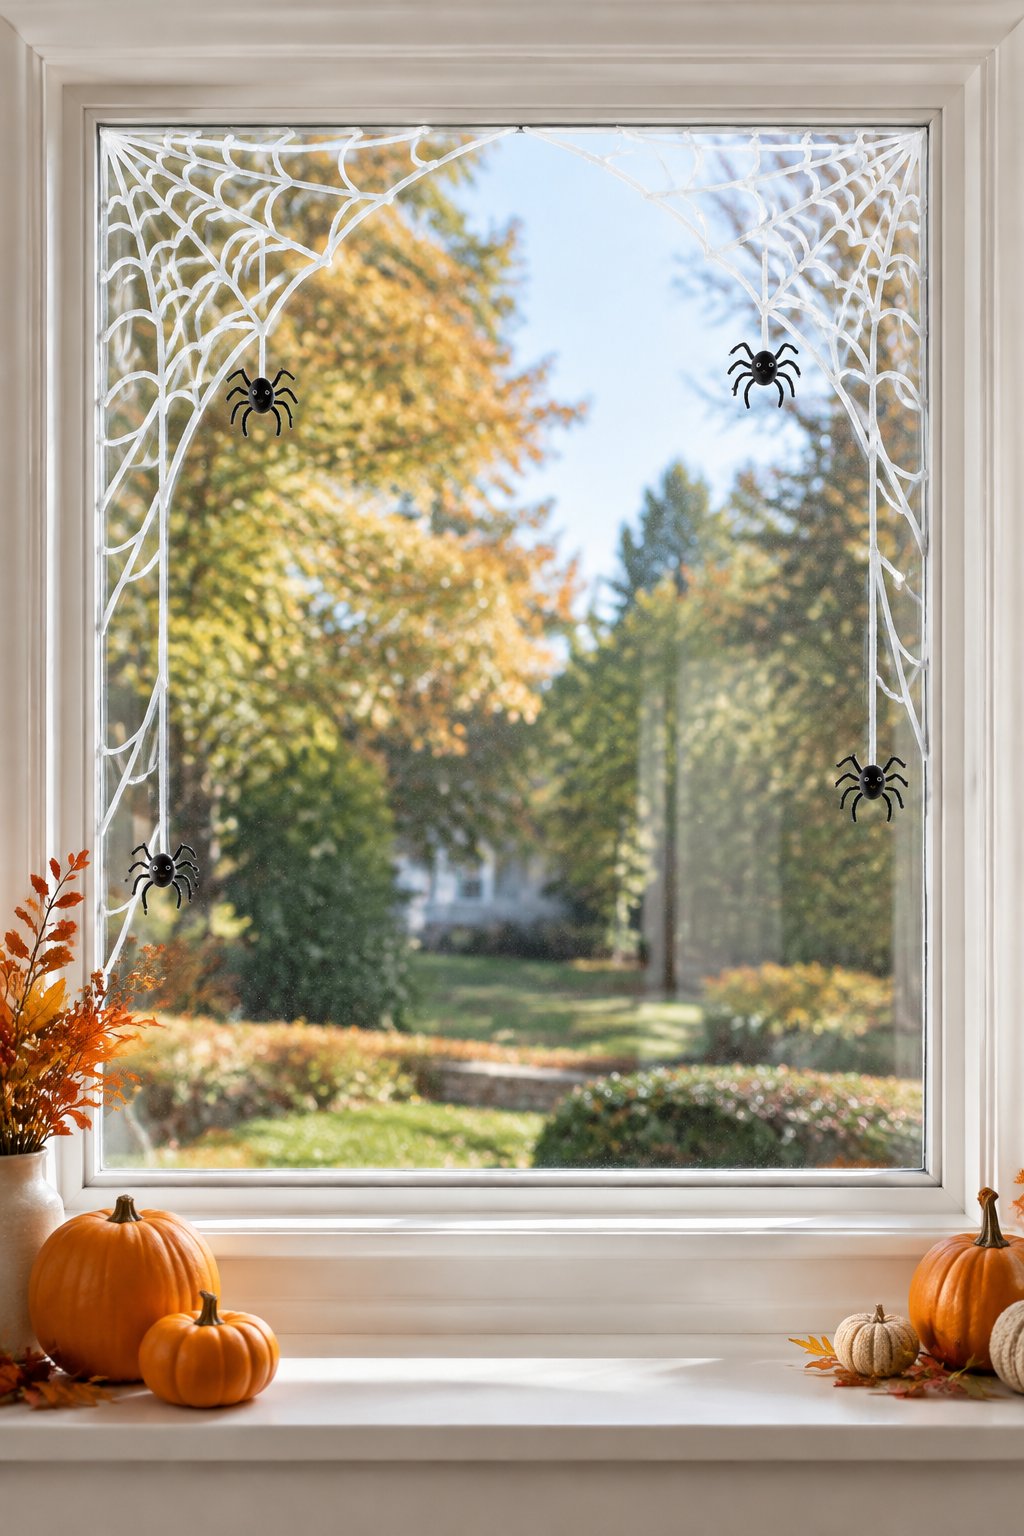
White spider webs stretch across the upper corners of a kitchen window over the sink. Each web covers about 12 inches of glass, with small black spiders scattered along the strands.
Grab white washable window paint, black paint, a fine brush, a round sponge, and cotton swabs. Paint the longest web lines first, then add the curved threads so the corners look neat.
2. Bat Swarm Across the Glass
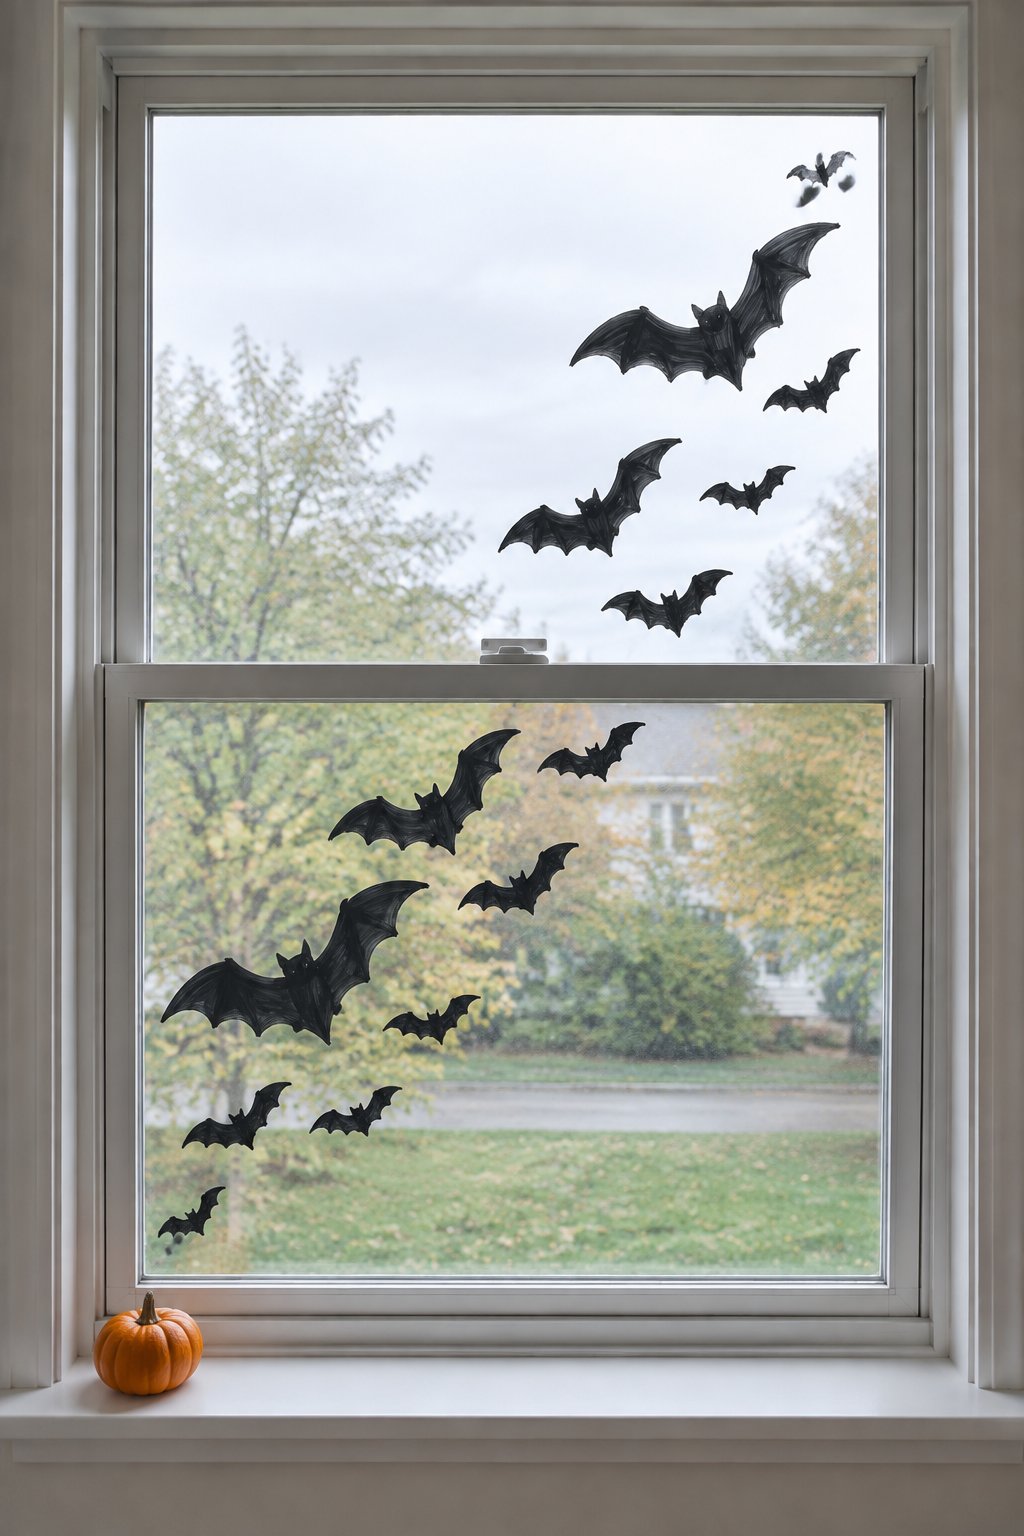
A sweeping group of black bats crosses a double-hung living room window from the lower left to the upper right. Mix 2-inch bats with a few larger 5-inch shapes, which gives the movement across the panes a more natural feel.
Gather black washable paint, a detail brush, bat stencils, painter’s tape, and a cotton swab. Tape the stencil to the glass, then change the bat angles as you work across the window.
3. Ghost Trio With Dot Eyes
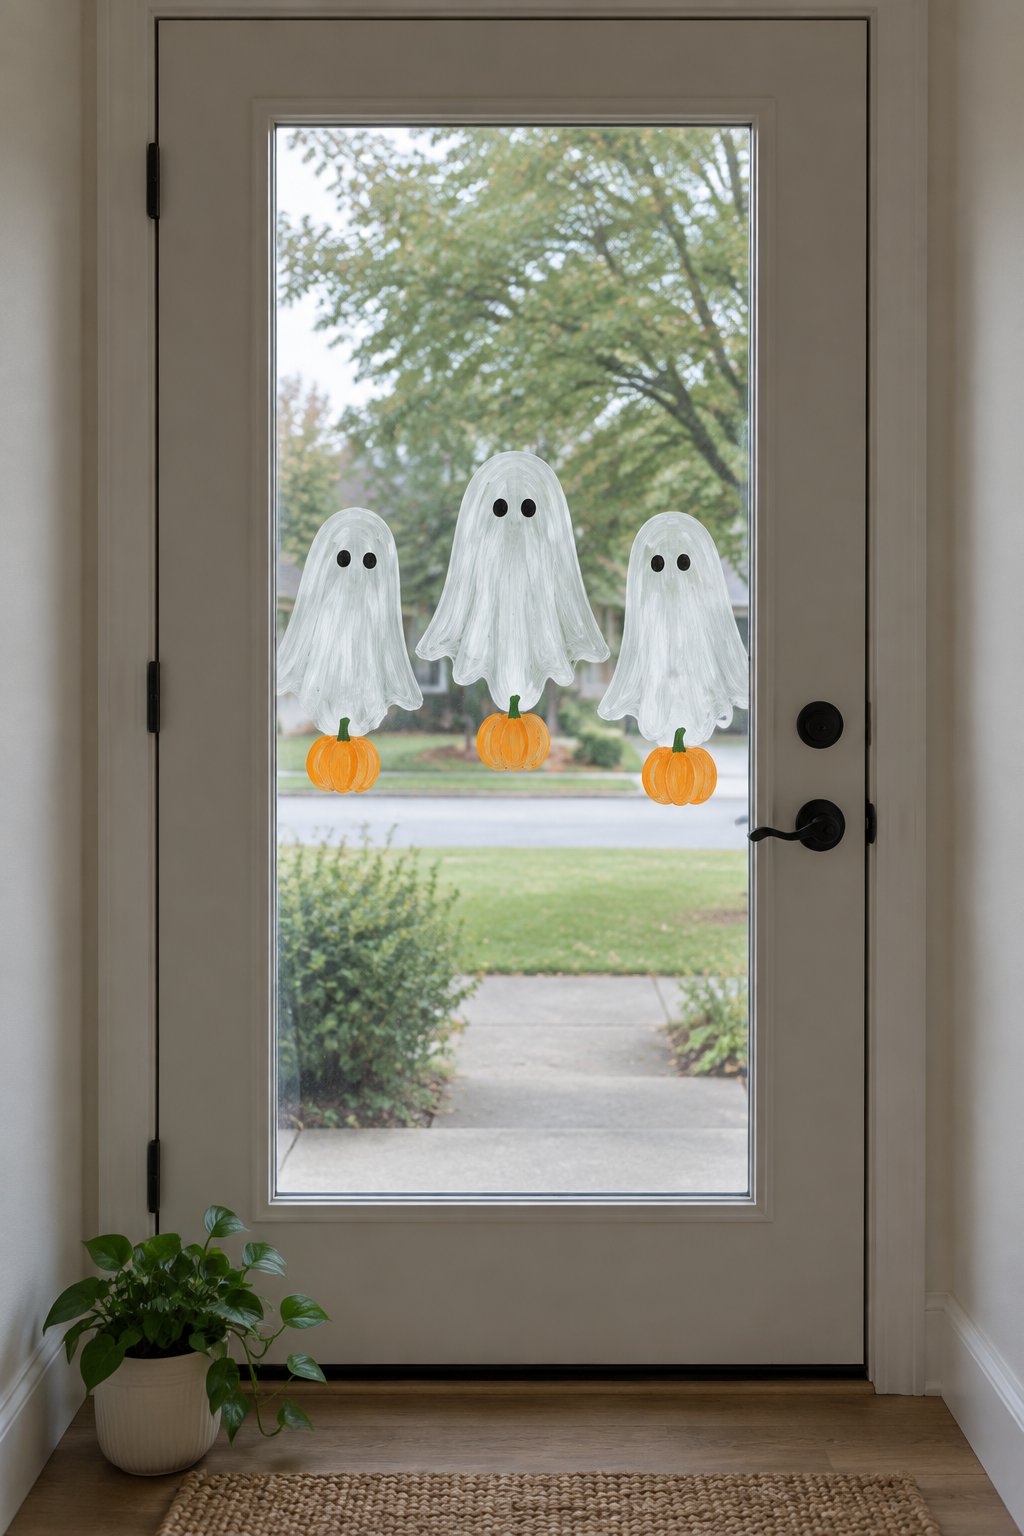
Three white ghosts float across the center of a front door glass panel. Their rounded bodies measure 8 to 10 inches tall, with black dot eyes and small orange pumpkins beneath them.
Choose white and black washable paint, orange paint, a medium brush, a fine brush, and a sponge. Dab the ghost edges with the sponge to soften the shapes, then add the eyes once the white paint has dried.
4. Jack-o’-Lantern on Every Pane
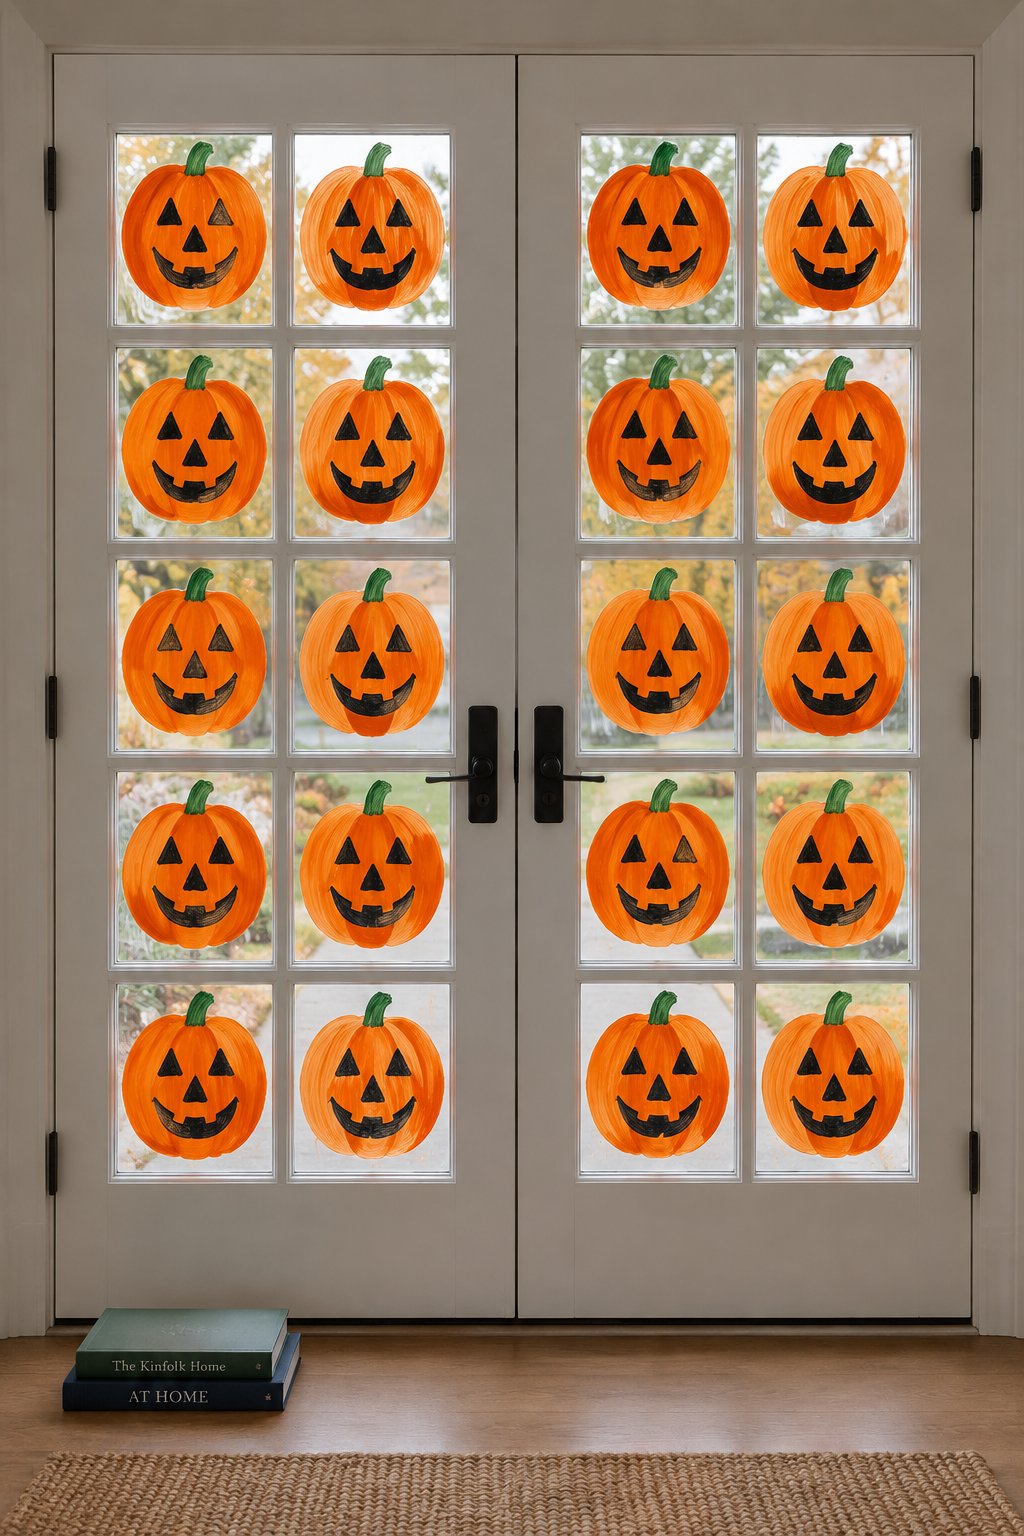
Cheerful orange jack-o’-lantern faces fill every pane of a French door window. Each face sits inside its own glass section, with black triangle eyes, noses, and curved smiles.
Set out orange and black washable paint, a flat brush, a fine brush, painter’s tape, and a small sponge. Use the muntins as natural guides, then repeat one simple face pattern for a tidy finish.
5. Candy Corn Border
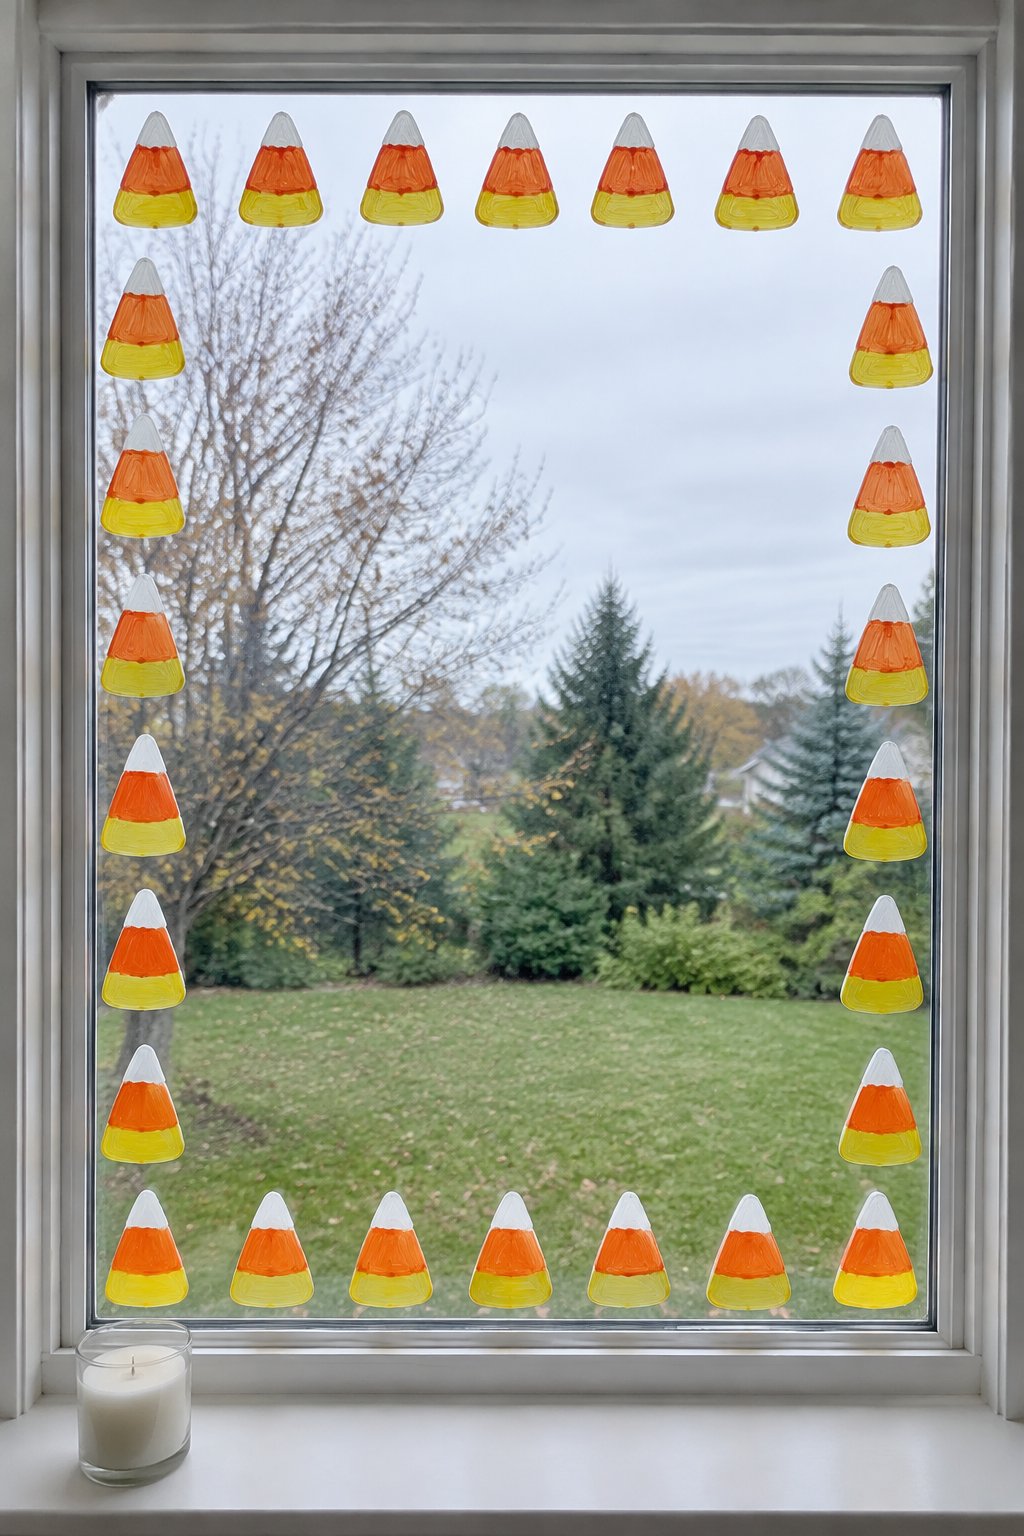
Chunky candy corn pieces form a border around a large picture window. Each triangle is about 4 inches tall, with white tips, orange centers, and yellow bases spaced evenly around the glass.
Reach for white, orange, and yellow washable paint, a flat brush, painter’s tape, and a cotton swab. Tape a light outline for each triangle, then paint one color band at a time.
6. Full Moon and Flying Bats
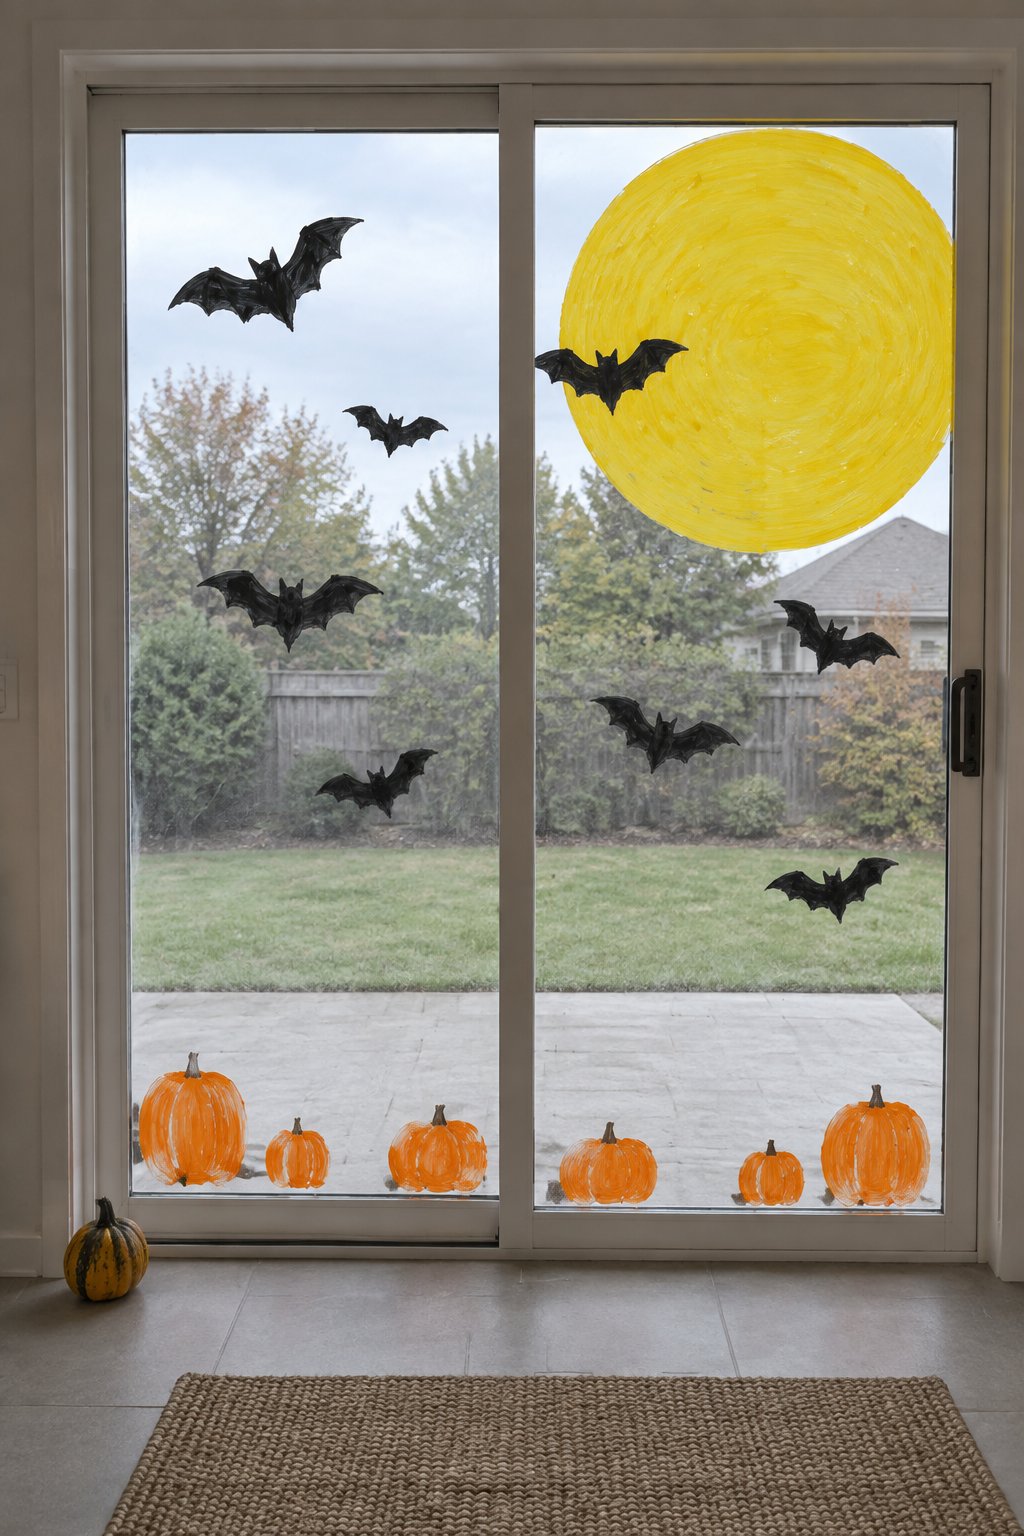
A round yellow full moon fills the upper right of a sliding patio door, with black bats flying across the surrounding glass. Small orange pumpkins sit along the bottom edge in a loose row.
Bring yellow and black washable paint, orange paint, a circle stencil, a wide brush, and a fine brush. Trace the moon with a plate, then add the bats once the moon dries.
7. Dotted Pumpkin Patch
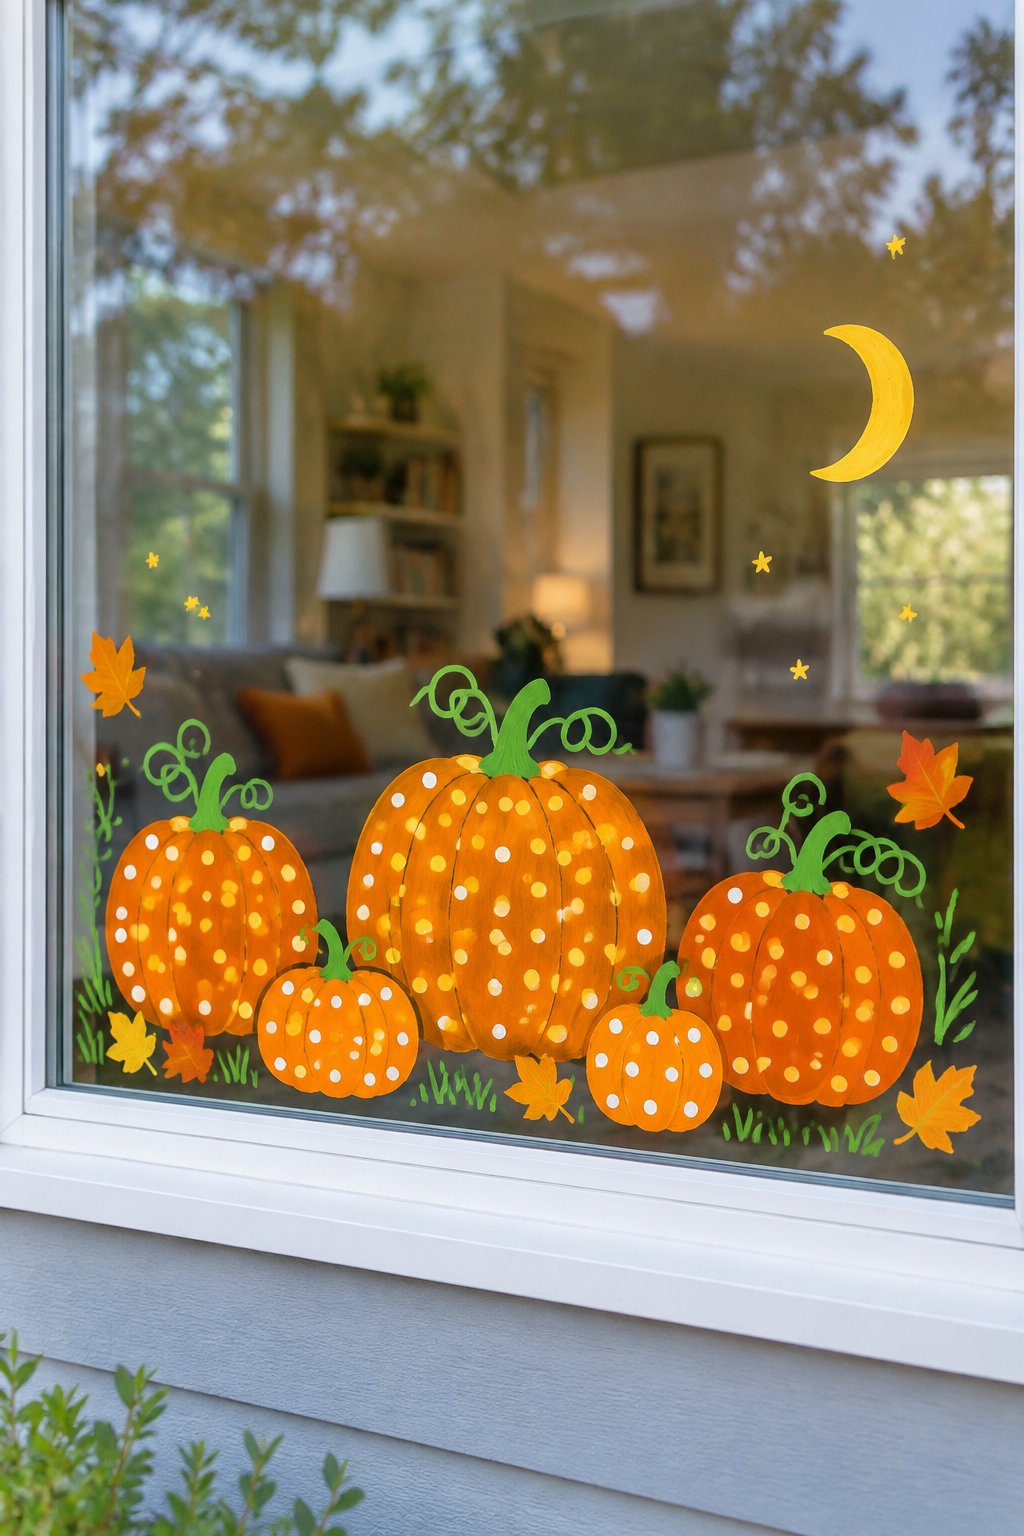
Orange pumpkins made from dotted paint fill the lower half of a living room window. Green vines curl between the pumpkins, with red and yellow leaves scattered along the edges.
Use orange, green, red, and yellow paint markers, a dotting tool, a leaf stencil, and painter’s tape. Mark the ground line first so the pumpkin patch stays level across the glass.
Halloween Window Art
8. Haunted House on the Hill
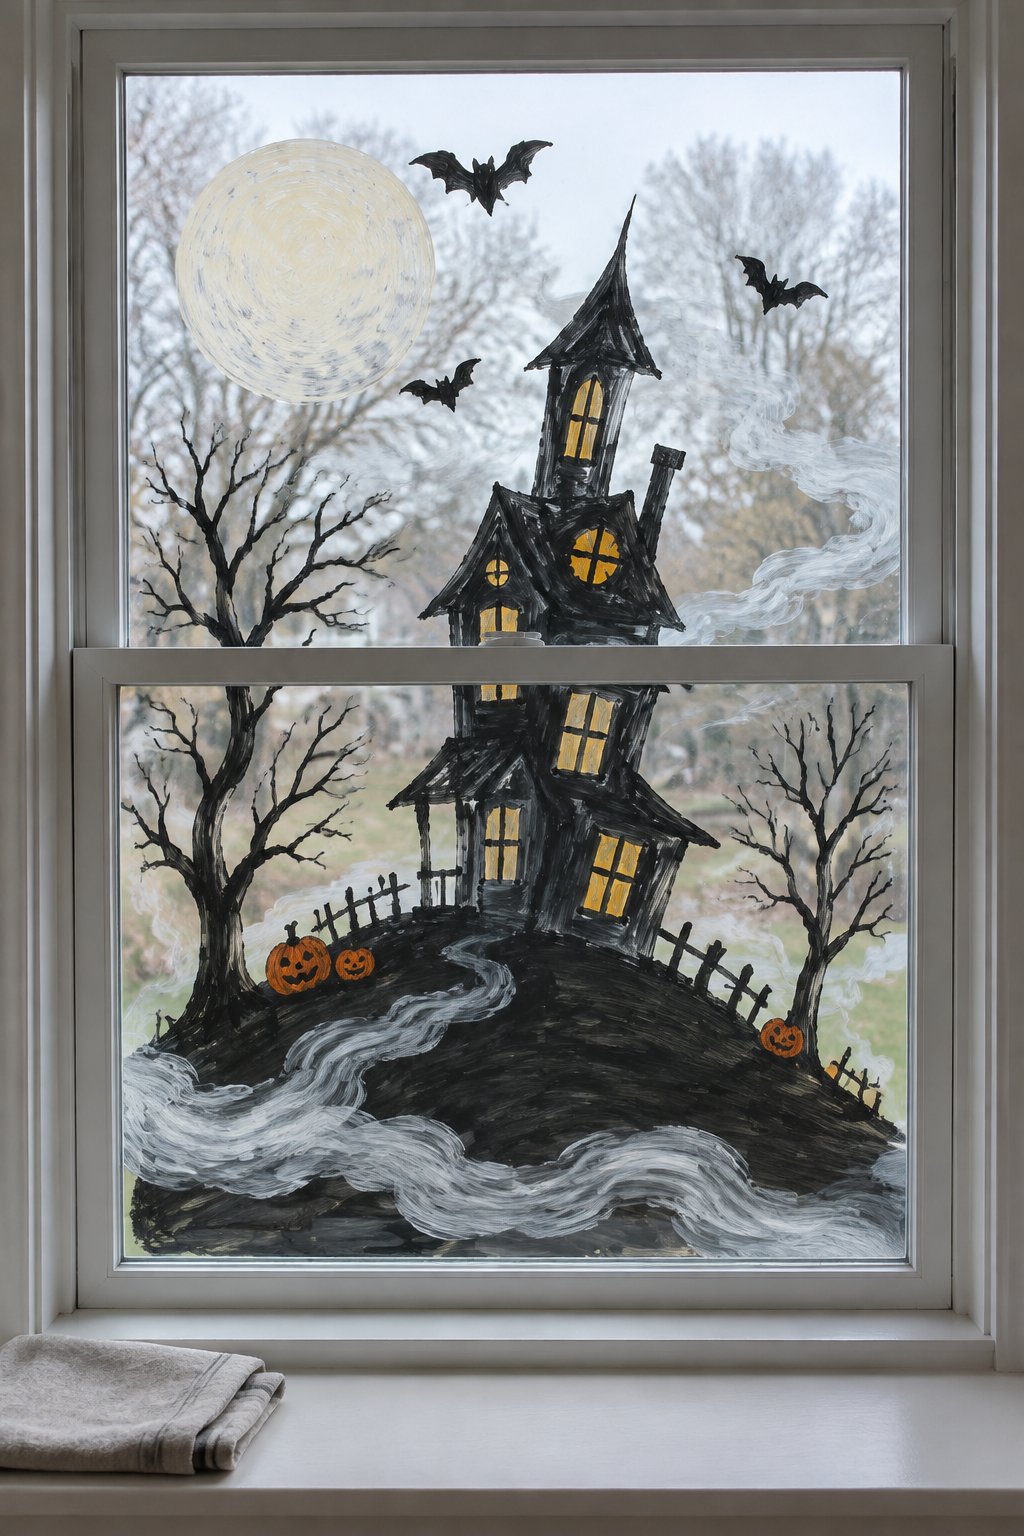
A crooked haunted house sits on a black hill across a double-hung living room window. A pale moon, bare trees, small pumpkins, bats, and white fog fill the space around the house.
Gather black, gray, white, yellow, and orange washable paint, detail brushes, painter’s tape, and cotton swabs. Paint the background shapes first, then add the windows and branches with a fine brush.
9. Black Cat on a Crescent Moon
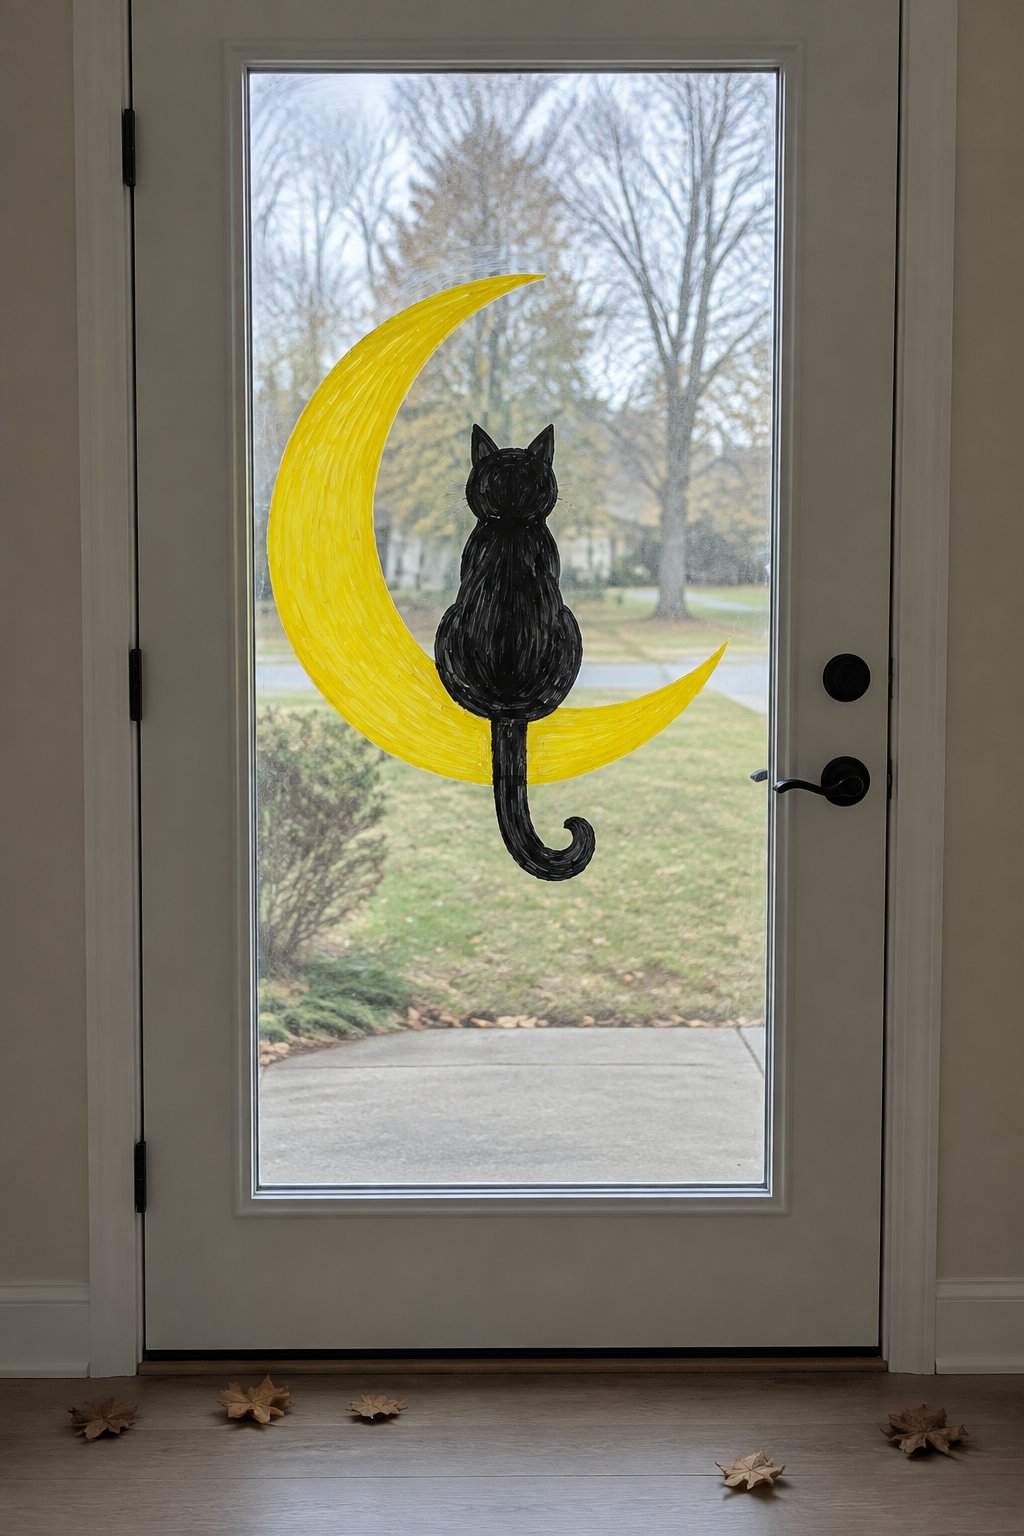
A black cat silhouette sits on a yellow crescent moon near the center of a front door glass panel. The moon spans about 10 inches, while the cat’s pointed ears and curved tail create a clear outline.
Pick up black and yellow washable paint, a crescent stencil, a fine brush, painter’s tape, and a small sponge. Paint the moon first, and wait until it dries before adding the cat silhouette.
10. Pumpkin Patch Landscape
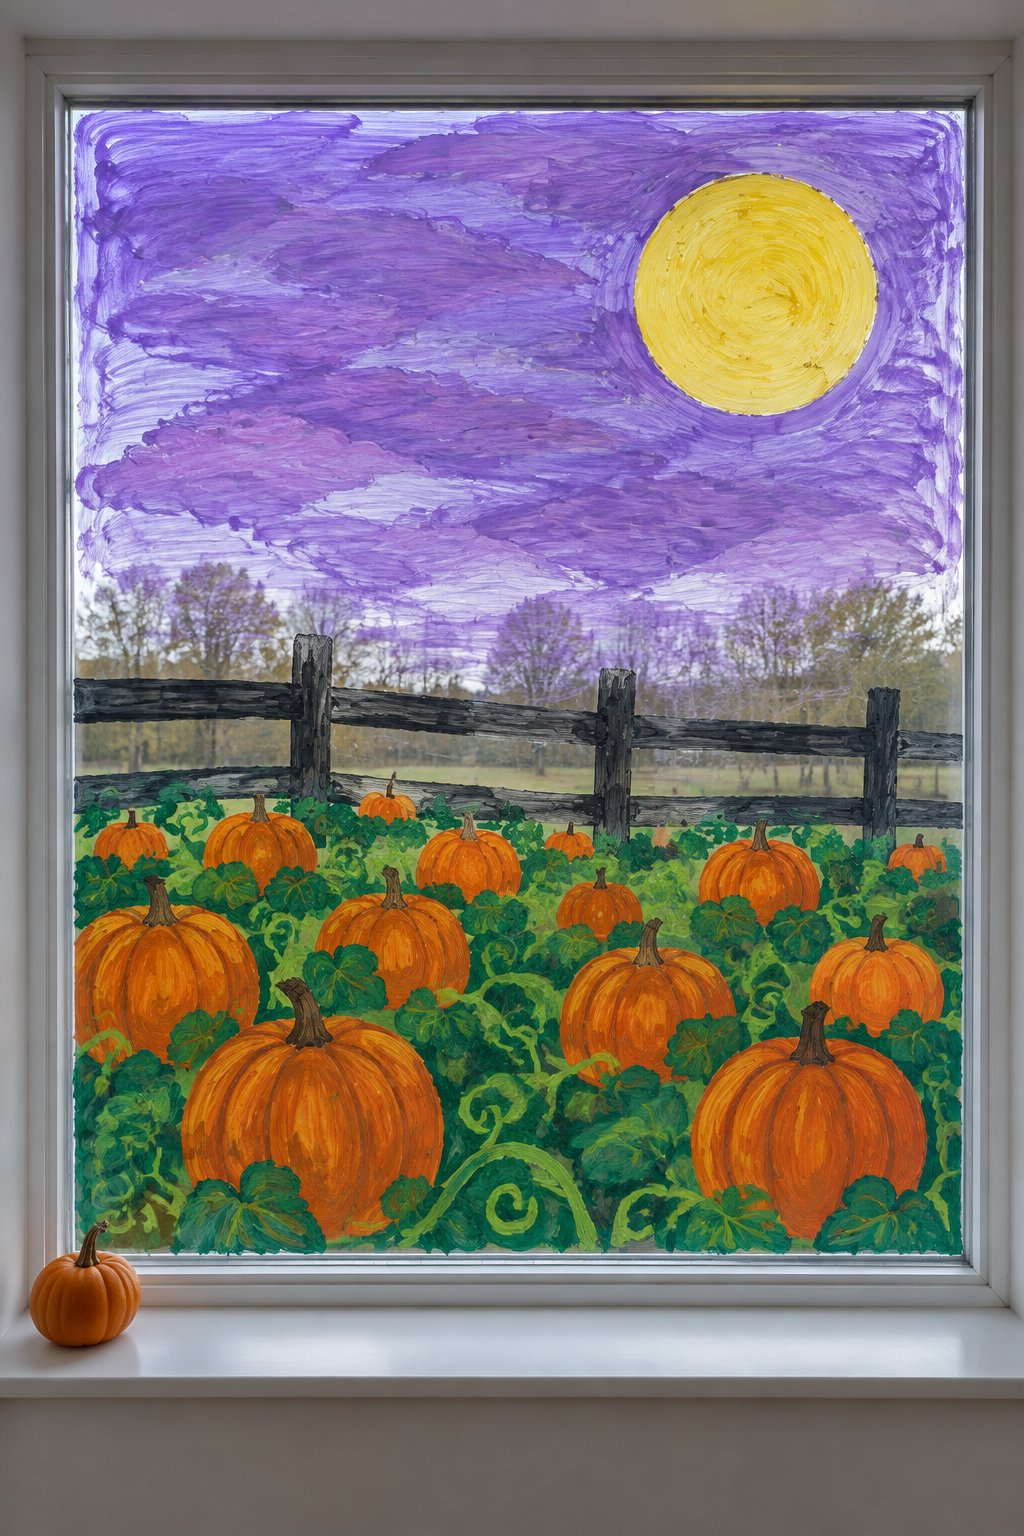
A pumpkin patch landscape spreads across a large picture window beneath a purple sky and yellow moon. Orange pumpkins, green vines, and a dark fence fill the lower half of the glass.
Choose purple, yellow, orange, green, and black washable paint, wide brushes, fine brushes, painter’s tape, and a sponge. Tape the fence line first, then layer the sky, moon, pumpkins, and vines.
11. Owl on a Bare Branch
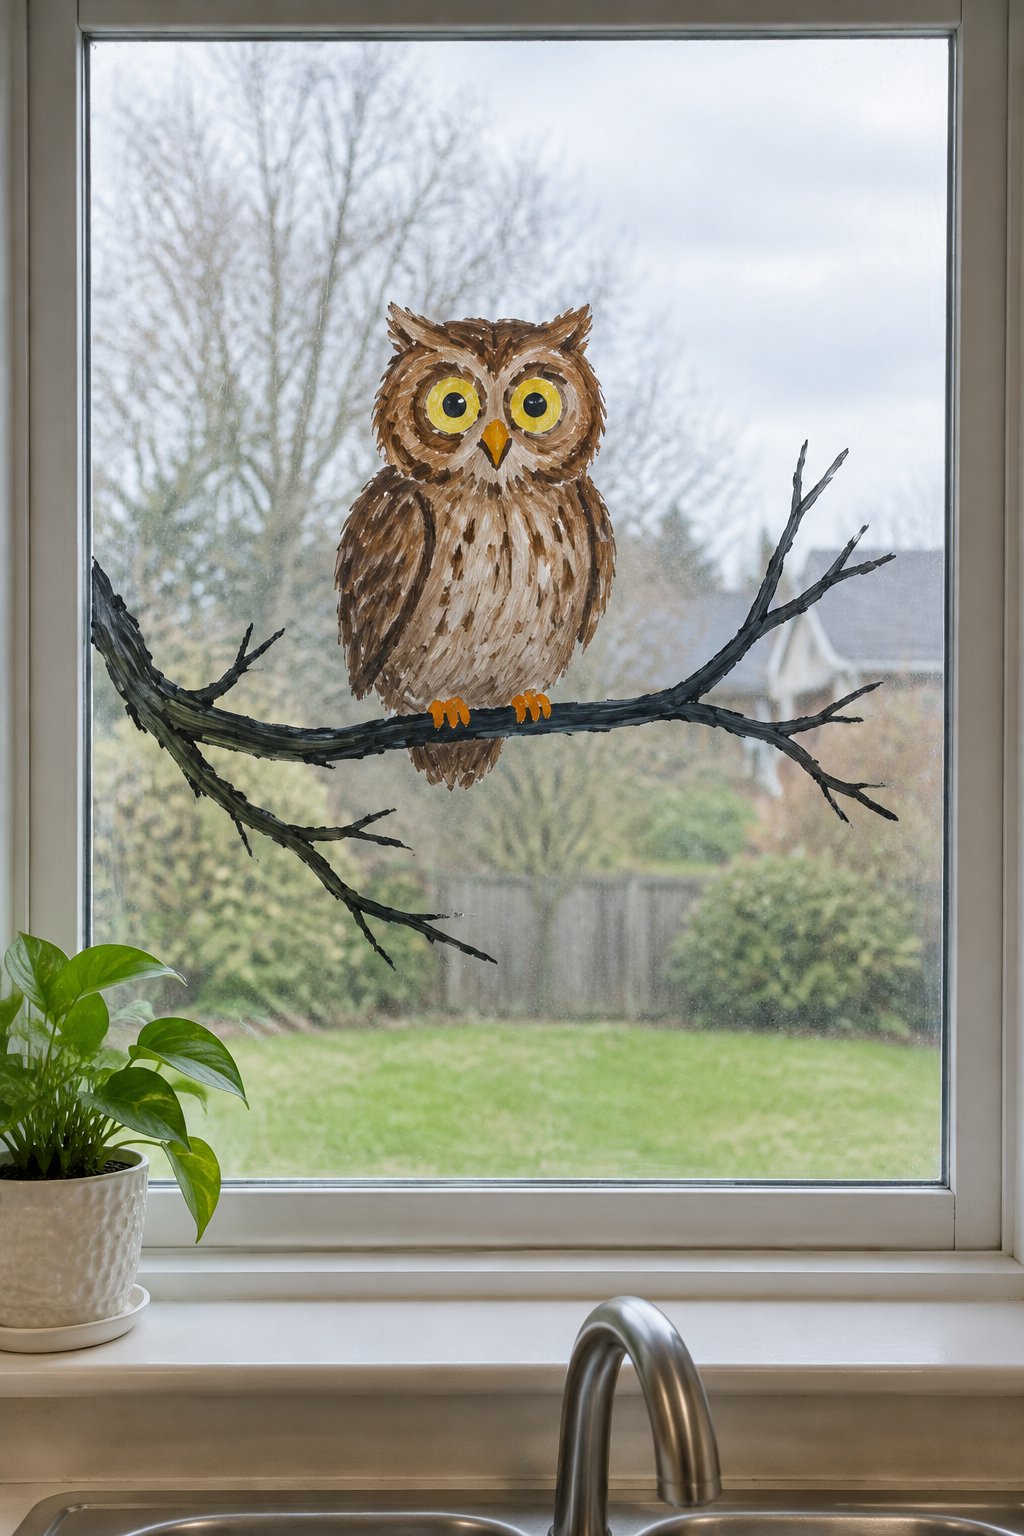
A round-eyed brown owl perches on a bare black branch across a kitchen window over the sink. The owl measures about 9 inches tall, with yellow eyes and small orange feet.
Set out brown, black, yellow, and orange paint, a medium brush, a detail brush, a branch stencil, and cotton swabs. Paint the branch first so the owl’s feet line up with it.
12. Crows on a Fence Line
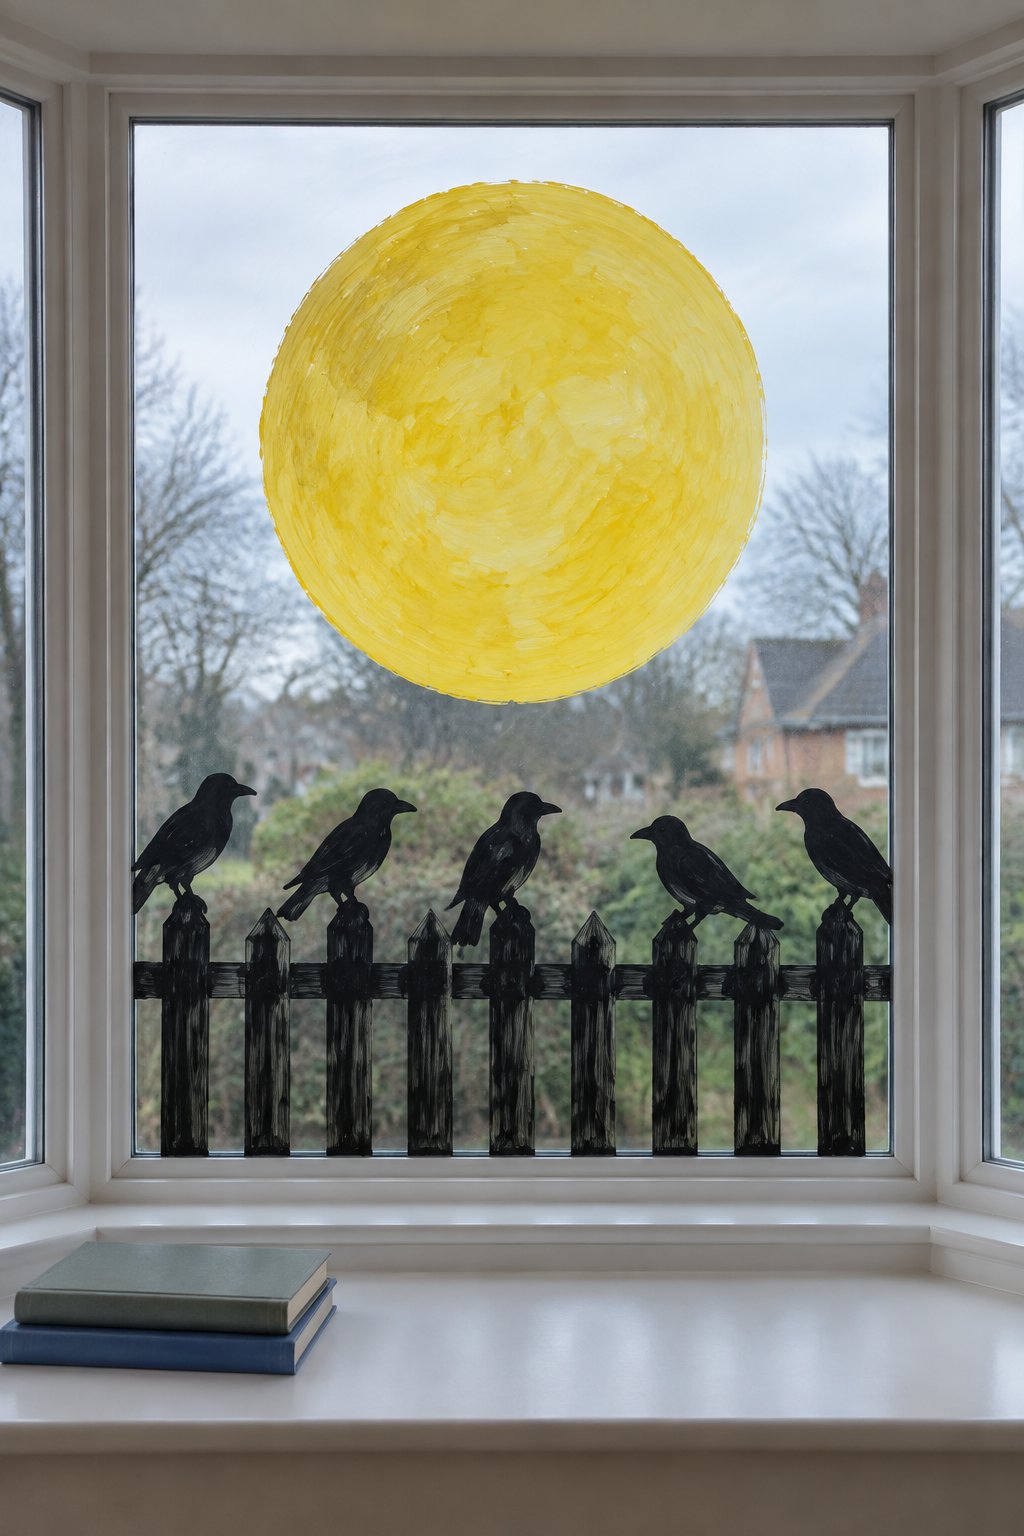
Black crows perch along a dark fence across the bottom of a bay window. A large yellow full moon fills the upper center, with the birds spaced in 4-inch silhouettes.
Pull together black and yellow washable paint, a moon stencil, a fine brush, painter’s tape, and a flat brush. Paint the fence as one long band, then add the crows with small, quick strokes.
13. Spooky Forest Tree Line
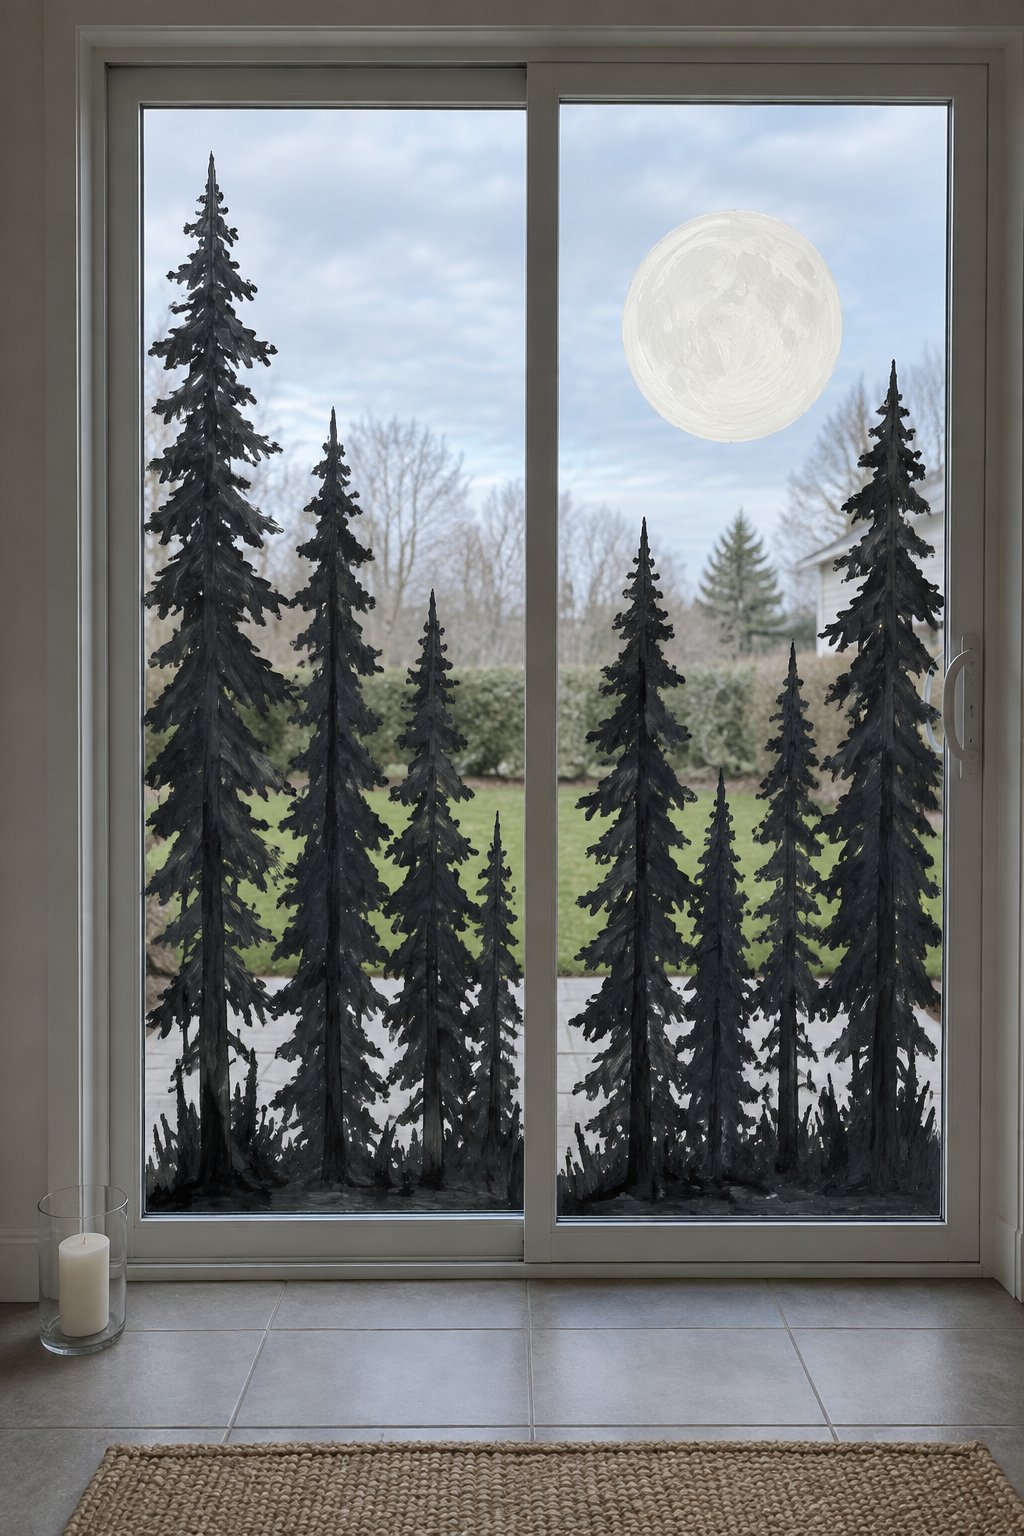
Tall black trees rise across a sliding patio door beneath a pale full moon. Vary the tree heights from 12 to 24 inches so the forest line feels uneven across the glass.
Grab black, gray, and yellow washable paint, a wide brush, a fine brush, a circle stencil, and painter’s tape. Place the moon first, then overlap the tree trunks across its lower edge.
14. Bubbling Cauldron
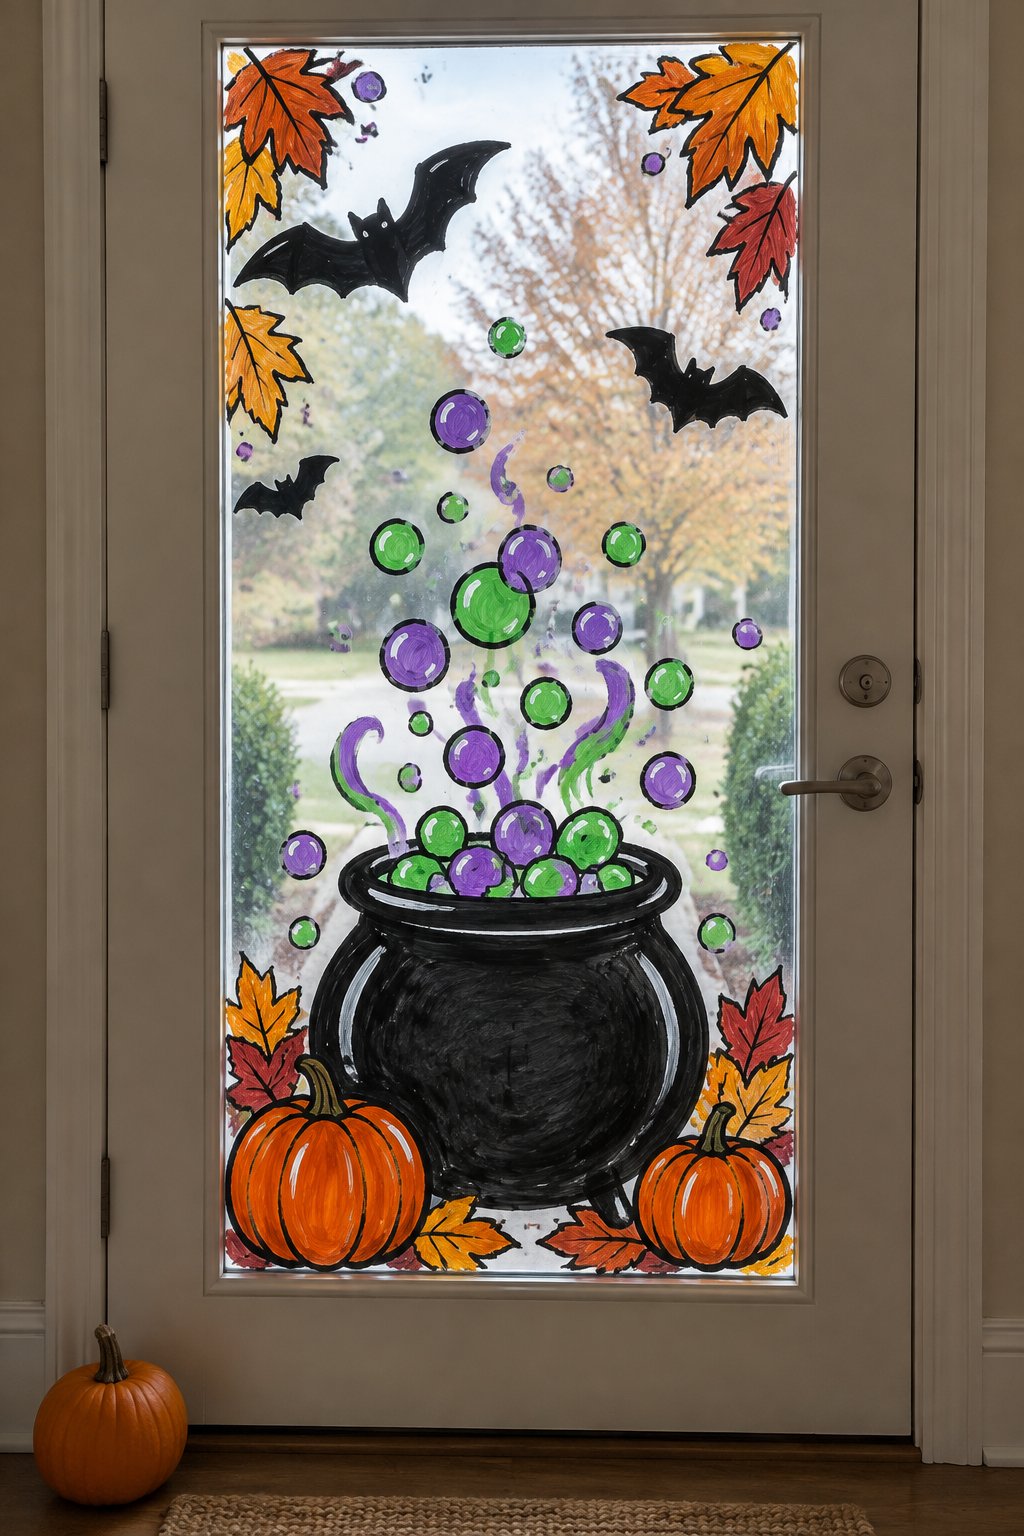
A black cauldron sits near the bottom of a front door glass panel, surrounded by purple and green bubbles. Orange pumpkins, bats, and autumn leaves fill the corners around the 12-inch-wide pot.
Use black, purple, green, orange, and yellow washable paint, round brushes, a fine brush, a sponge, and cotton swabs. Dot the bubbles with the sponge tip so their edges stay soft and round.
Halloween Window Silhouettes
15. Arched Black Cat Silhouette
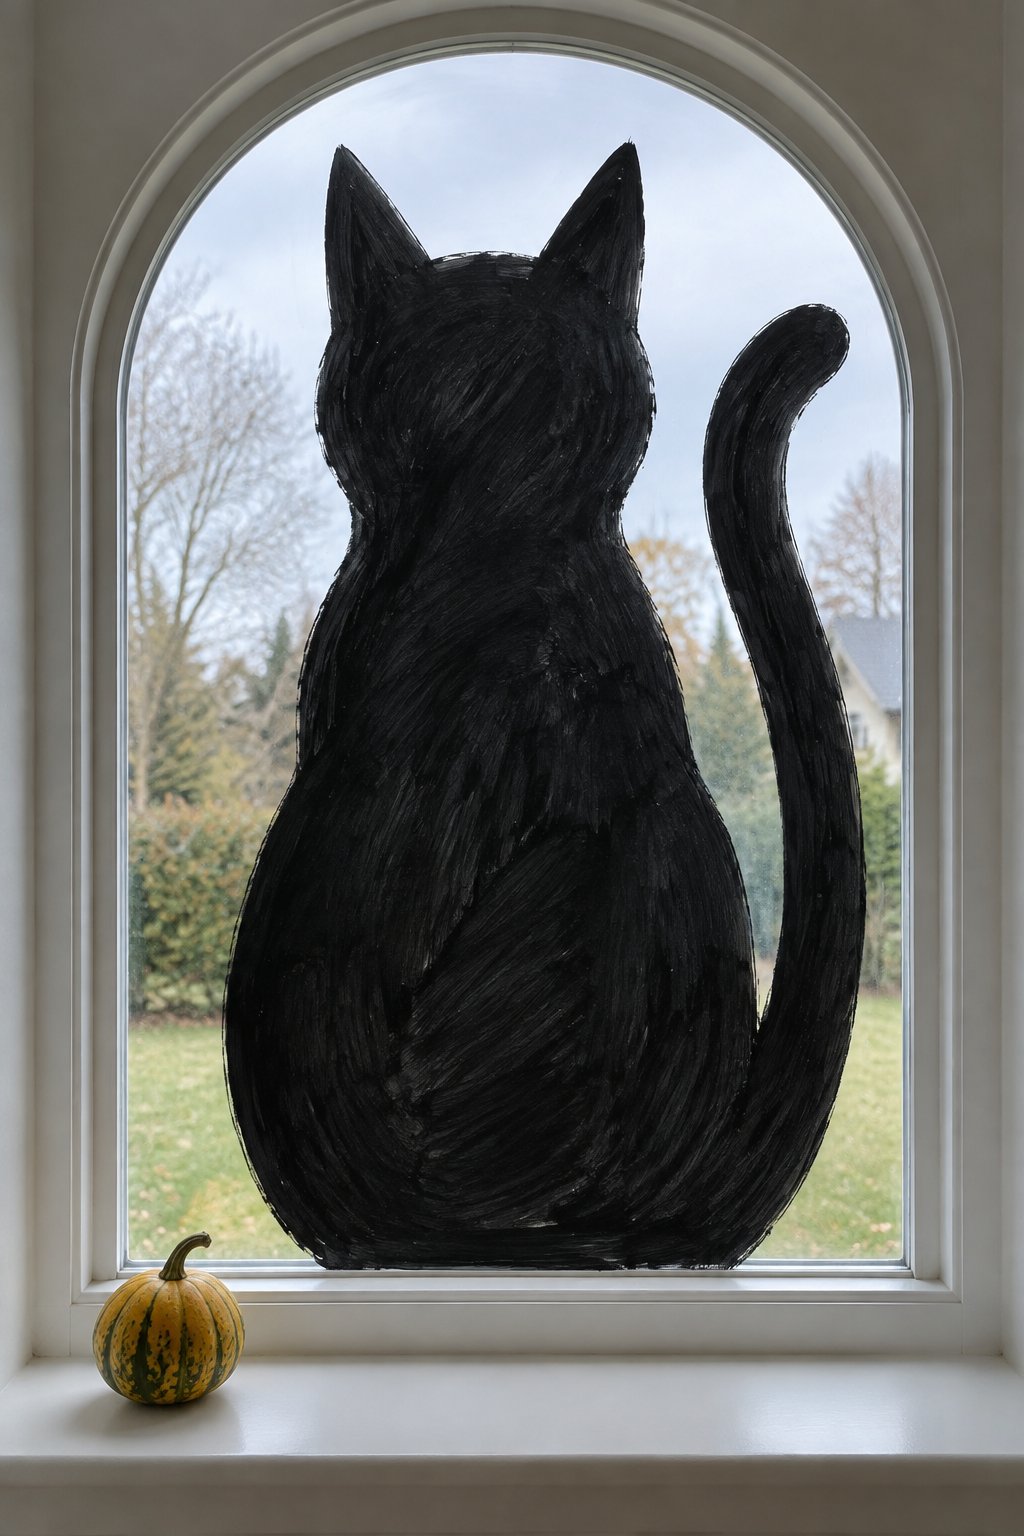
A solid black cat silhouette fills the center of an arched window. Its tail curves upward along the right side, while two pointed ears reach toward the rounded top of the glass.
You’ll want black washable paint, a cat stencil, painter’s tape, a wide brush, and a fine brush. Secure the stencil at the center, then fill the large body before outlining the tail.
16. Bats Hanging Upside Down
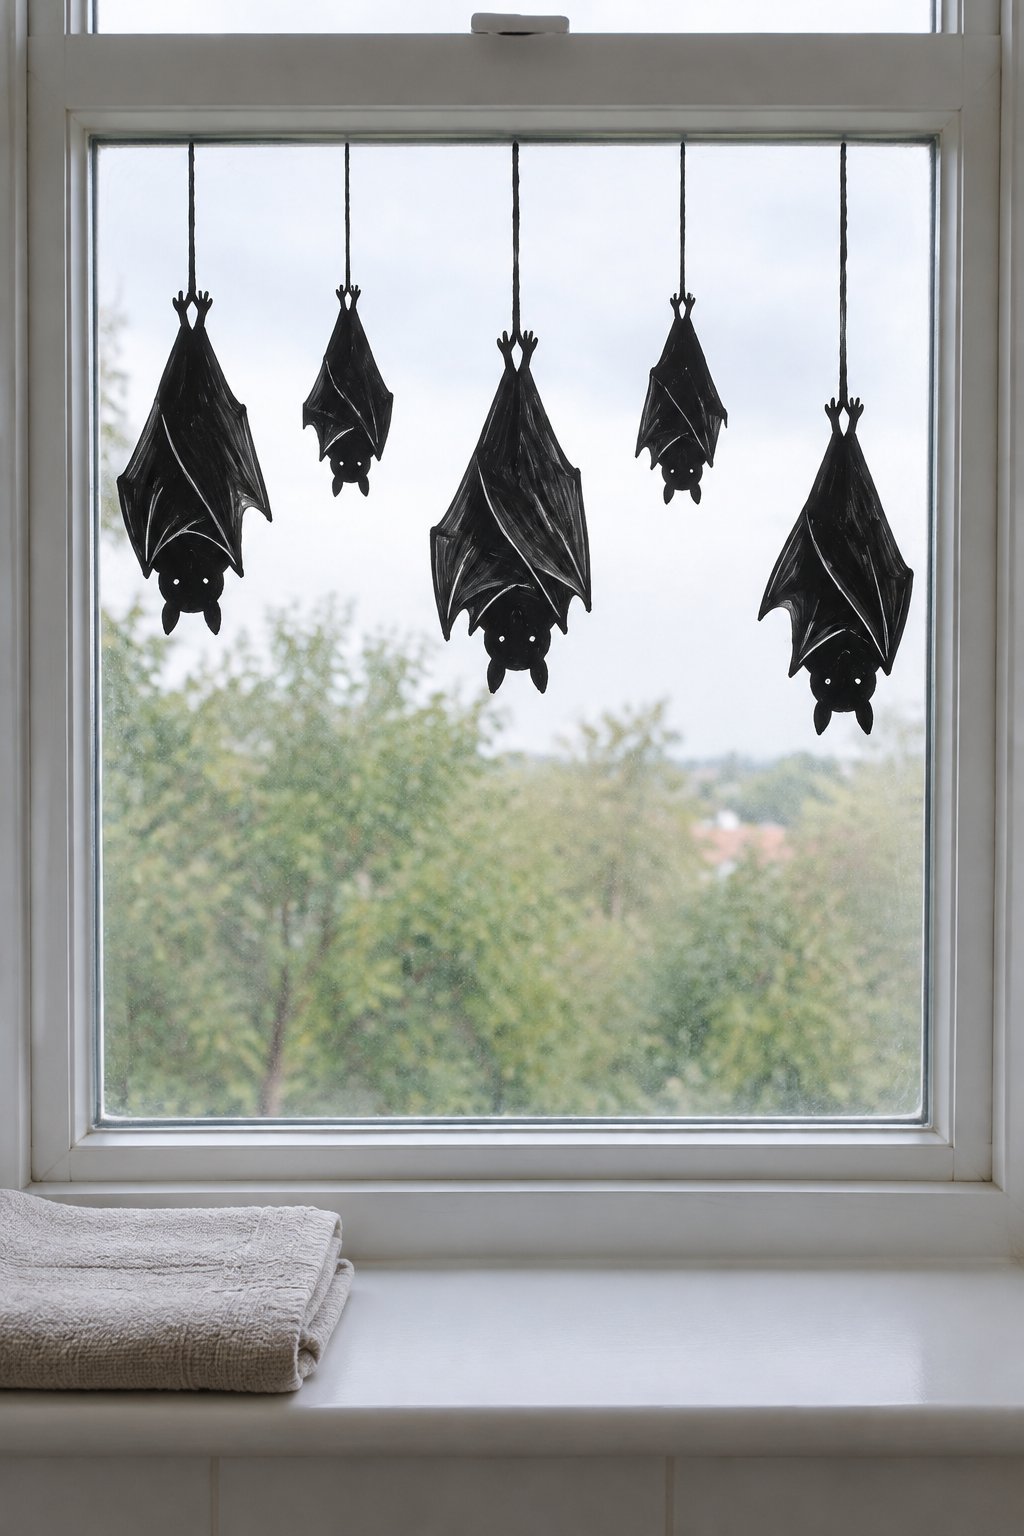
Black bats hang upside down from the top of a small bathroom window. The silhouettes range from 3 to 6 inches wide, with thin painted lines connecting their feet to the upper frame.
Gather black washable paint, bat stencils, a fine brush, painter’s tape, and cotton swabs. Paint the hanging lines first, then attach each bat so the strings stay straight.
17. Twisted Haunted Tree
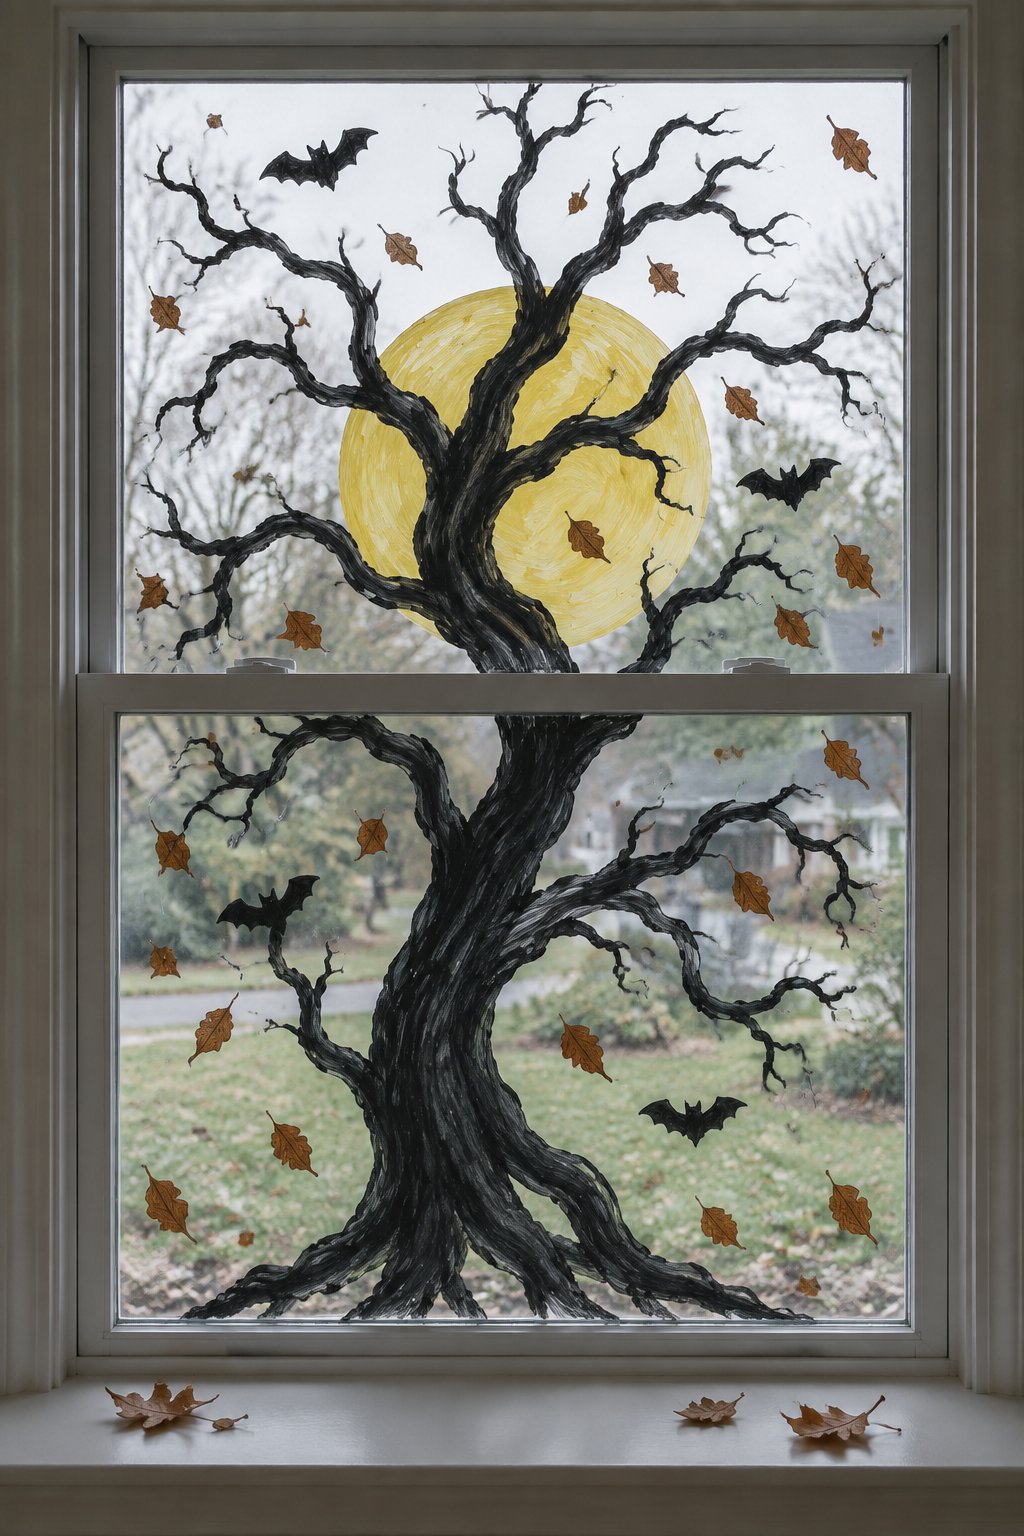
A twisted black tree spreads its branches across a double-hung living room window, with a yellow moon behind the trunk. Small bats and brown leaves scatter across the surrounding panes.
Start with black, yellow, and brown washable paint, a wide brush, a fine brush, a circle stencil, and painter’s tape. Paint the moon first, then build the trunk with branching strokes that taper at the ends.
18. Graveyard Gate and Tombstones
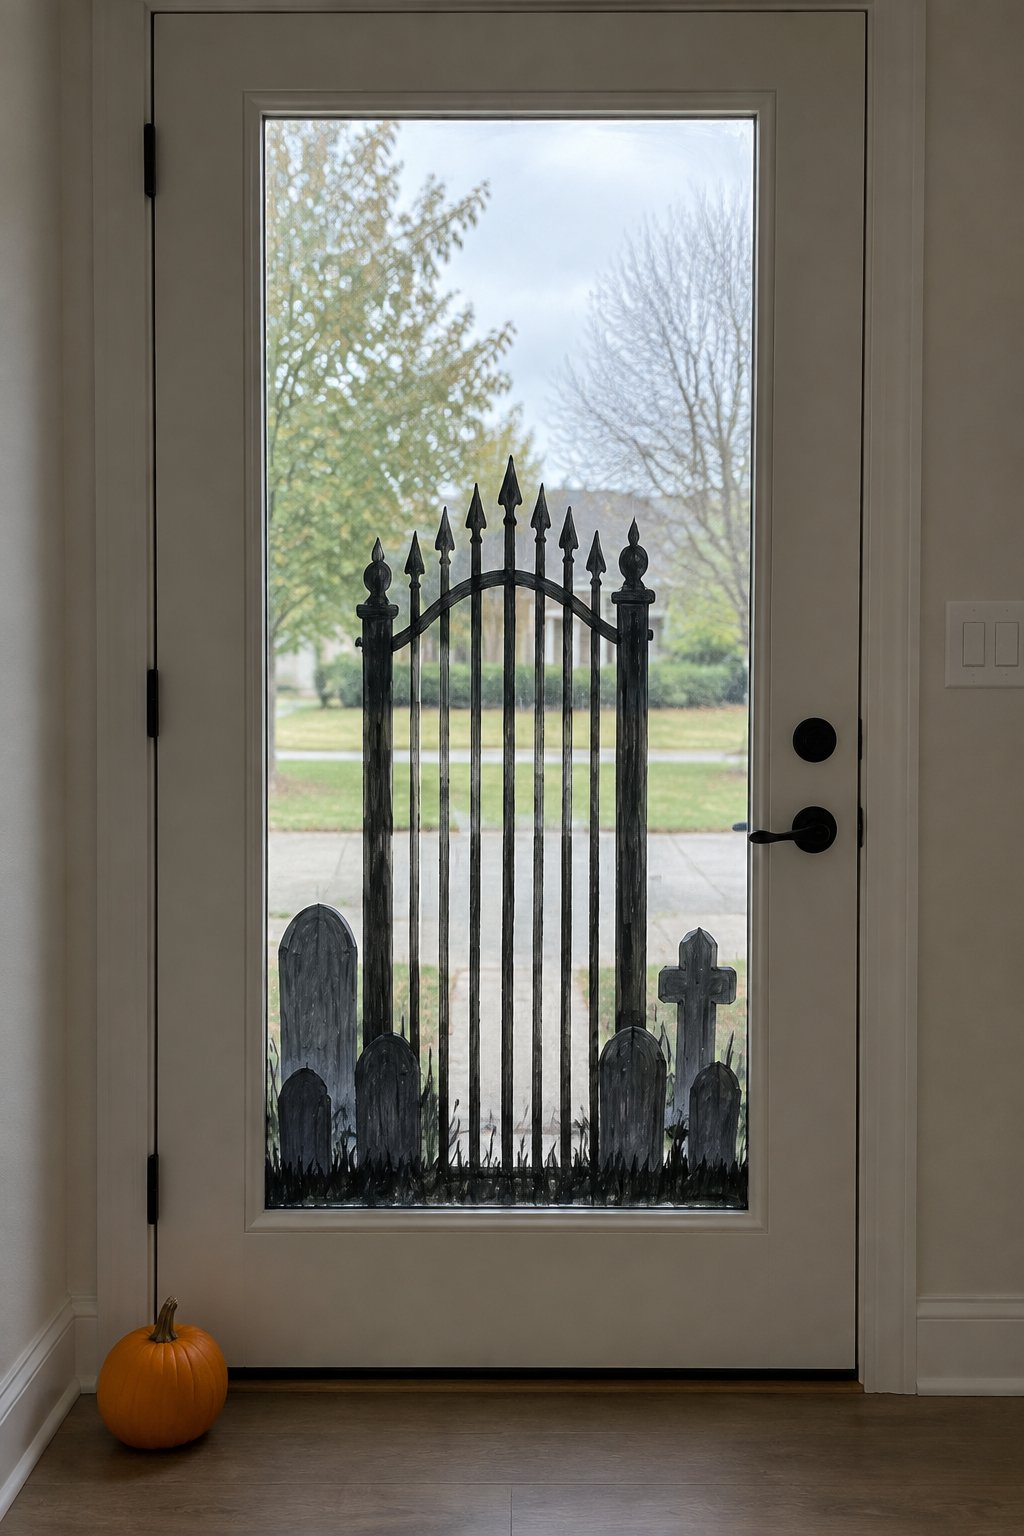
A tall black graveyard gate stands in the center of a front door glass panel, with rounded tombstones spread along the bottom. The gate reaches about 18 inches high and has narrow vertical bars.
Choose black, gray, and white washable paint, a flat brush, a fine brush, painter’s tape, and a ruler. Tape the gate’s vertical lines before painting so the bars stay evenly spaced.
19. Castle With Circling Bats
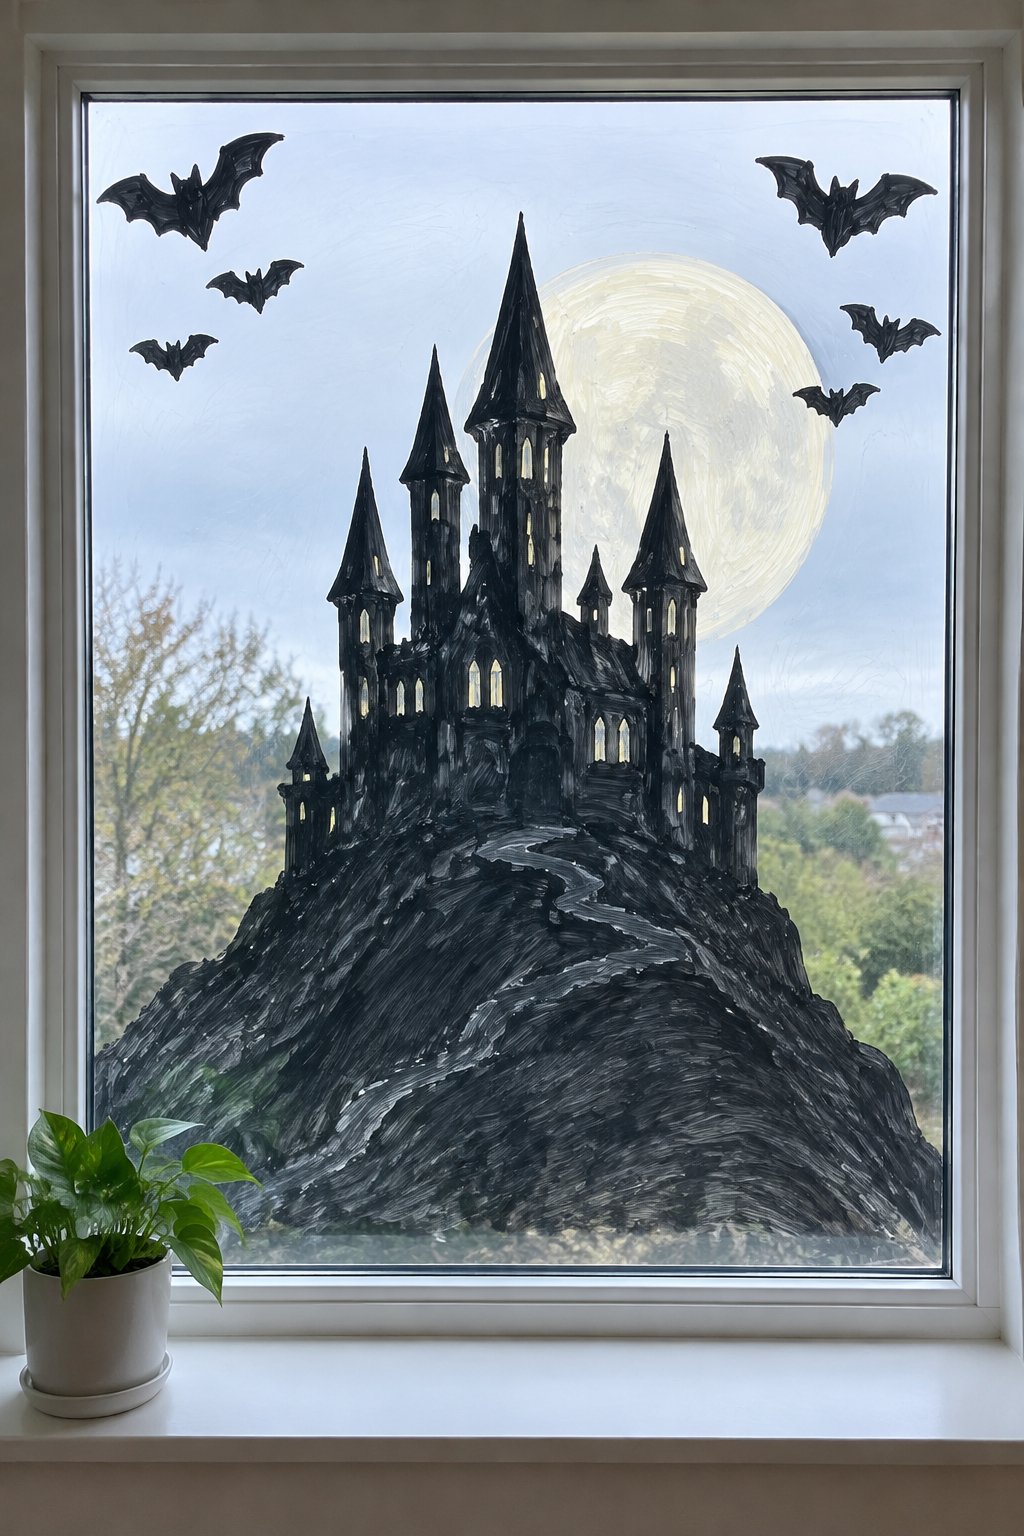
A dark castle with pointed towers sits on a hill across a large picture window. A pale moon rises behind it, while black bats circle the upper corners of the glass.
All you need is black, gray, yellow, and purple washable paint, a castle stencil, a circle stencil, a wide brush, and painter’s tape. Paint the hill as a single curved band, then add the towers with a fine brush.
20. Spider Dangling on a Thread
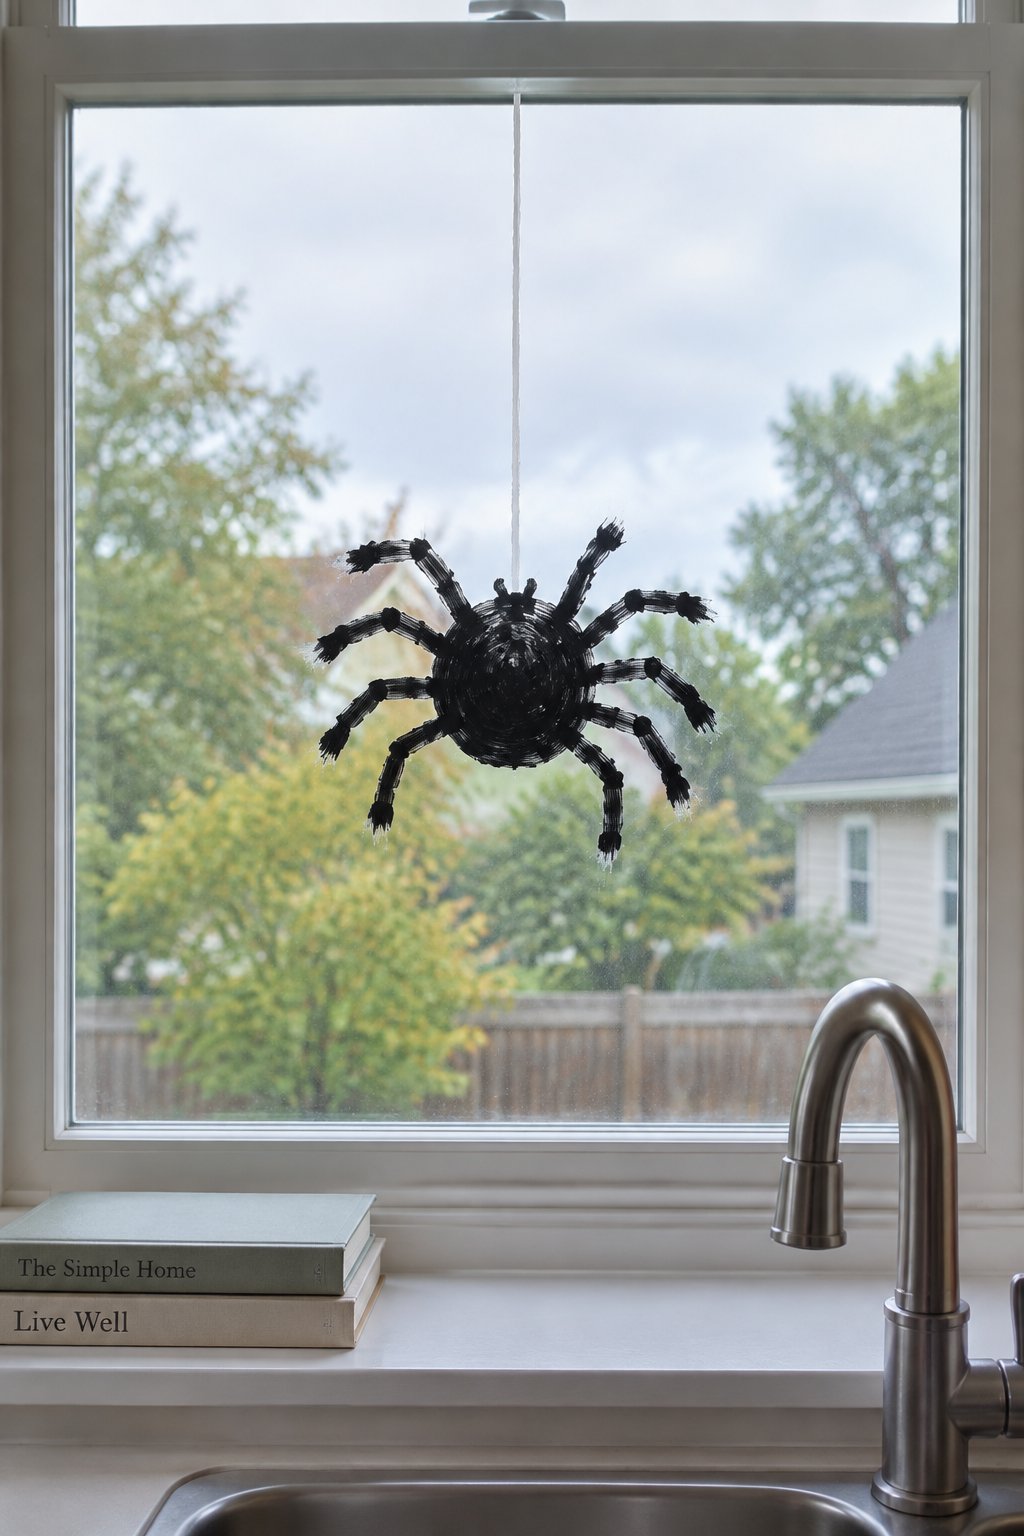
A black spider hangs from a thin white thread near the center of a kitchen window over the sink. Its round body is about 4 inches wide, with eight short legs spreading across the glass.
Set out black and white paint, a fine brush, a spider stencil, painter’s tape, and a cotton swab. Paint the thread in one steady downward stroke, then center the spider at the end.
Halloween Window Display Ideas
21. Full-Window Pumpkin Patch Scene
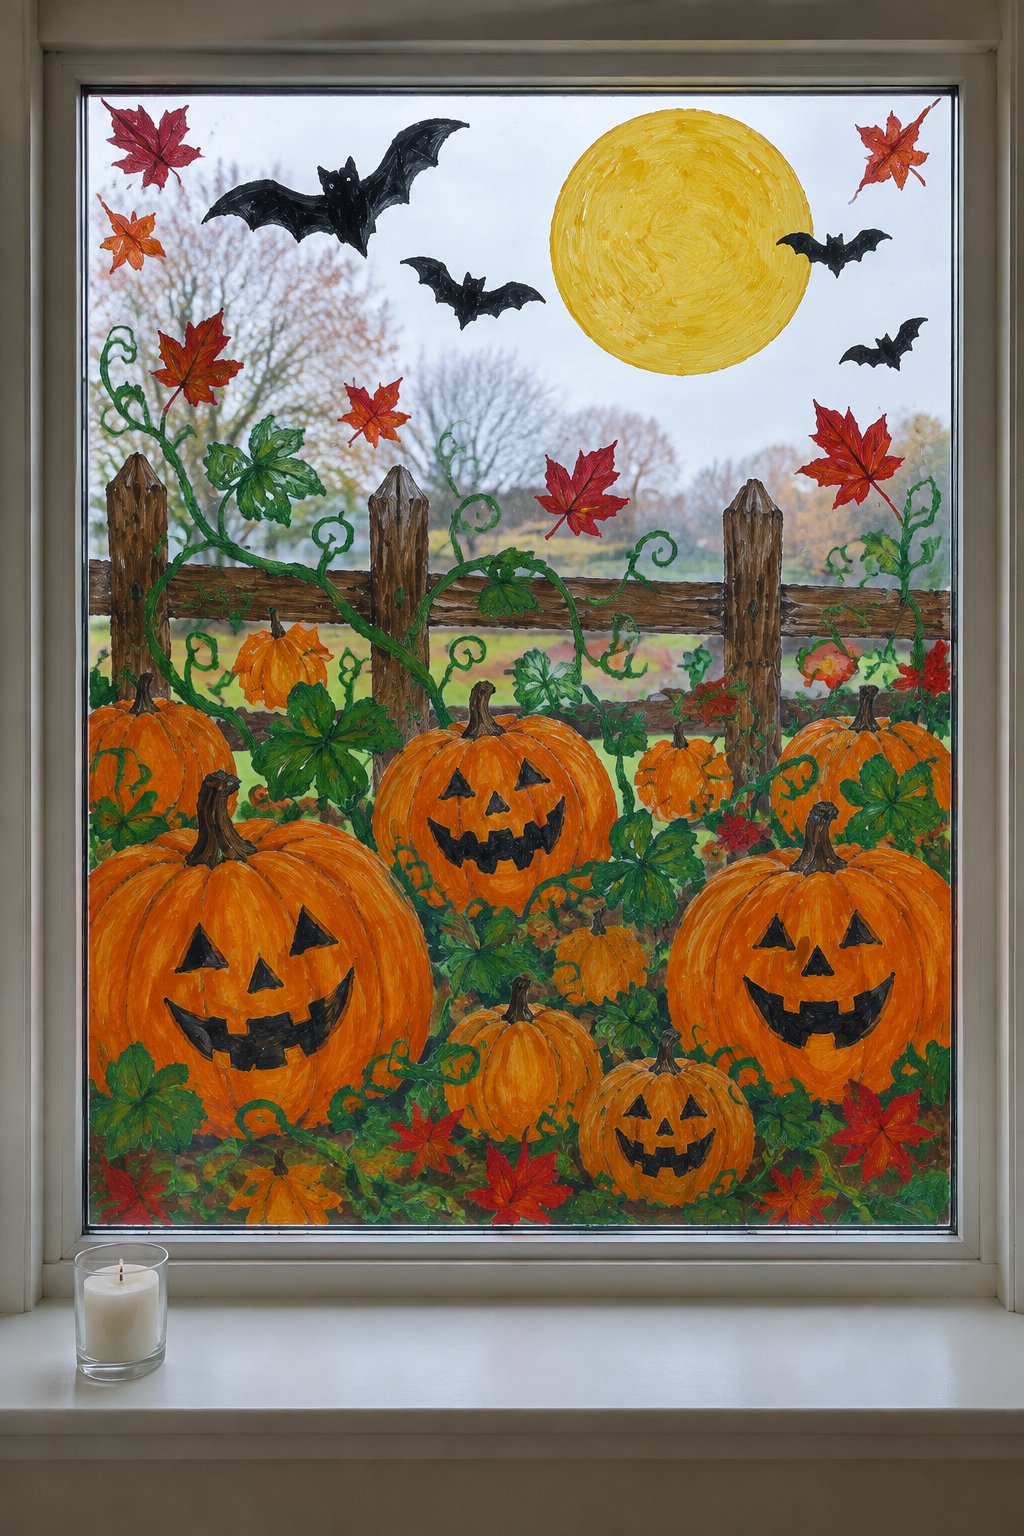
A full pumpkin patch covers a large picture window from the sill to the top frame. Orange jack-o’-lanterns, green vines, a rustic brown fence, yellow moon, black bats, and red leaves fill the glass.
Grab orange, green, brown, yellow, black, and red washable paint, wide brushes, detail brushes, painter’s tape, and a sponge. Divide the window into sky, fence, and patch areas with tape before painting each layer.
22. Haunted Mansion on a Bay Window
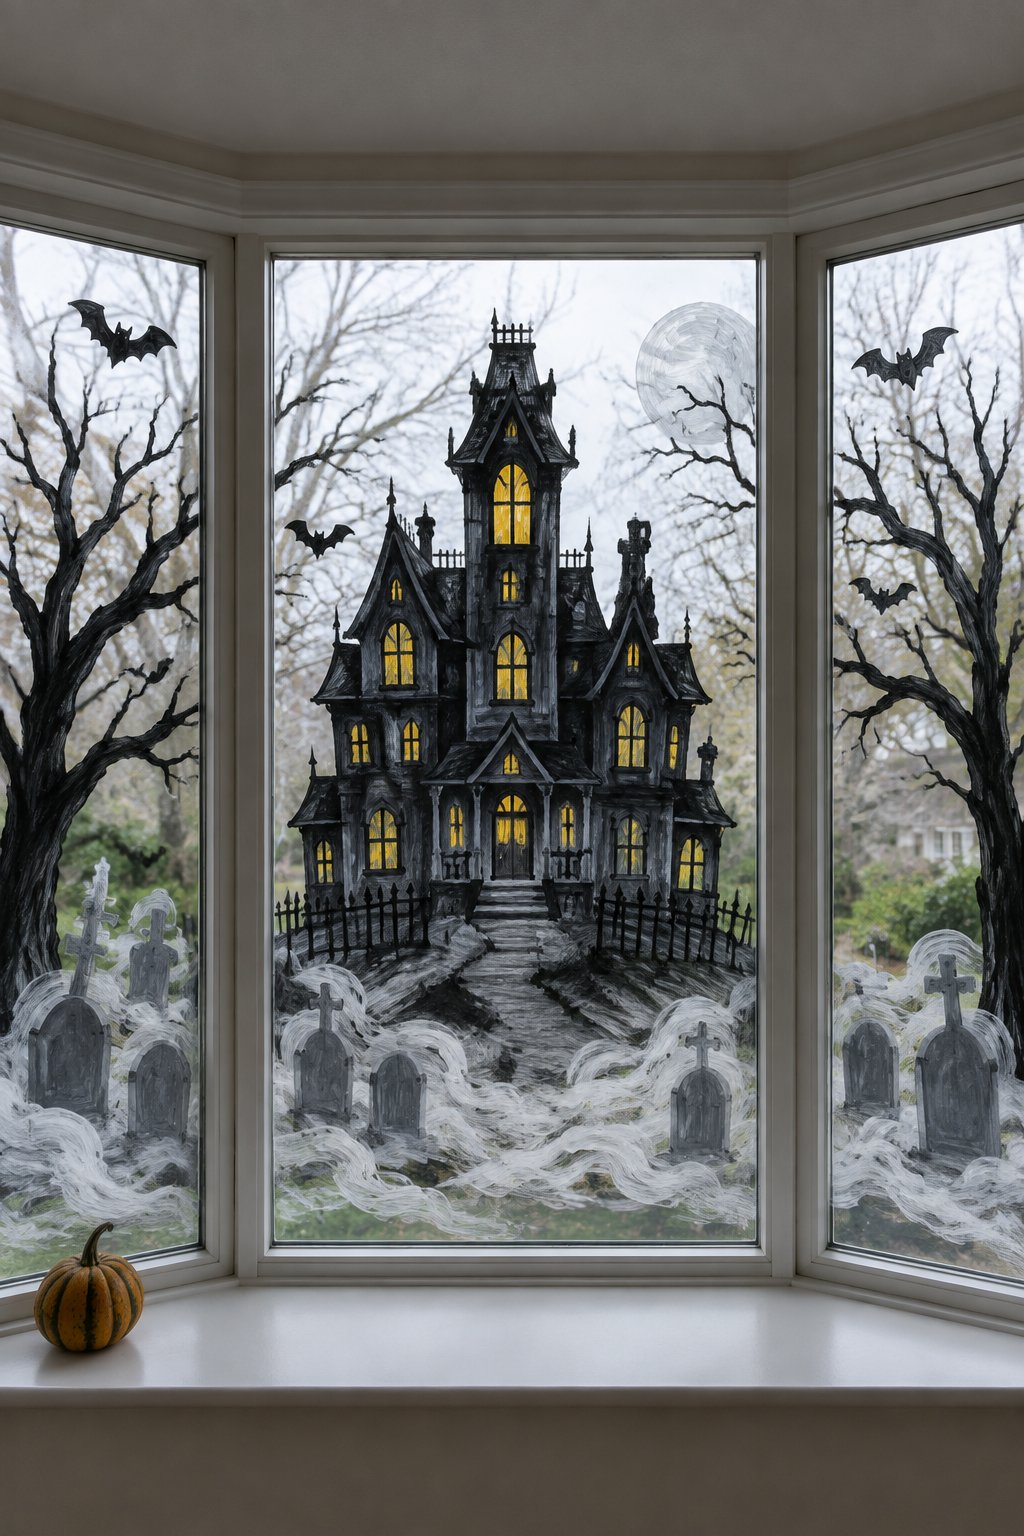
A haunted mansion spans all three panels of a bay window, with the center section holding the main house and the side panes carrying trees and bats. Gray gravestones and white fog connect the design across the lower glass.
Use black, gray, white, yellow, and purple washable paint, painter’s tape, wide brushes, detail brushes, and a sponge. Sketch the mansion across paper first so the roofline lines up from pane to pane.
23. Pumpkin Stack Beside the Front Door
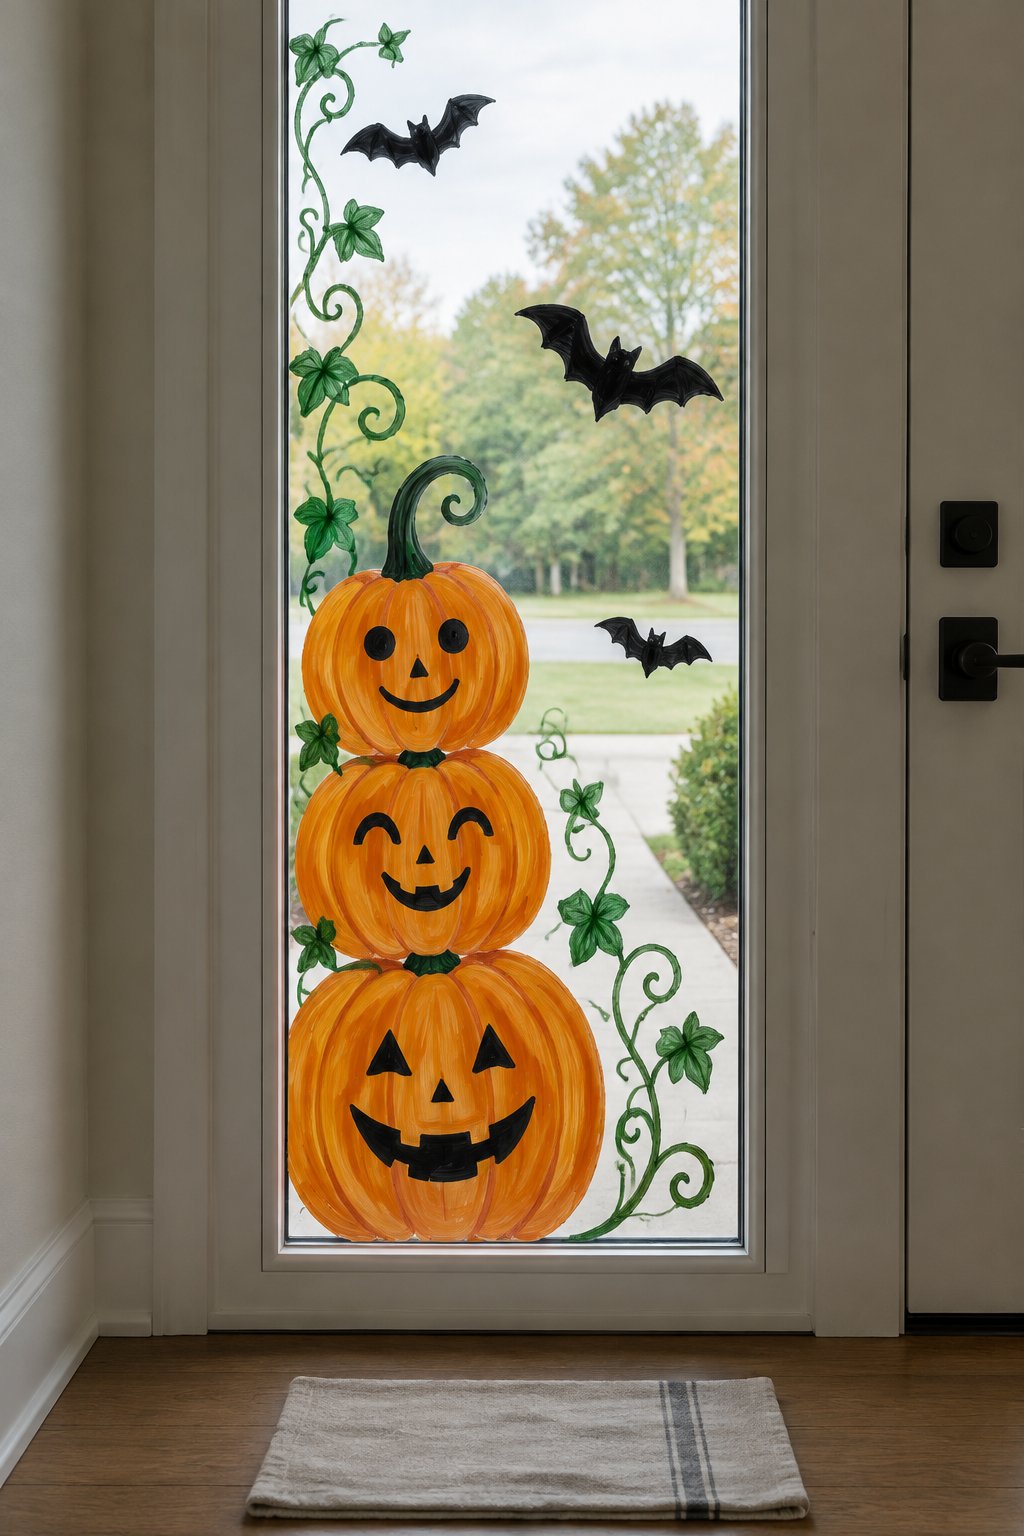
A stack of orange pumpkins sits beside a front door glass panel decorated with black bats and green vines. The painted pumpkins range from 6 to 12 inches wide, with curved stems and simple face details.
Reach for orange, green, black, and brown washable paint, a flat brush, a fine brush, painter’s tape, and a sponge. Paint the largest pumpkin first, then add the smaller shapes so the stack stays balanced.
Halloween Storefront Window Painting Ideas
24. Witches’ Brew Coffee Cup
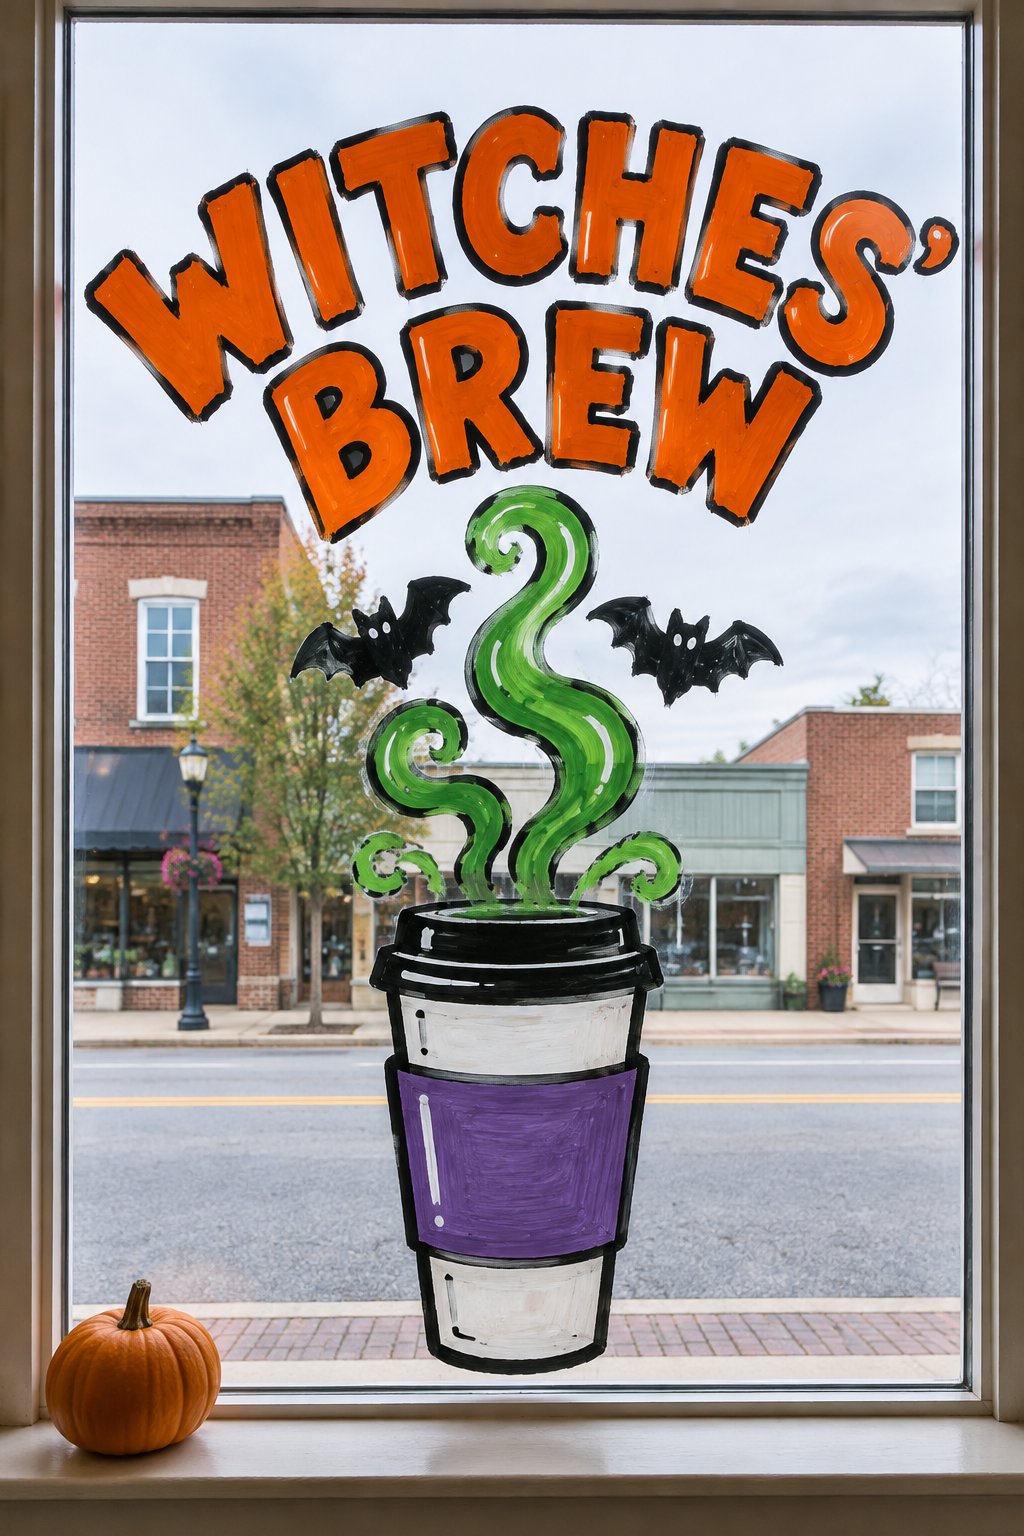
A tall paper coffee cup with a purple sleeve sits in the lower corner of a café window, and green steam curls up into two small bats. “Witches’ Brew” arcs above the steam in chunky orange letters.
Grab black, purple, green, orange, and white window paint, a flat brush, and a round brush. Paint the cup first, then pull the steam up in one smooth stroke so the curls stay loose.
25. Bakery Window of Spooky Treats
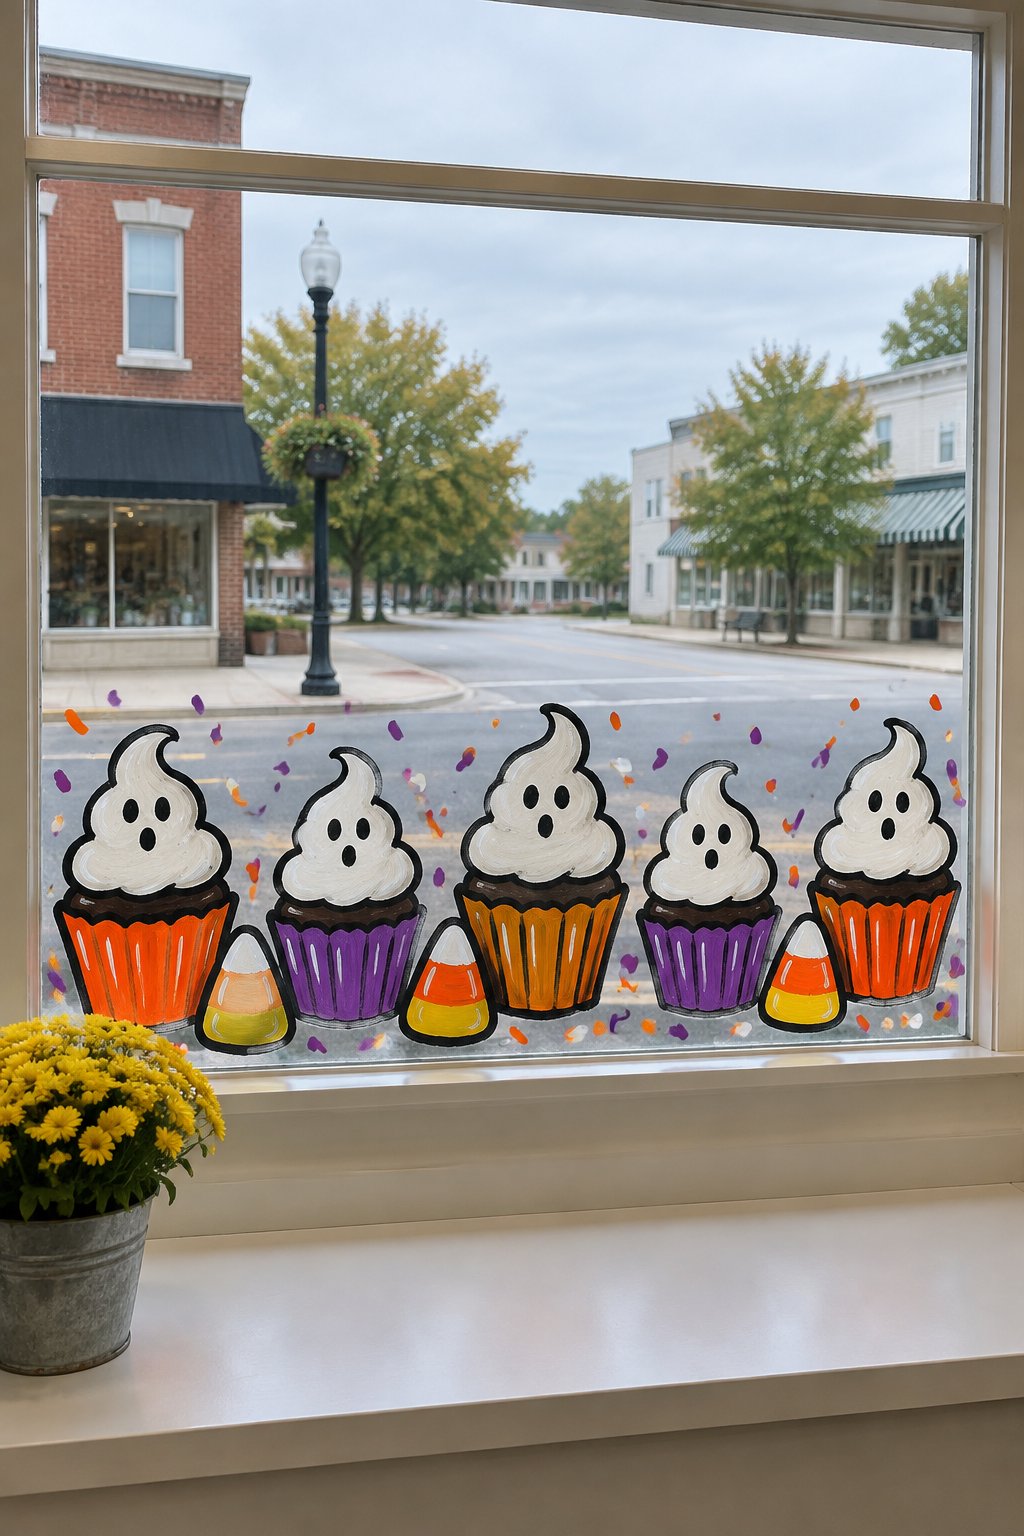
A row of cupcakes topped with little ghost swirls lines the bottom of a bakery window, with candy corn cookies tucked between them. Orange and purple sprinkles dot the glass around each treat.
Reach for white, orange, purple, pink, and brown window paint, a round brush, and a small dauber for the sprinkles. Paint each cupcake liner as a striped shape before adding the frosting on top.
26. Black Cat on a Stack of Books
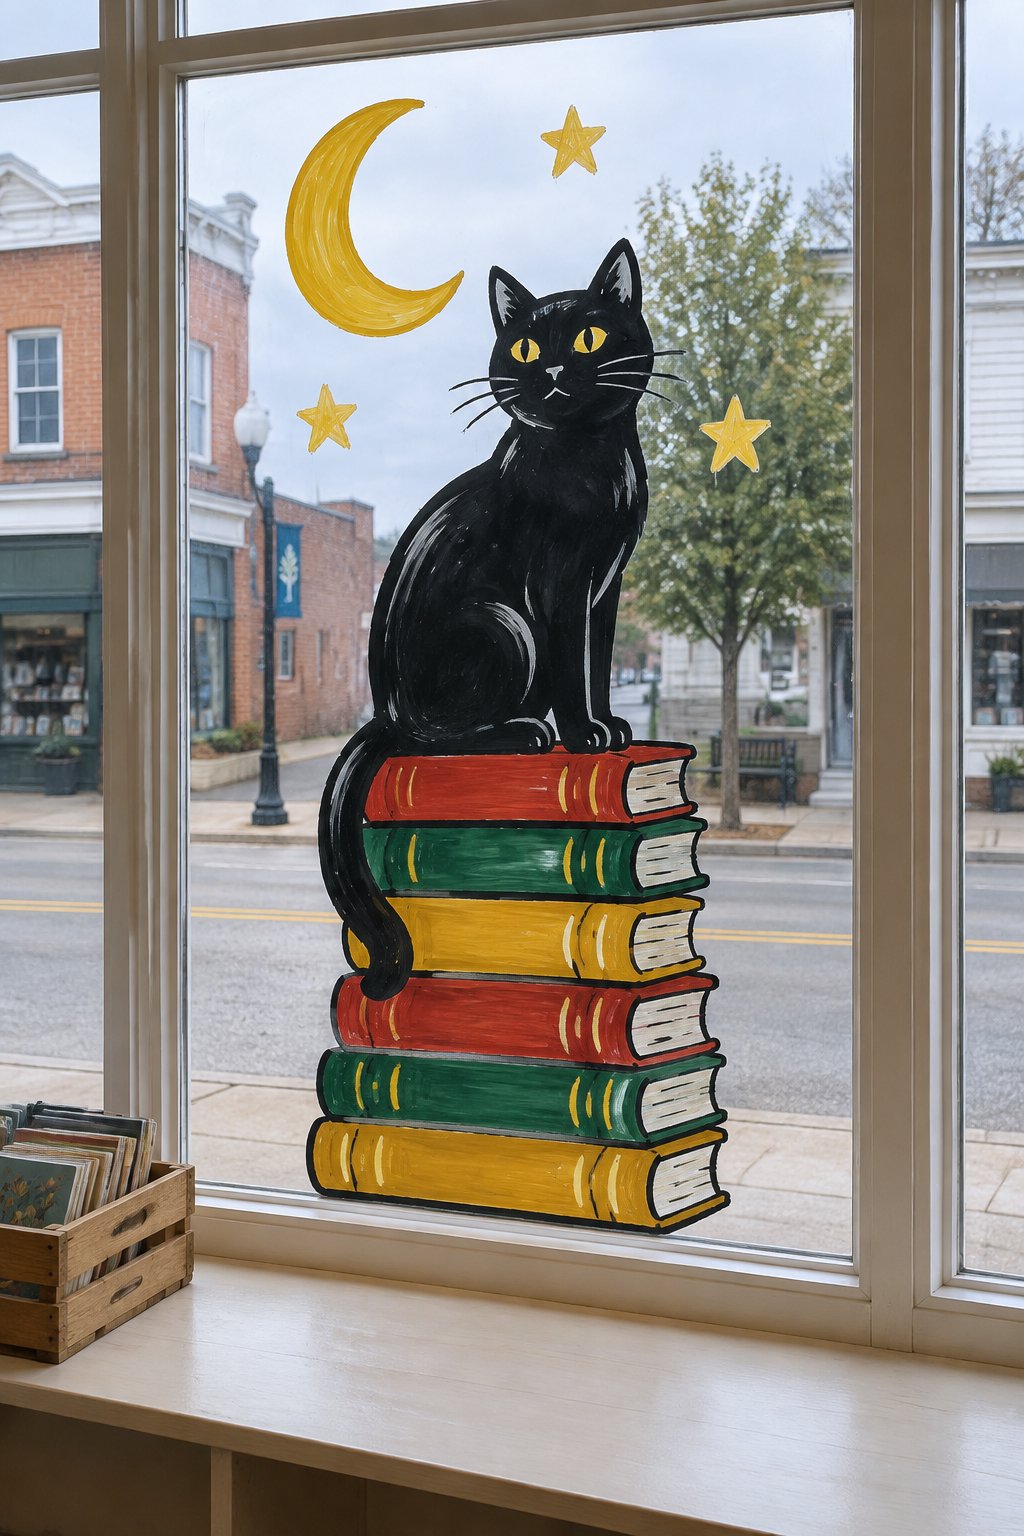
A black cat sits on a tall stack of red, green, and mustard books in the corner of a bookshop window. A crescent moon and a few yellow stars float above its pointed ears.
Set out black, red, green, mustard, yellow, and white window paint, a flat brush, and a fine liner. Paint the books as stacked rectangles, then fill the cat in as one solid shape so it reads from outside.
27. Trick-or-Treaters Welcome Shop Door
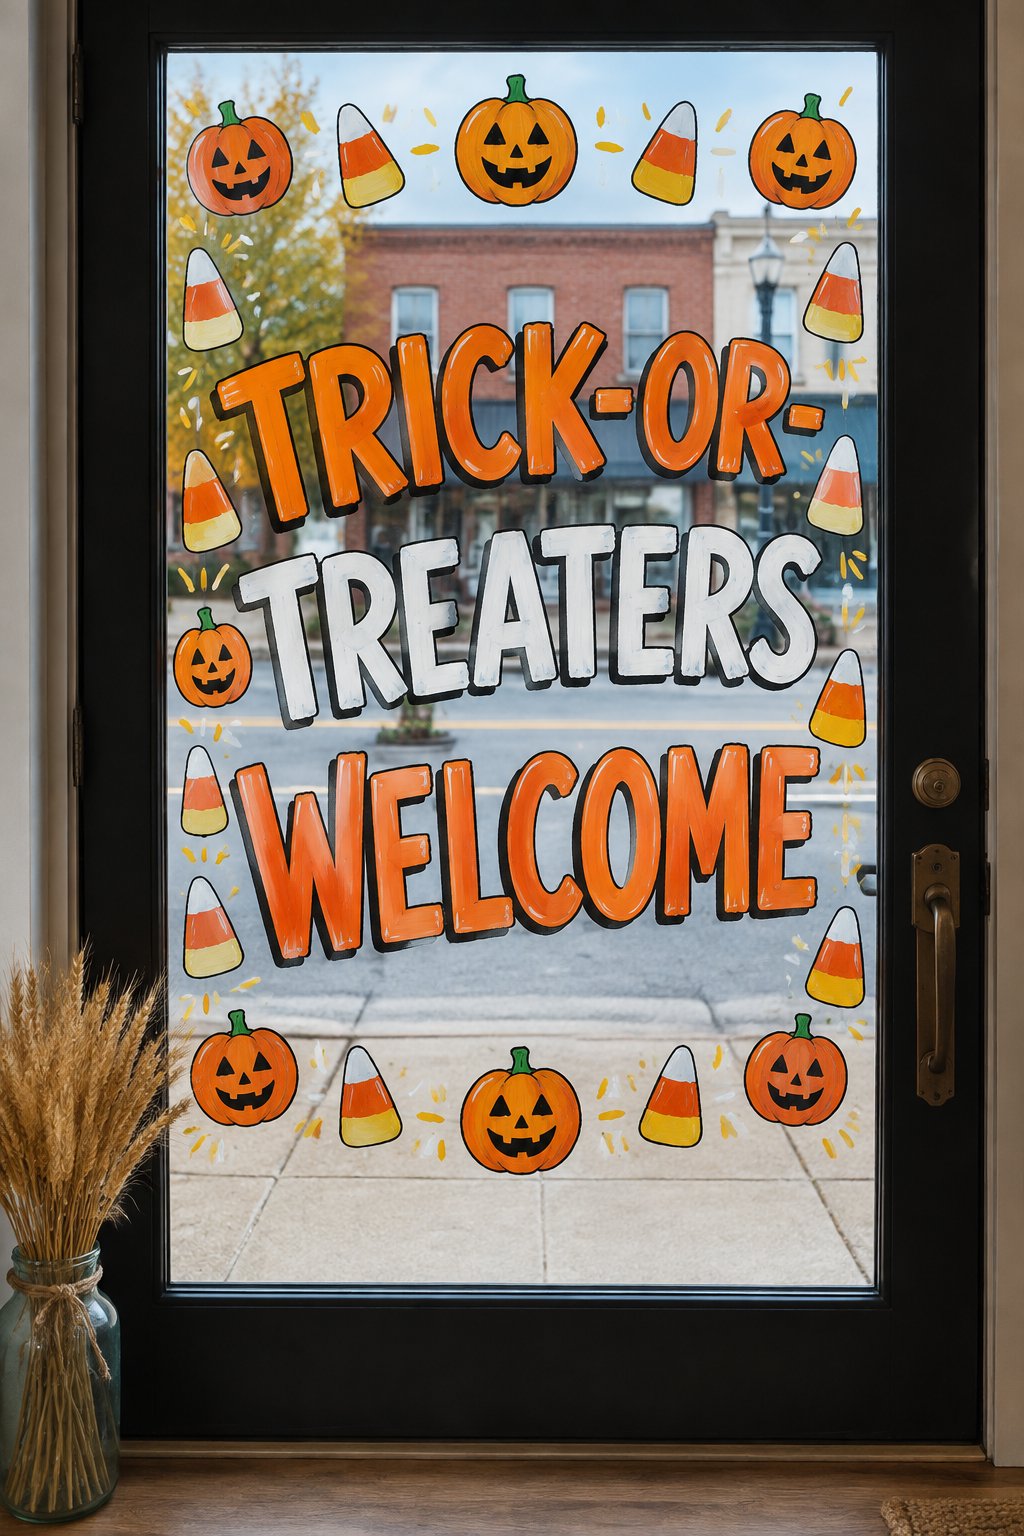
“Trick-or-Treaters Welcome” runs across the glass of a shop door in bold orange and white letters. A border of candy corn and small jack-o’-lanterns frames the words for a downtown trick-or-treat night.
Pick up orange, white, yellow, and black window paint, a chisel-tip paint marker, and a flat brush. Sketch the words on paper and tape the sheet outside the glass as a guide while you letter.
28. Spooky Season Boutique Banner
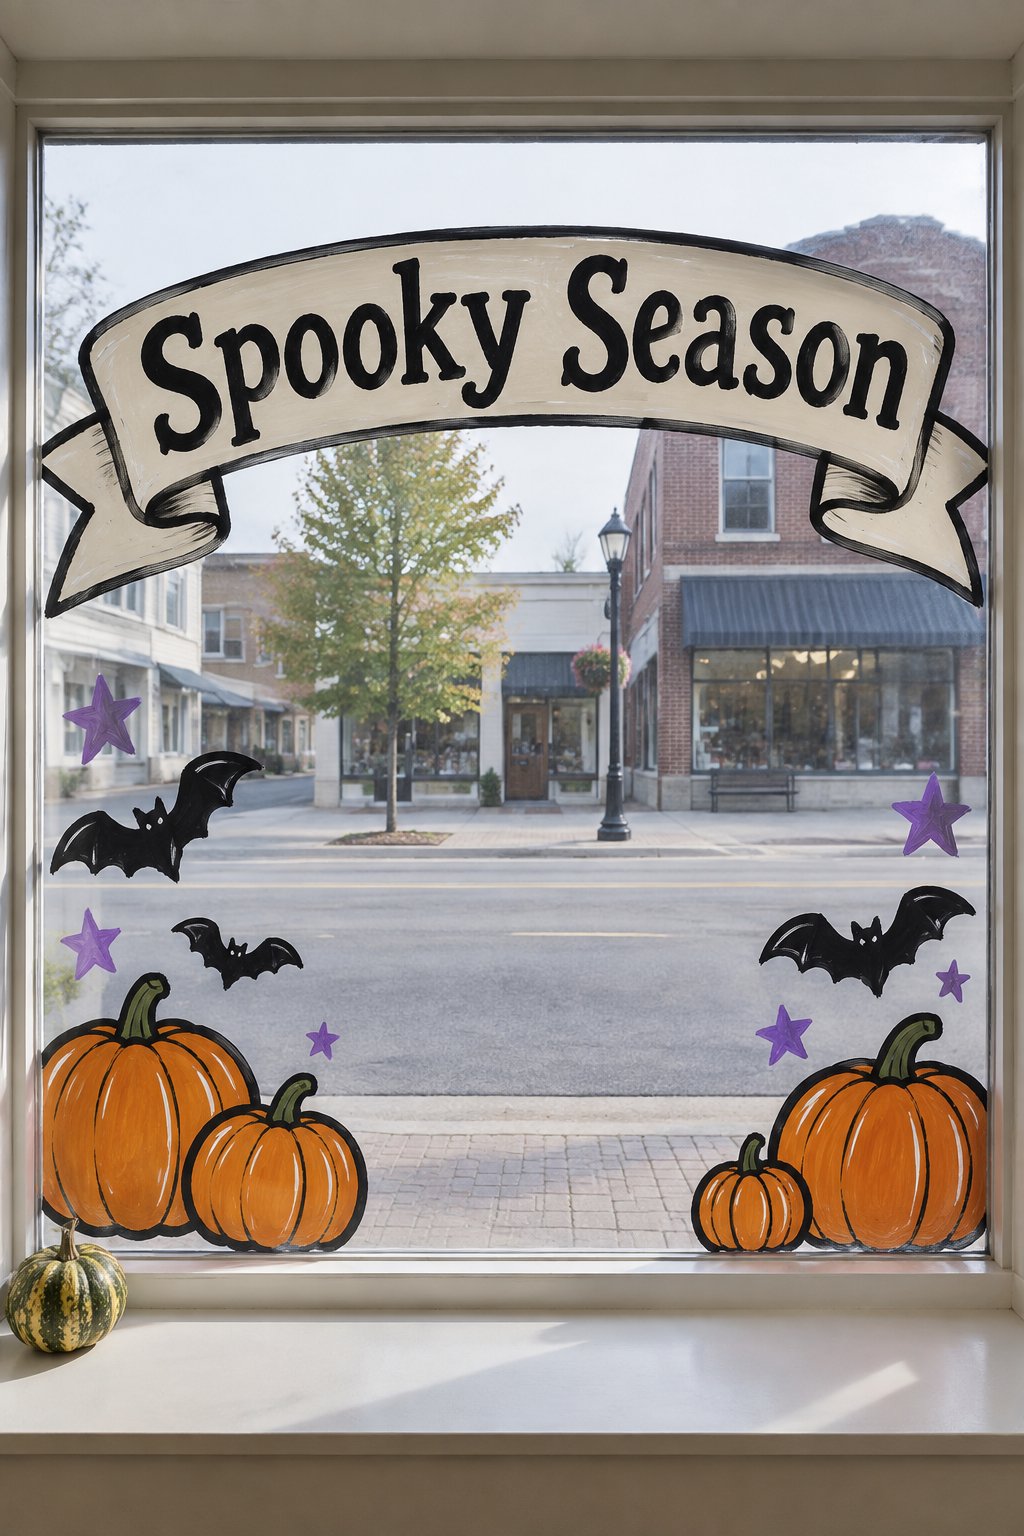
A cream ribbon banner stretches across the top of a boutique window with “Spooky Season” painted inside it in black. Pumpkins, bats, and a few purple stars fill the lower corners.
Start with cream, black, orange, purple, and green window paint, a flat brush, and a fine liner. Paint the banner shape first and let it dry before lettering on top so the black stays crisp.
Halloween Window Drawing Ideas
29. White Marker Spider Webs
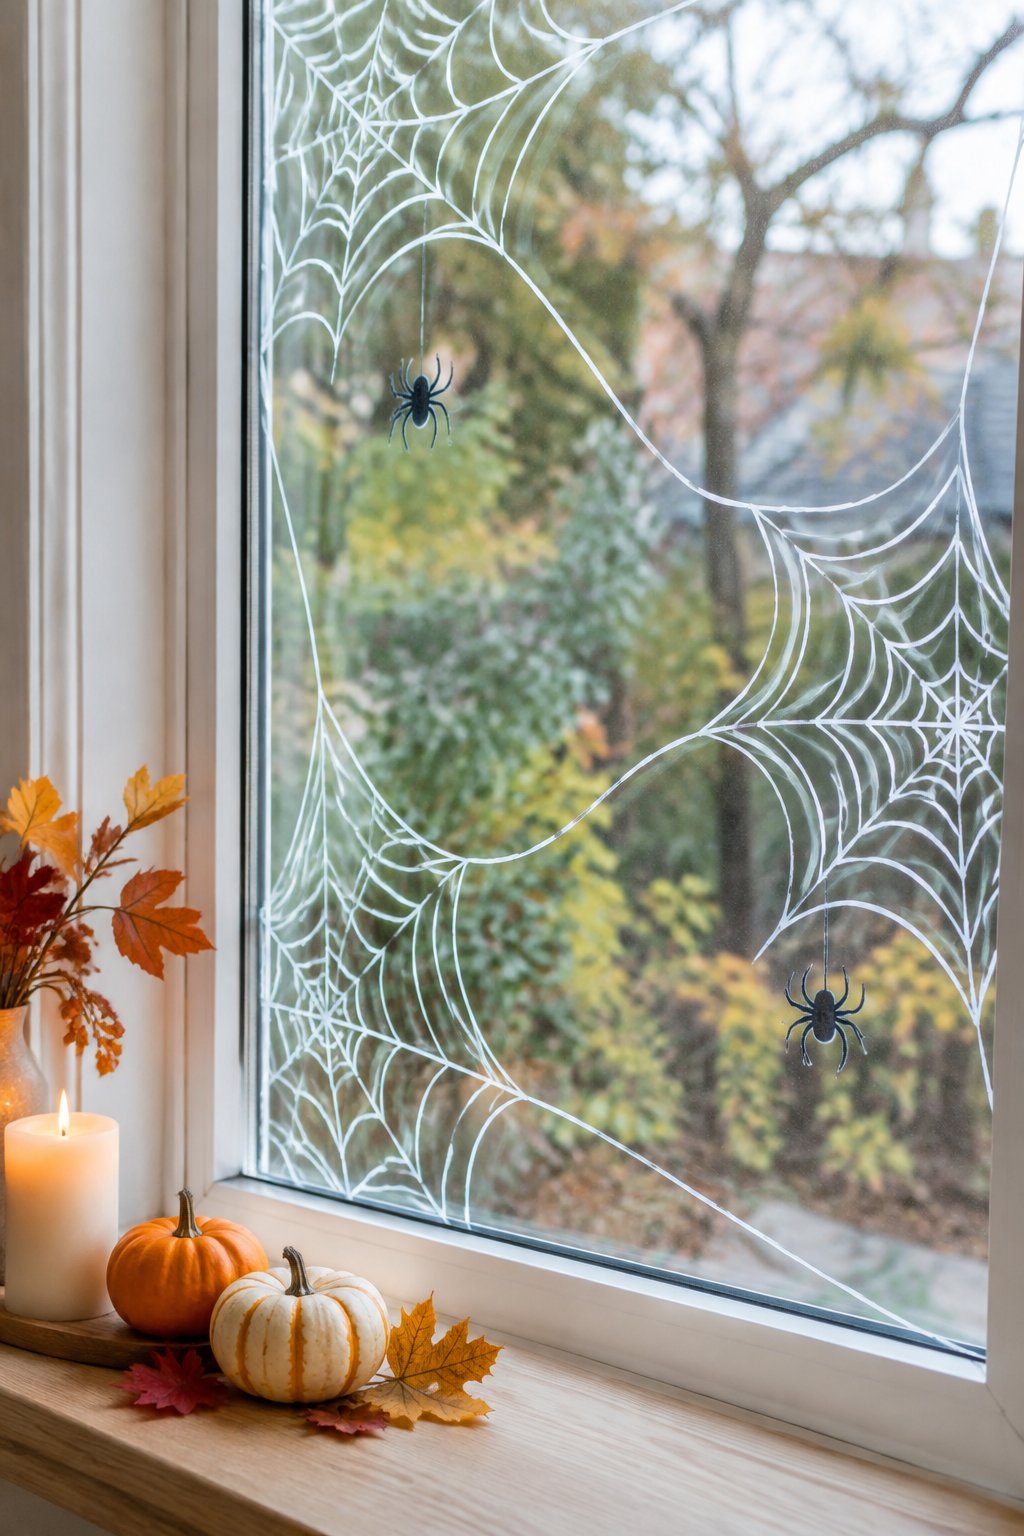
White marker webs fill the upper corners of a double-hung living room window, while small orange pumpkins line the lower edge. Each web has thin spokes and curved strands stretching across about 10 inches of glass.
Use a white paint marker, black paint marker, orange washable paint, a ruler, and painter’s tape. Draw the straight spokes first, then connect them with curved lines to keep the web spacing even.
30. Doodled Ghost Parade
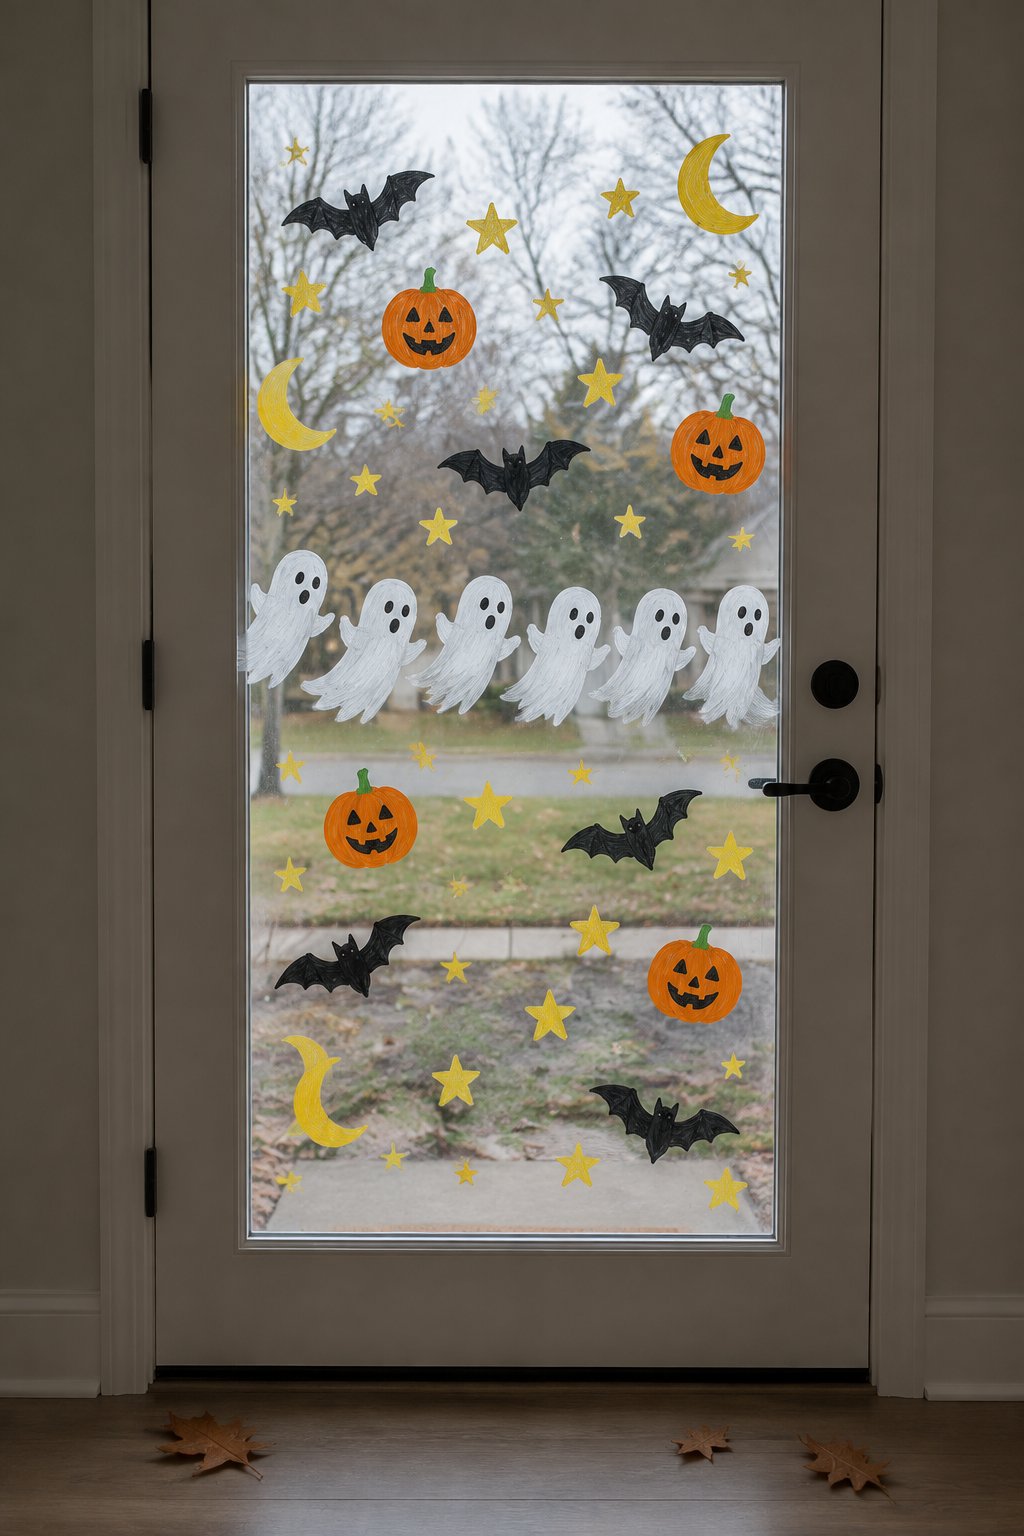
A parade of small white ghosts moves across the center of a front door glass panel. Black bats, orange pumpkins, yellow stars, and crescent moons fill the open spaces around the 6-inch ghost shapes.
Grab white, black, orange, and yellow paint markers, a ruler, a ghost stencil, and cotton swabs. Lightly mark a baseline so the doodled ghosts stay at a steady height across the door.
31. Sketched Pumpkin Trio
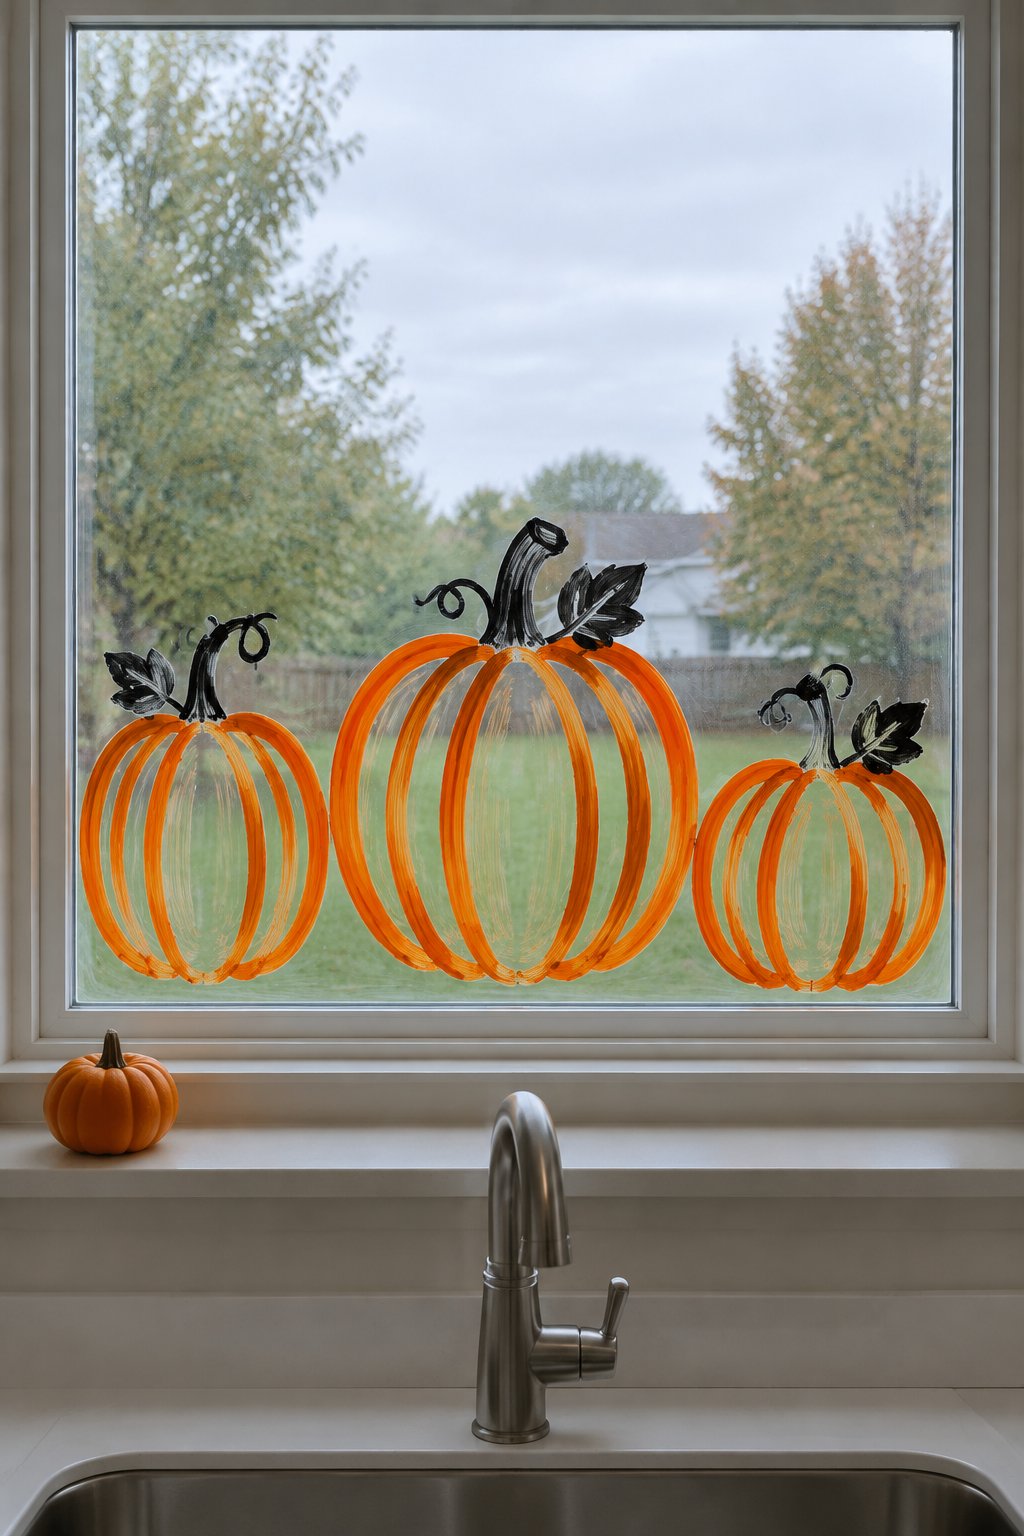
Three sketched pumpkins sit across the lower half of a kitchen window over the sink. The orange outlines range from 6 to 10 inches wide, with black stems, curved ribs, and small leaf shapes.
Use orange and black paint markers, a pencil-style window marker, a pumpkin stencil, painter’s tape, and cotton swabs. Draw the center pumpkin first, then place the smaller pumpkins on either side.
32. Zentangle Pumpkin
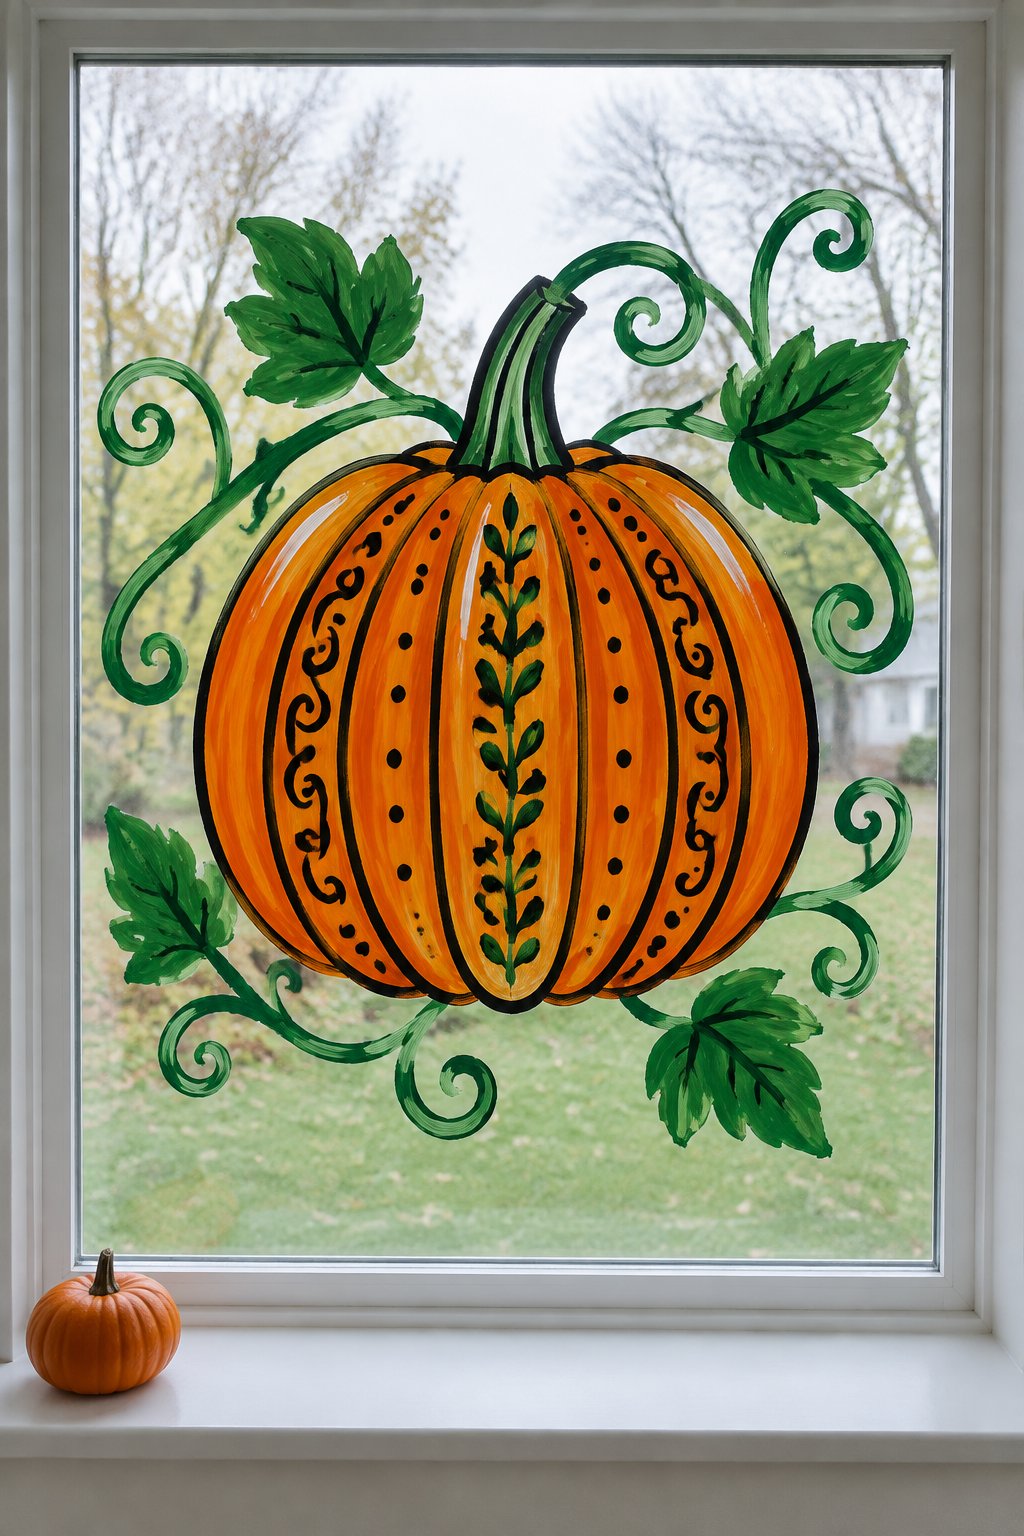
An intricate orange pumpkin fills the center of a large living room window, with black pattern lines inside each curved rib. Green vines and leaves curl outward around the 10-inch pumpkin shape.
Set out orange, black, and green paint markers, a pumpkin stencil, a ruler, and cotton swabs. Divide the pumpkin into sections before adding the patterns so the details stay evenly sized.
33. Dot-to-Dot Bat Constellation
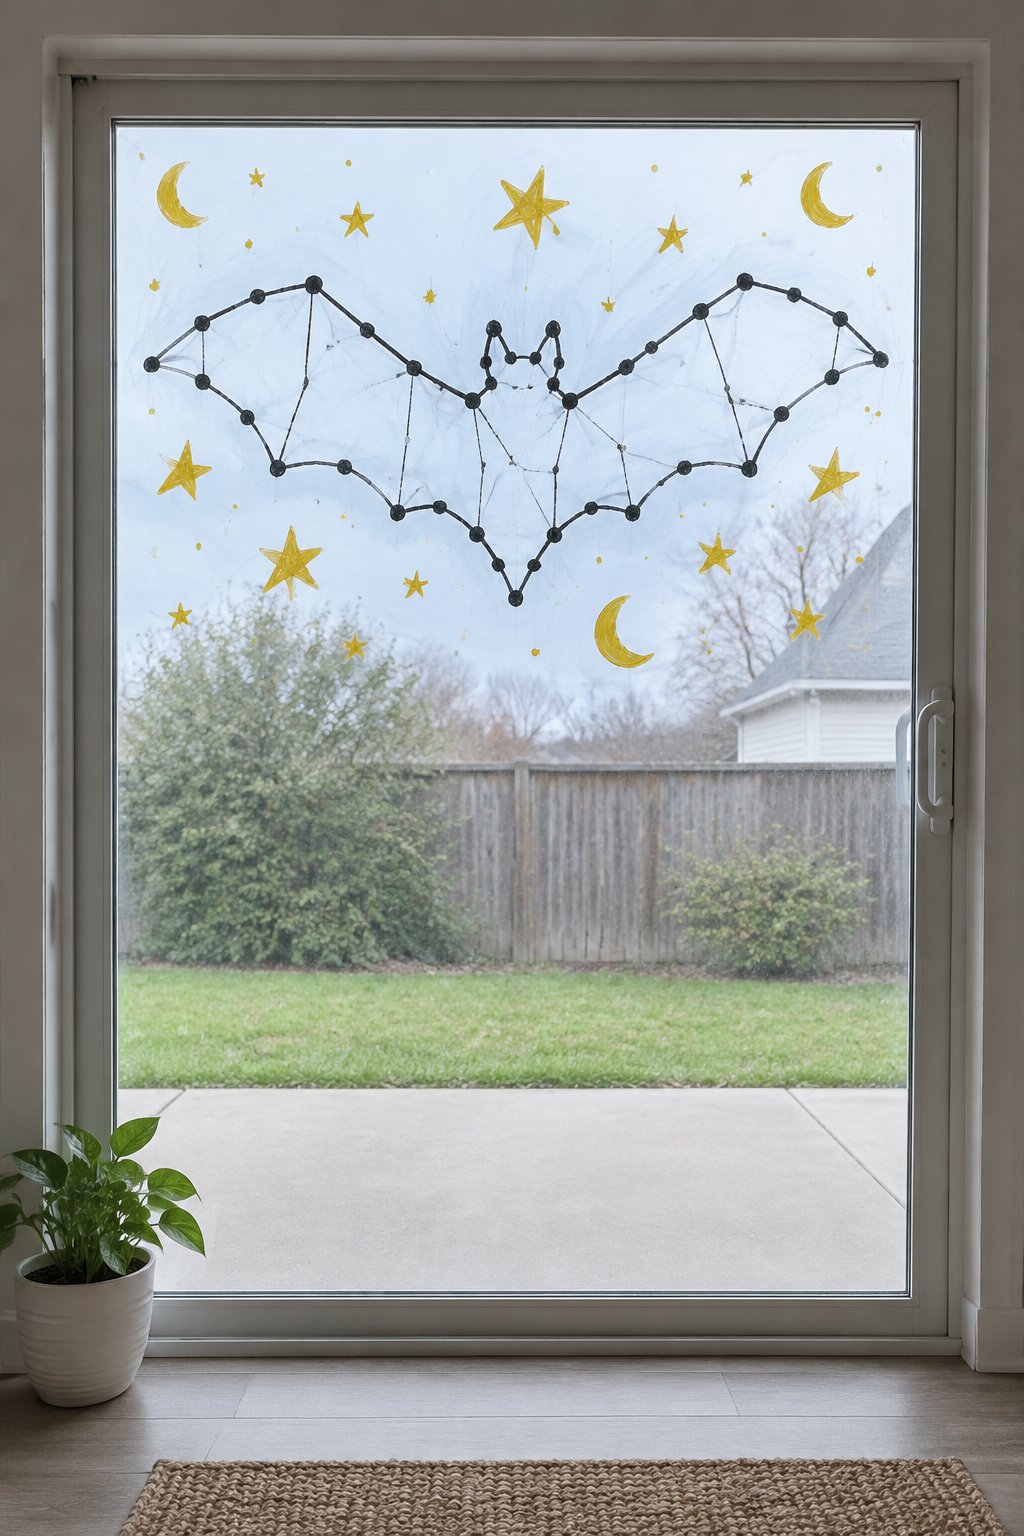
A dotted black bat constellation spans the upper half of a sliding patio door. Yellow stars and small crescent moons surround the 12-inch bat outline, with thin connecting lines between the dots.
Pull together black and yellow paint markers, a bat stencil, a ruler, painter’s tape, and a dotting tool. Mark the main points first, then connect only the dots that define the wings and body.
Cute Halloween Window Painting Ideas for Kids
34. Smiling Ghost Family
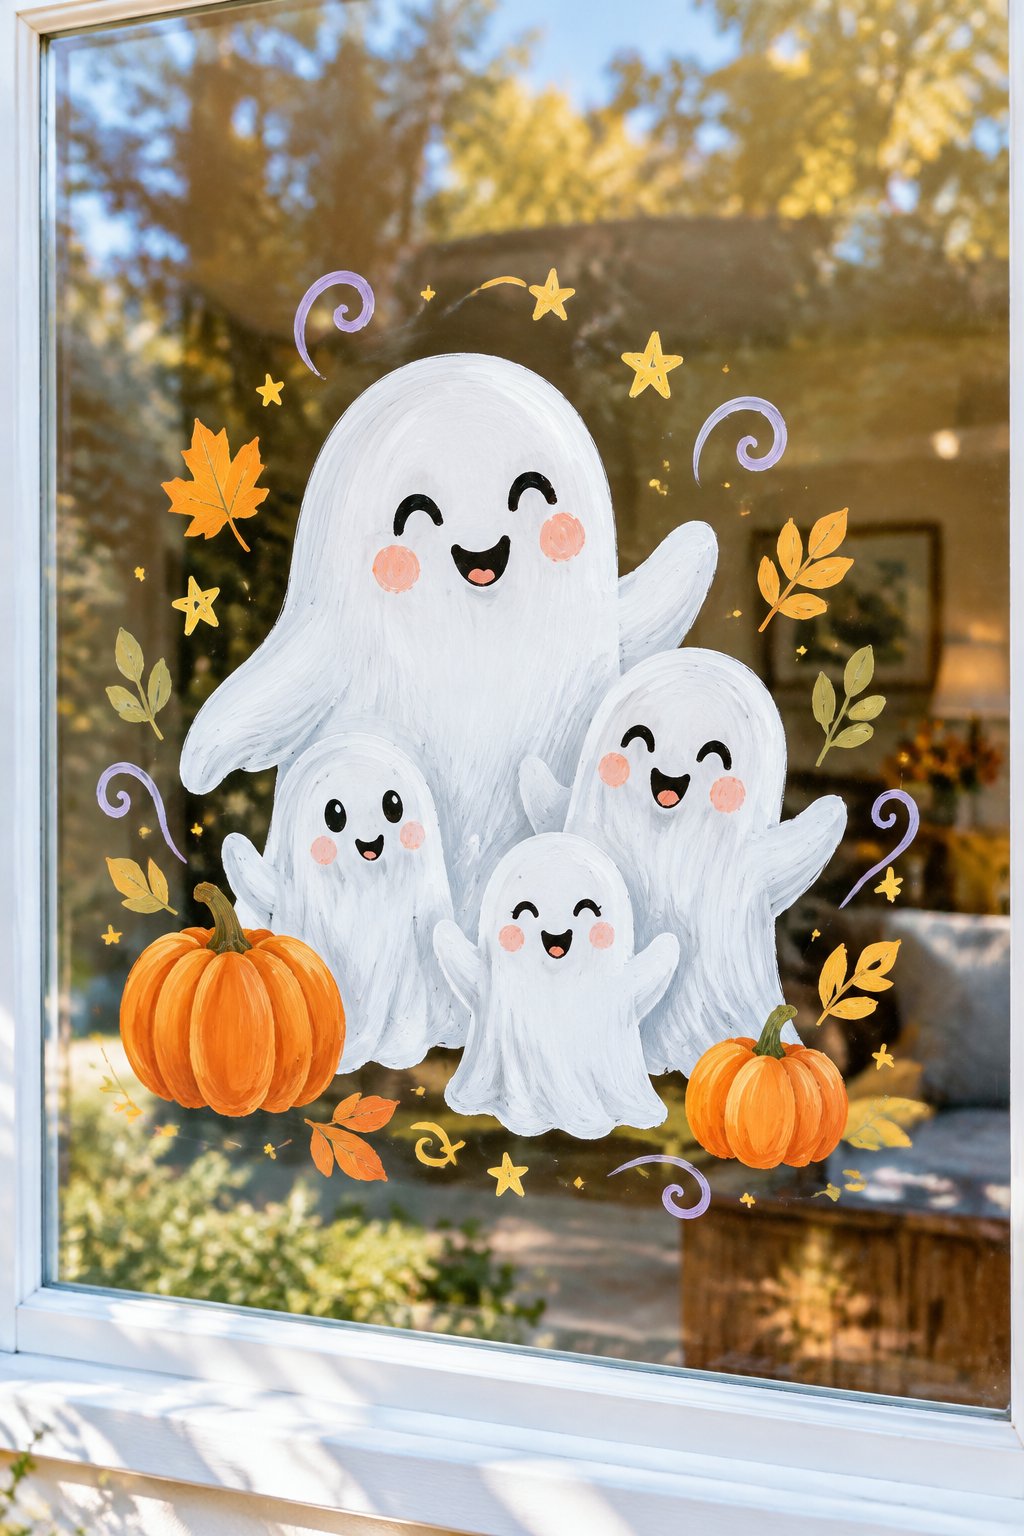
A family of white smiling ghosts fills the center of a French door window, with orange pumpkins, purple stars, and green accents around them. The ghost shapes range from 5 to 9 inches tall.
Use washable white, black, orange, purple, and green paint, round brushes, a sponge, painter’s tape, and cotton swabs. Outline each ghost with a sponge first, then add dot eyes and simple smiles.
35. Friendly Bat With Big Eyes
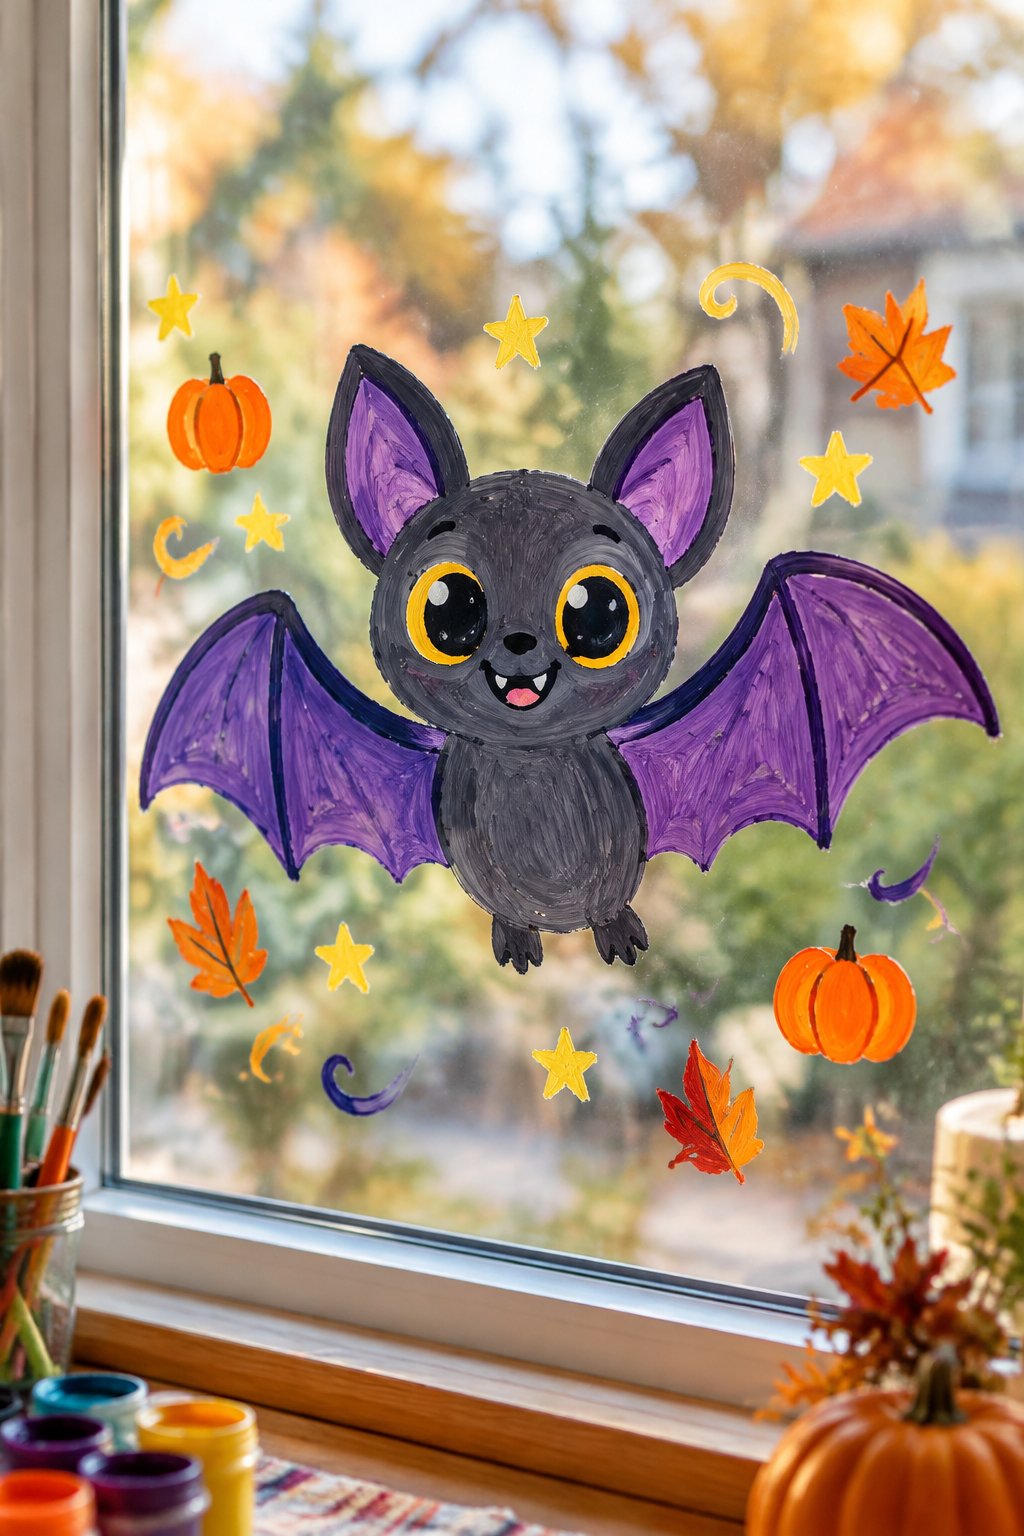
A purple bat with large white eyes spreads across the center of a playroom window. Orange stars and yellow dots surround its 10-inch wings, while a small smile keeps the face friendly.
Gather purple, white, black, orange, and yellow washable paint, a bat stencil, a wide brush, a detail brush, and painter’s tape. Paint the wings as one shape, then add the eyes once the purple layer dries.
36. Cat Peeking Out of a Pumpkin
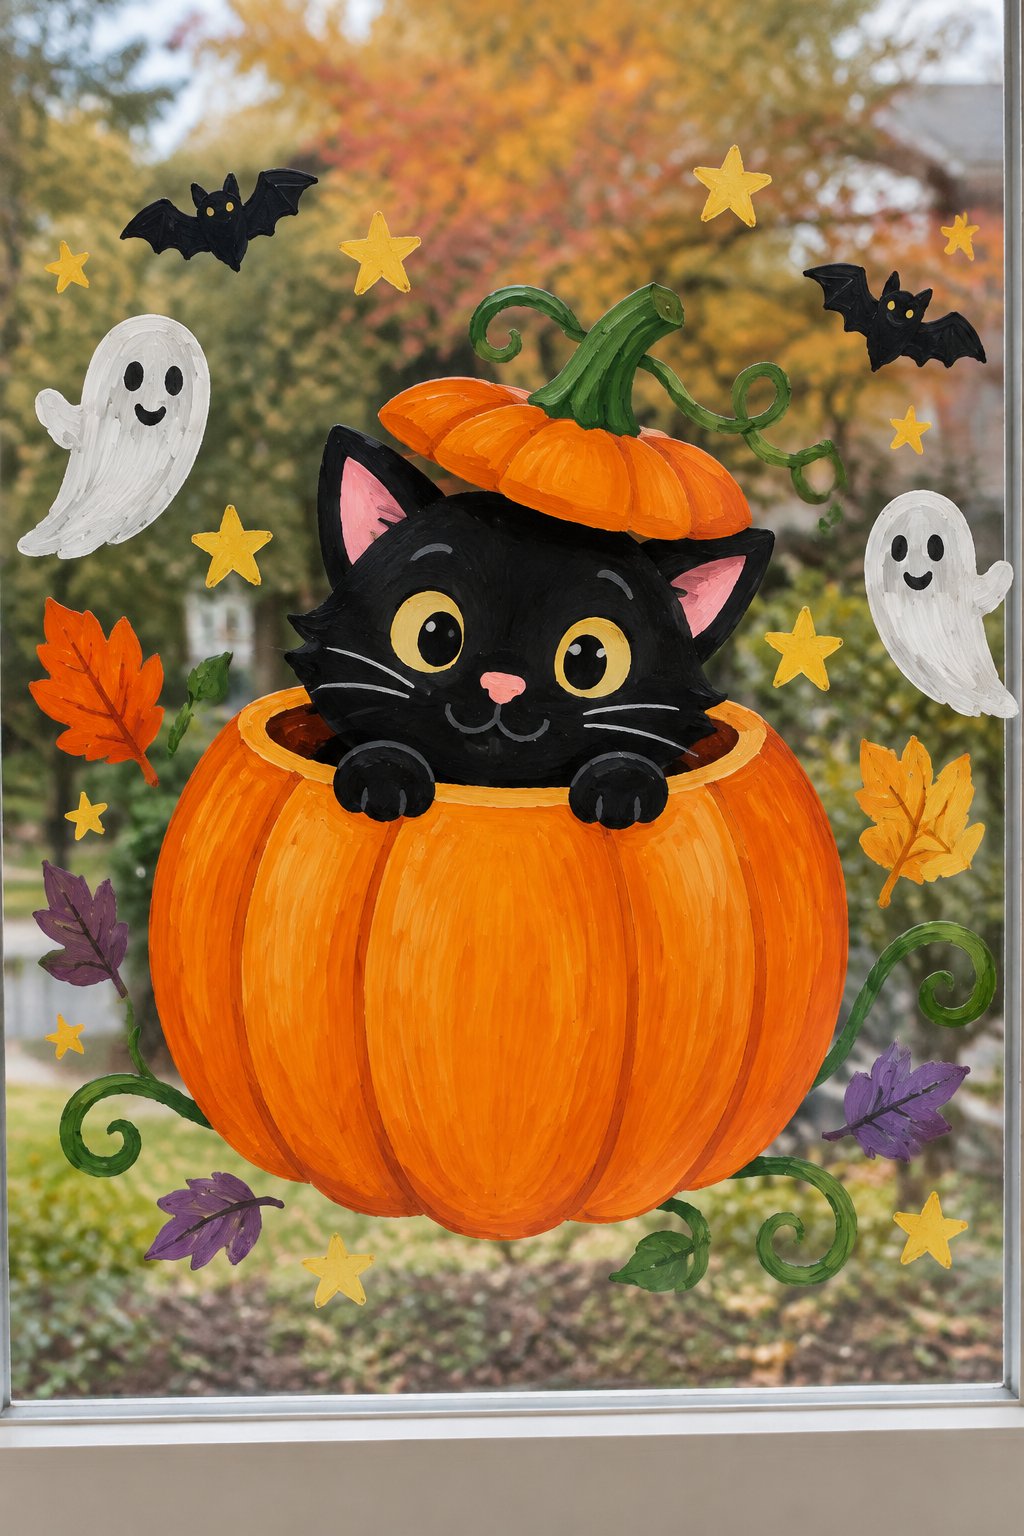
A black cat peeks from an orange pumpkin painted across the lower center of a double-hung living room window. The pumpkin is about 12 inches wide, with yellow eyes and a green curling stem.
You’ll want orange, black, yellow, and green washable paint, a pumpkin stencil, a fine brush, a sponge, and painter’s tape. Paint the pumpkin body first, then place the cat’s head over the opening for clean layers.
37. Rainbow Candy Corn
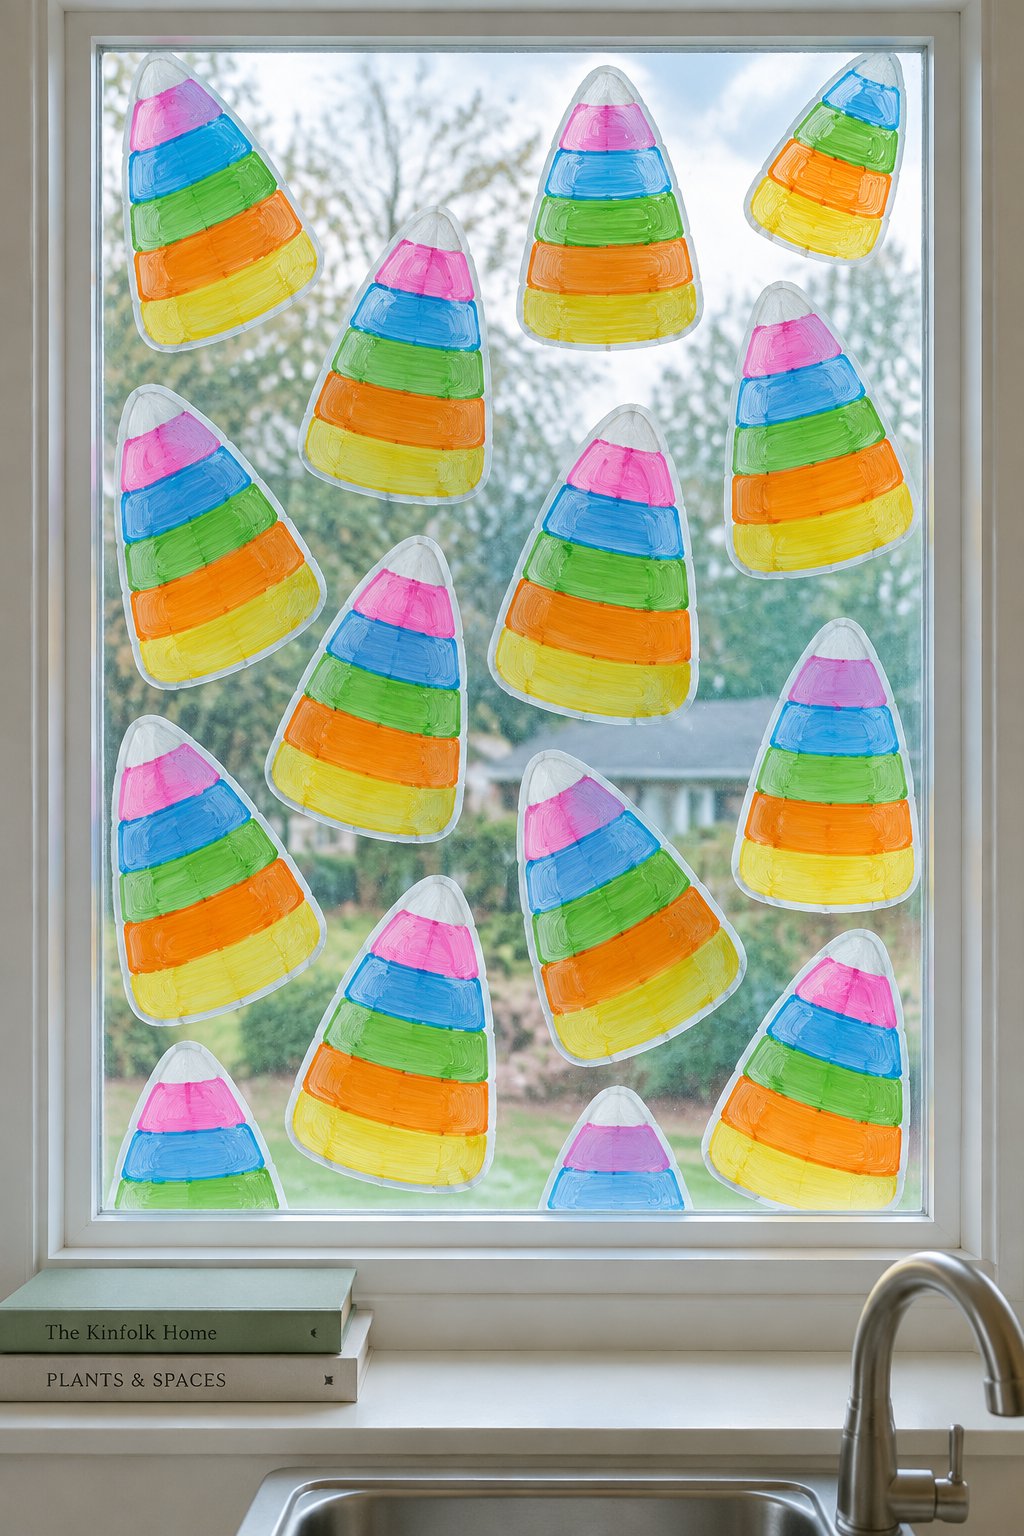
Large candy corn shapes fill a kitchen window over the sink in rainbow bands of pink, blue, green, orange, and yellow. Each piece is about 5 inches tall, with white outlines separating the colors.
Use washable paint in five bright colors, white paint, a flat brush, painter’s tape, and a triangular stencil. Paint the outer outline first, then fill each stripe with its own color.
38. Cute Spiders With Bows
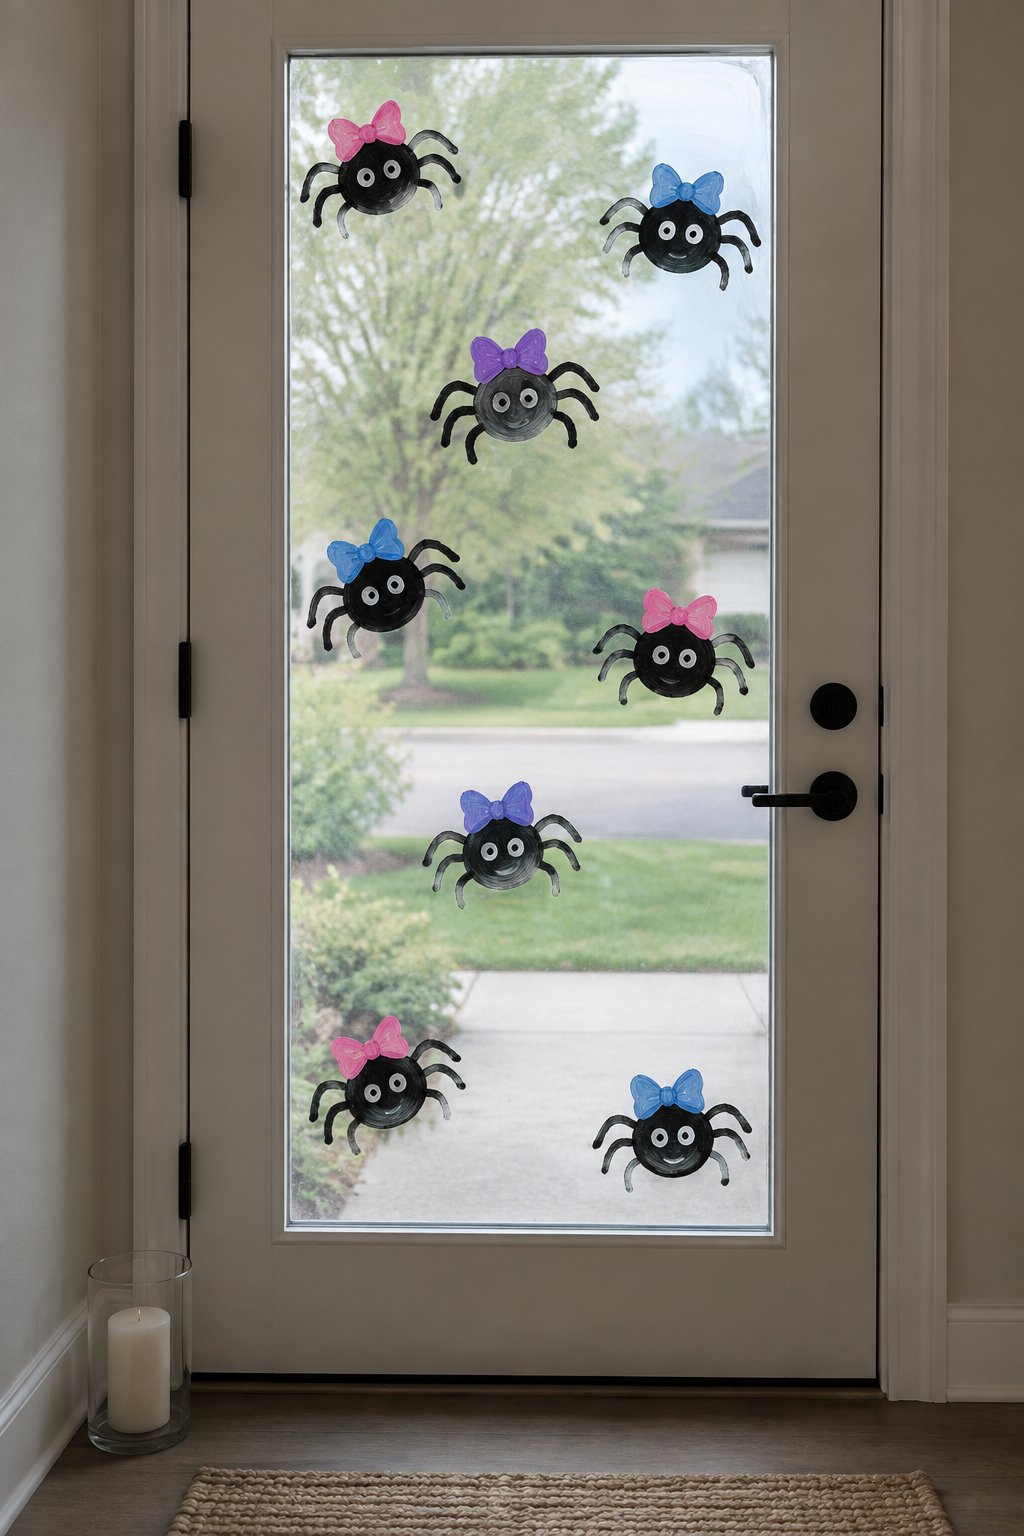
Small black spiders with pink, blue, and purple bows crawl across a front door glass panel. Each spider is about 4 inches wide, with round bodies and short, curved legs.
Set out black, pink, blue, purple, and white washable paint, a fine brush, a round sponge, painter’s tape, and cotton swabs. Stamp the bodies with the sponge, then draw the legs once the circles dry.
Stained Glass Halloween Window Painting
39. Stained Glass Pumpkin
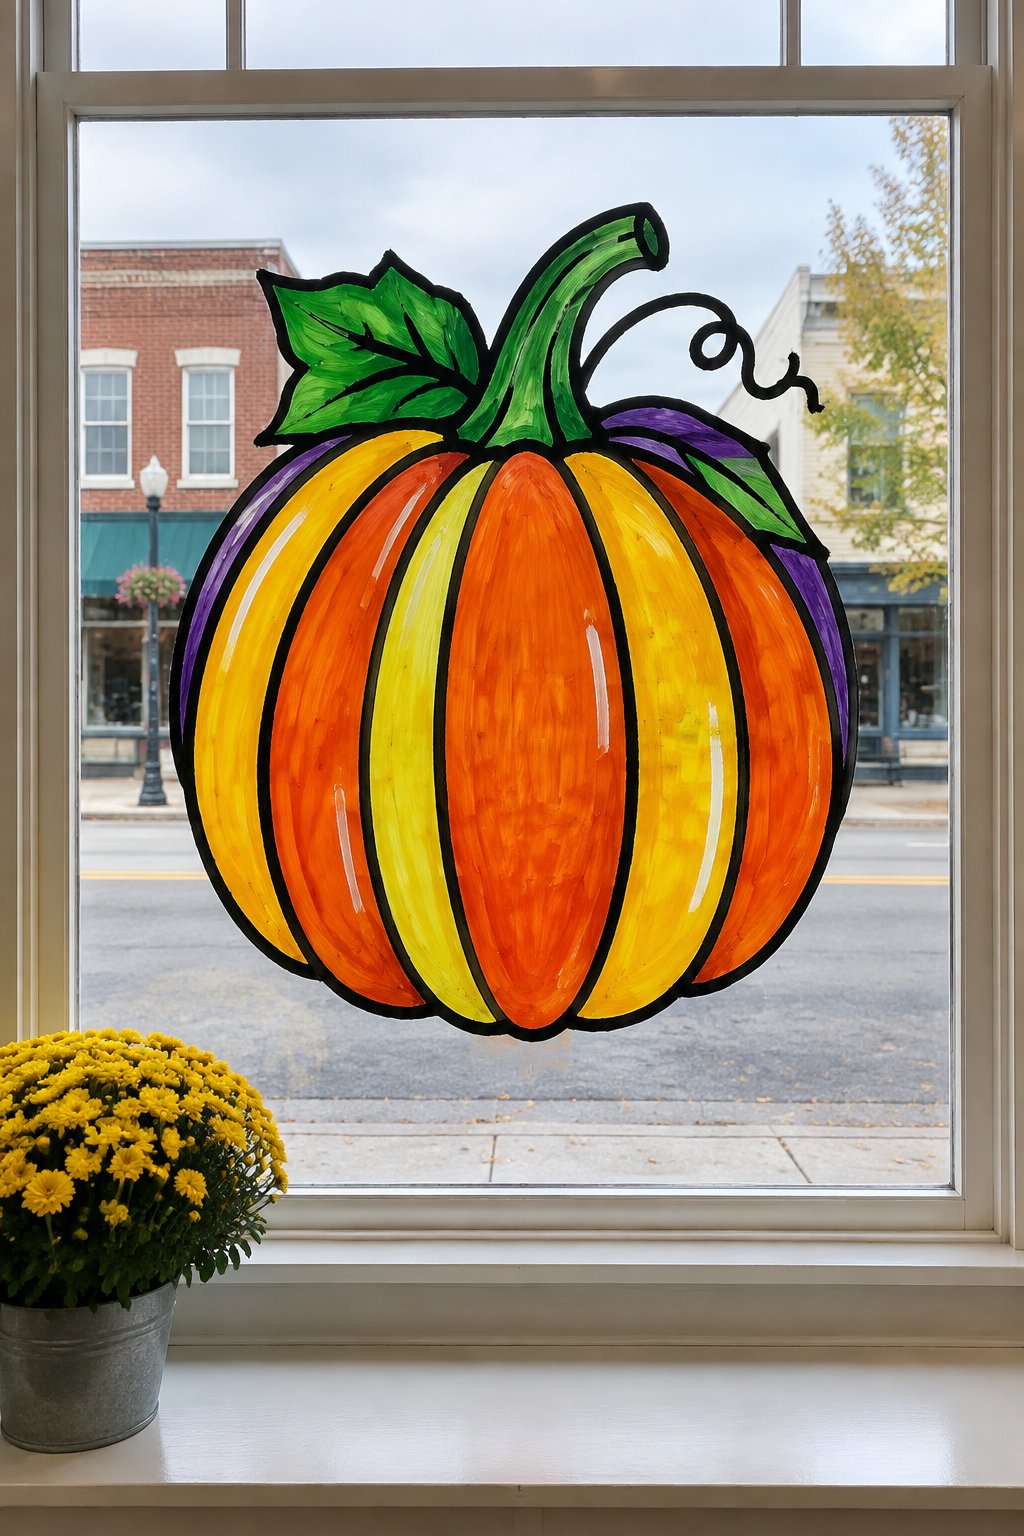
A stained-glass-style pumpkin fills the center of a tall window with orange, yellow, green, and purple sections. Thick black lines divide the 12-inch pumpkin into curved, glass-like panels.
Start with black window paint, orange, yellow, green, and purple paint, a fine liner, a pumpkin stencil, and painter’s tape. Outline every panel first, then fill in the colors after the black lines set.
40. Stained Glass Black Cat
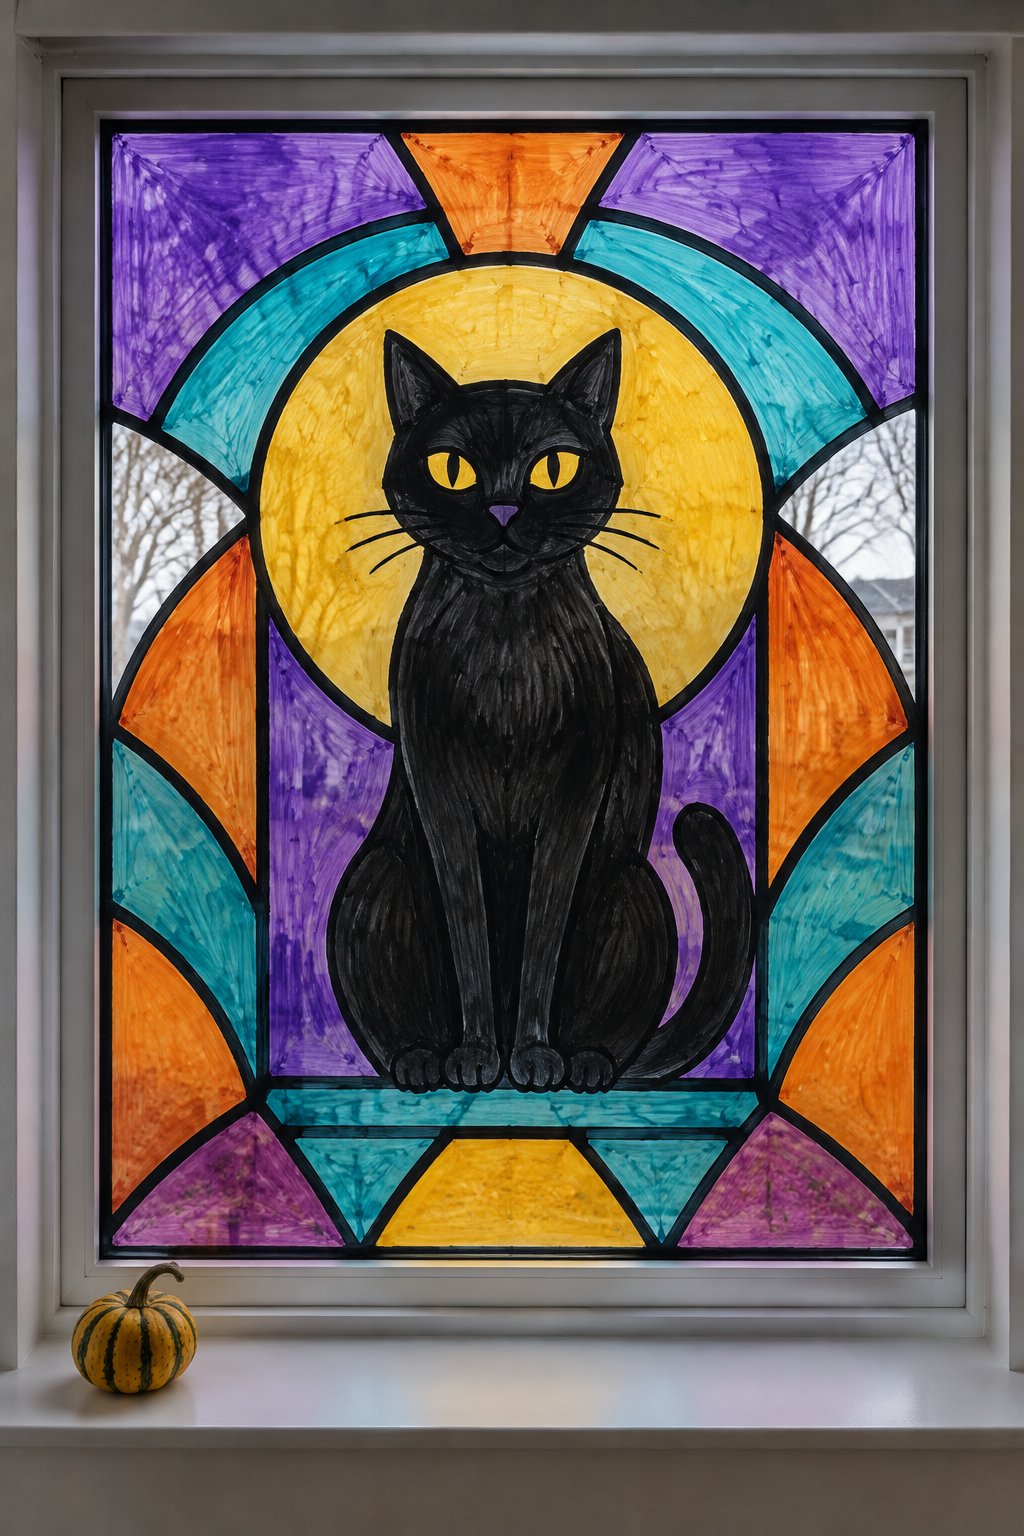
A black cat sits inside a stained-glass design on a large picture window. Purple, orange, yellow, and teal sections surround the cat, with bold black borders between each shape.
Gather black liner paint, purple, orange, yellow, and teal washable paint, a cat stencil, a fine brush, and painter’s tape. Keep the black outline at least ⅛ inch thick so the colored areas remain separated.
41. Stained Glass Spider Web
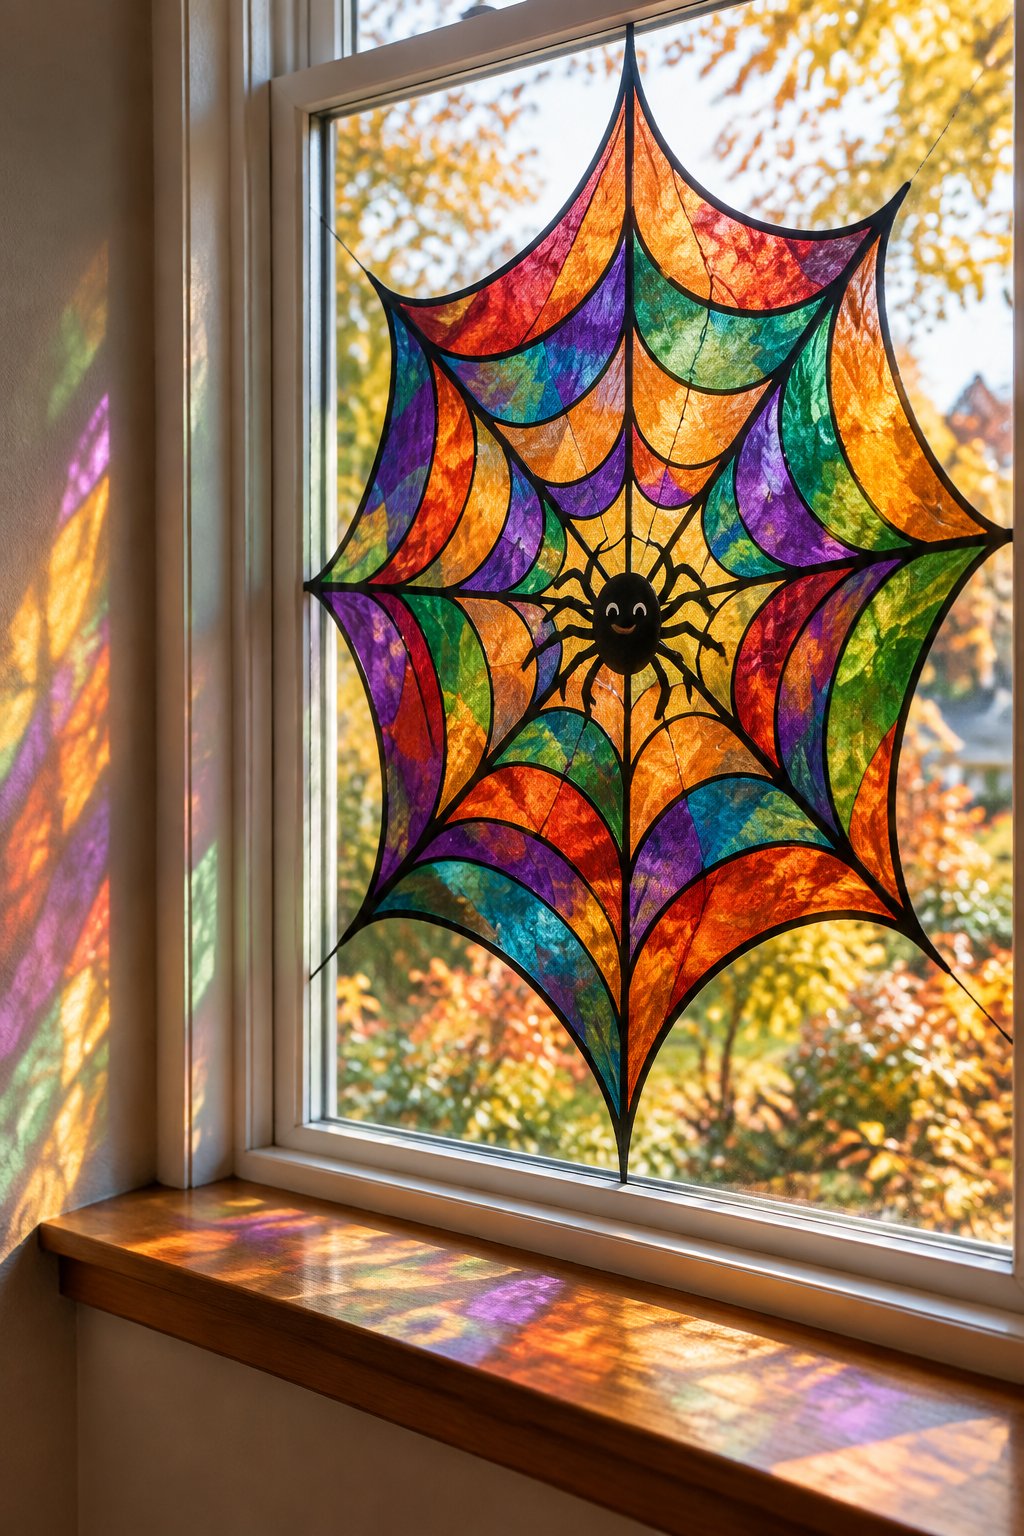
A colorful stained-glass spider web spreads across the upper corner of a small bathroom window. Blue, purple, orange, and green sections surround a small black spider at the web’s center.
All you need is black liner paint, four washable paint colors, a fine brush, a web stencil, and cotton swabs. Draw the web spokes with a ruler, then curve each connecting strand between them.
42. Stained Glass Moon and Bats
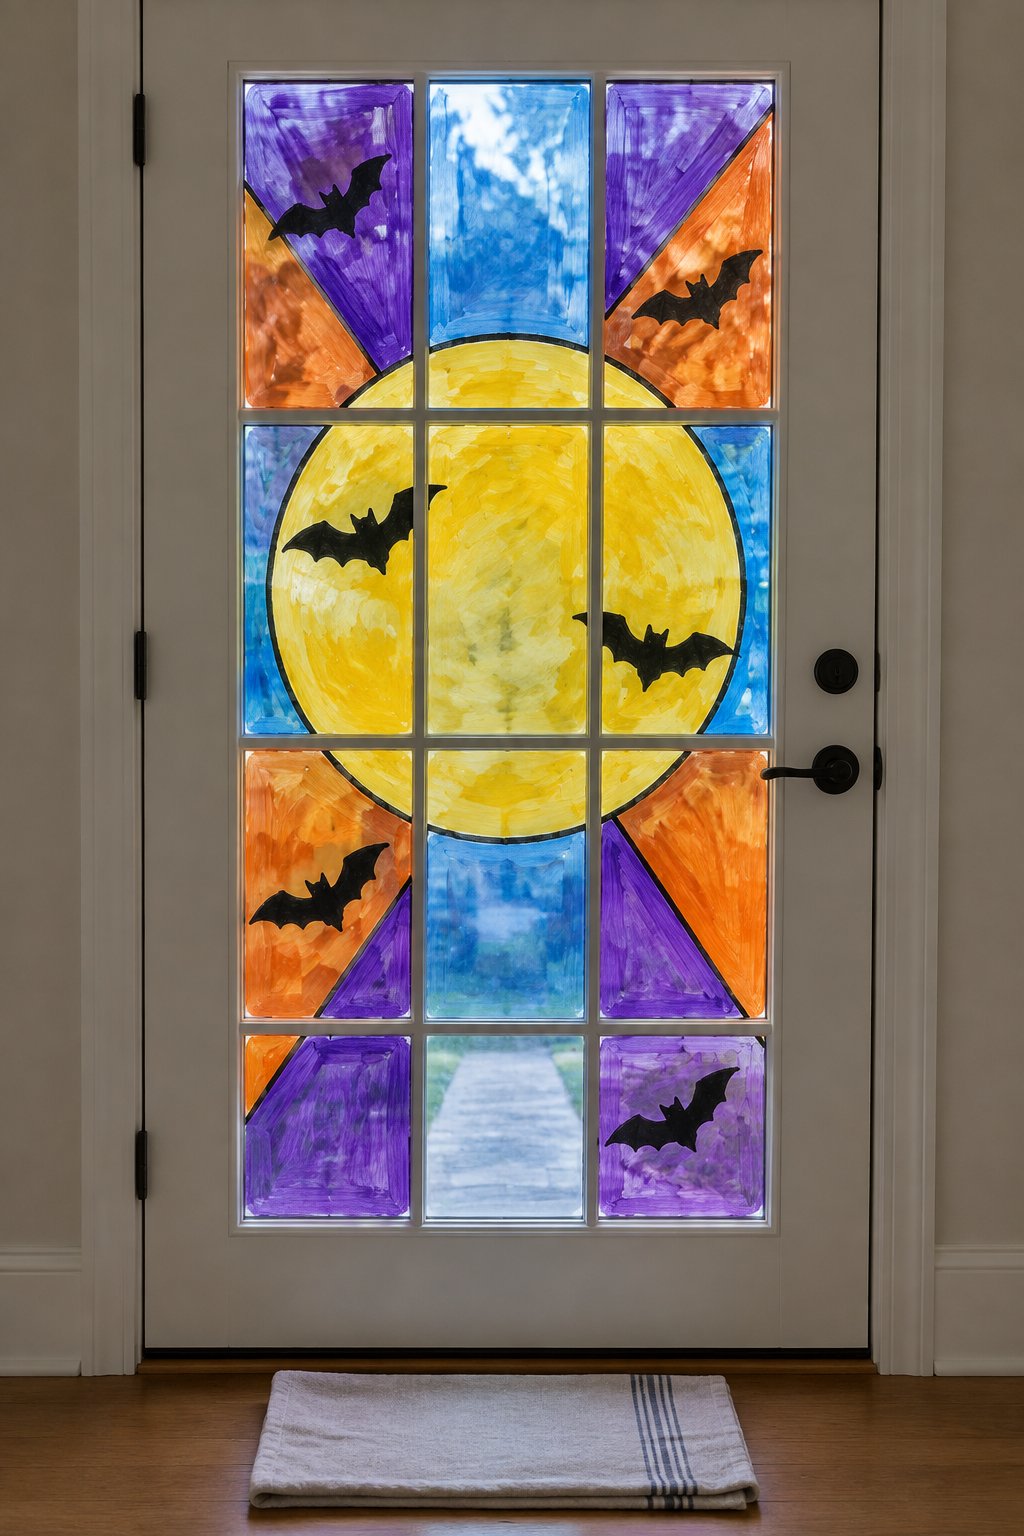
A yellow stained-glass moon fills the center of a French door window, surrounded by purple, blue, and orange panels. Black bats cross the colored sections in 3-inch silhouettes.
Grab black liner paint, yellow, purple, blue, and orange washable paint, a circle stencil, a bat stencil, and painter’s tape. Outline the moon and panels before adding the bats for crisp edges. When Halloween is packed away, the same paints carry right into our Christmas window painting ideas.
Happy Halloween Window Lettering
43. Happy Halloween Script Across the Top
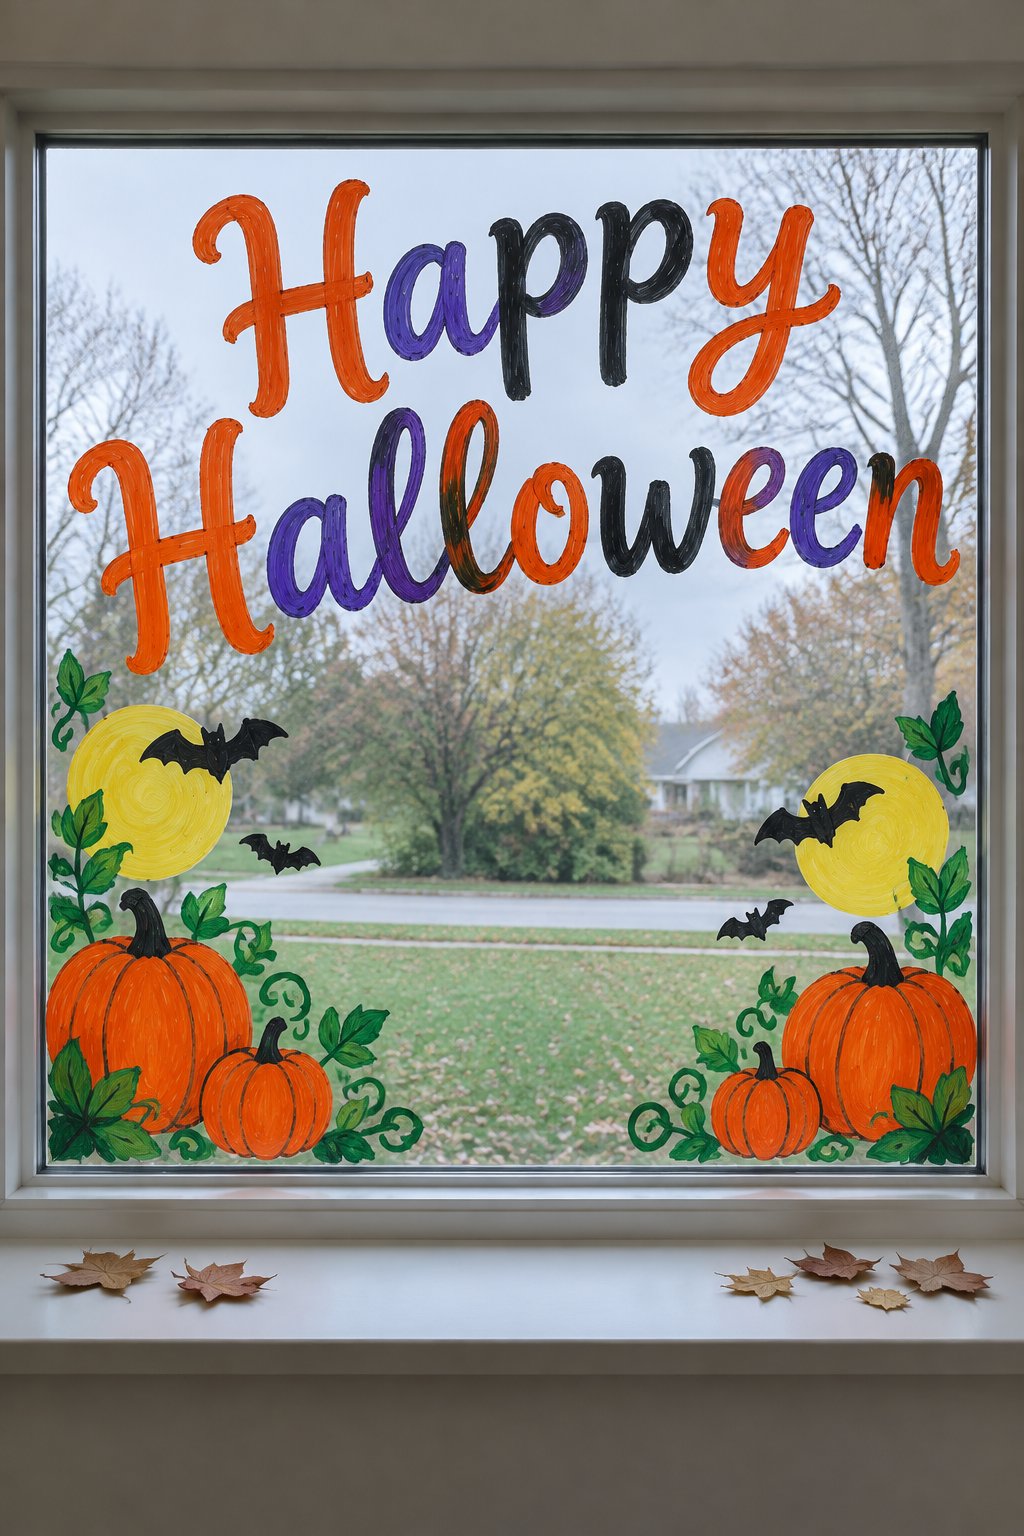
“Happy Halloween” stretches across the top of a large storefront window in orange, purple, and black script. Pumpkins, yellow moons, green leaves, and small bats fill the lower corners without covering the lettering.
Use orange, purple, black, yellow, and green paint markers, a lettering stencil, a ruler, painter’s tape, and cotton swabs. Tape a straight guide across the glass so each letter sits on the same baseline.
44. BOO in Bubble Letters
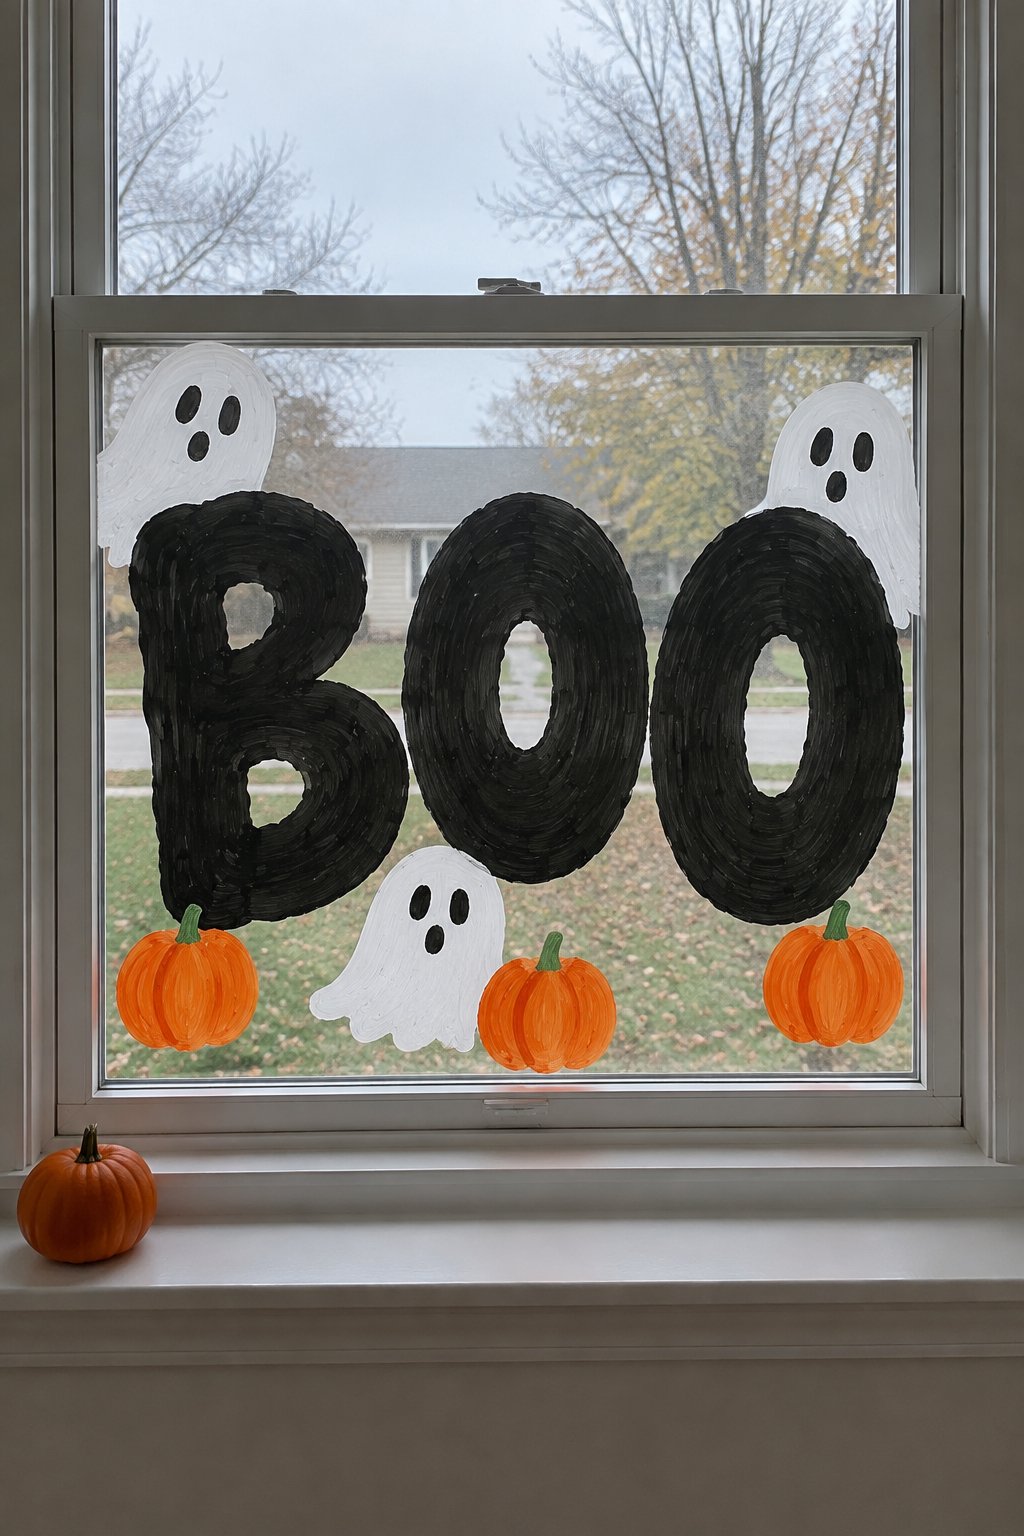
“BOO” appears in large black bubble letters across a double-hung living room window, with white ghost shapes tucked around the letters. Small orange pumpkins sit beneath the word as accents.
Gather black, white, and orange washable paint, a bubble-letter stencil, a flat brush, painter’s tape, and a fine brush. Block out each letter with tape first, then round the corners with a detail brush.
45. Trick or Treat on the Front Door Glass
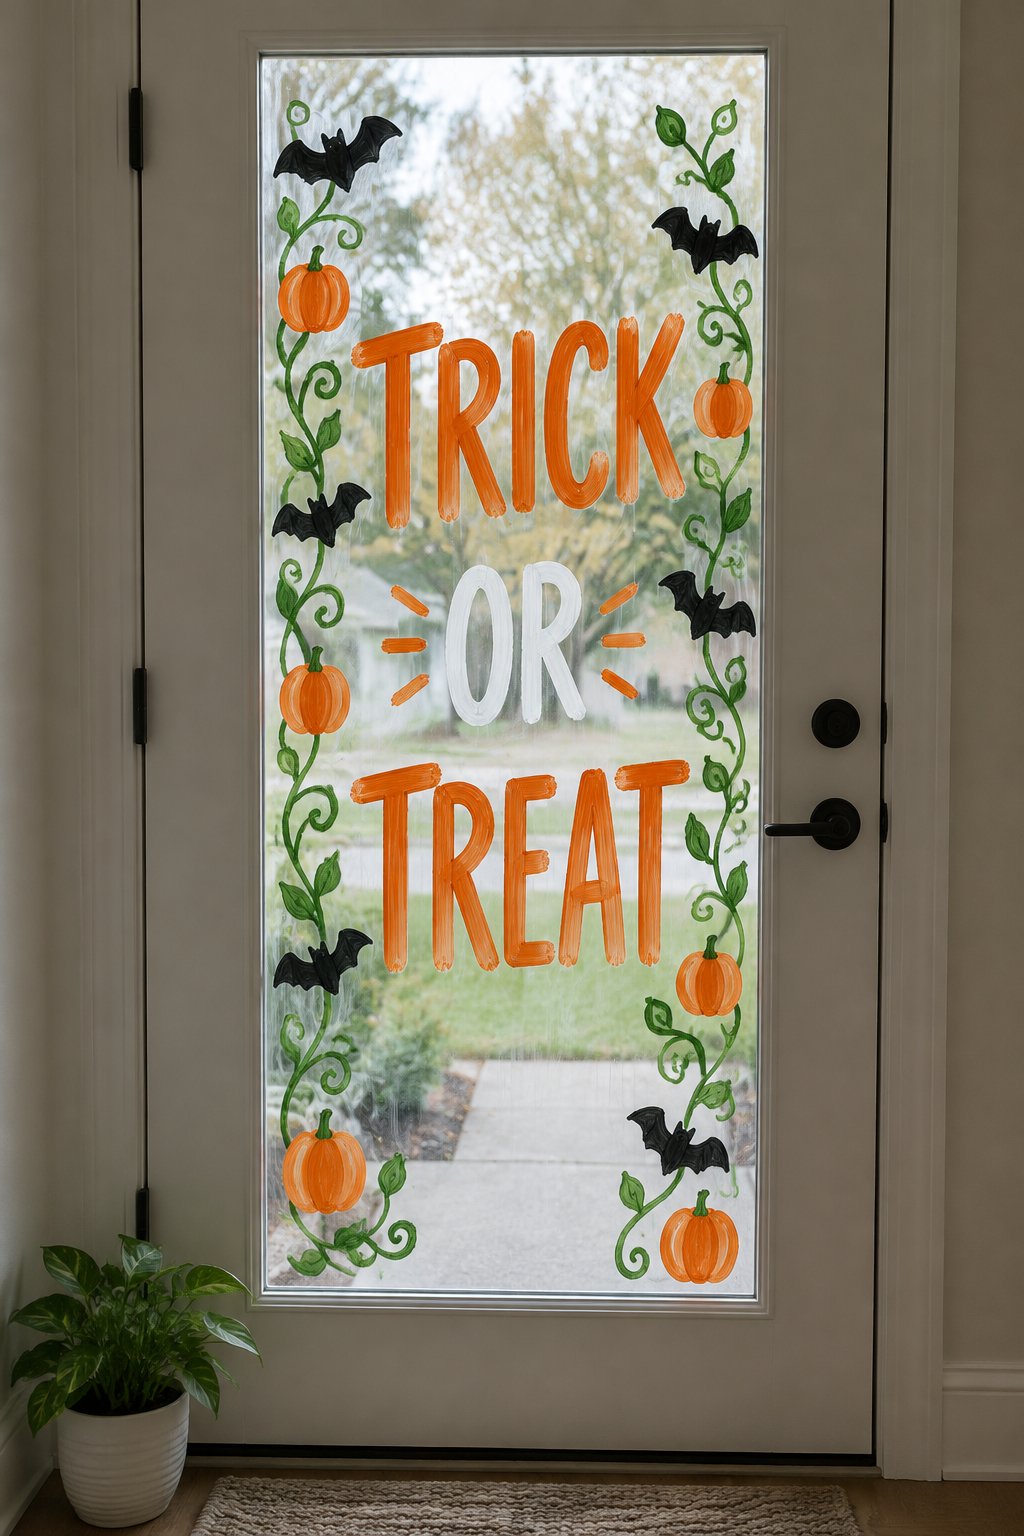
“Trick or Treat” runs down the center of a front door glass panel in white and orange lettering. Black bats, green vines, and small pumpkins frame the words along both sides.
Reach for white and orange paint markers, black washable paint, a lettering stencil, a ruler, and painter’s tape. Write the words on removable paper first, then place the sheet behind the glass as a tracing guide.
Heading to a church or school event this year? Our trunk-or-treat ideas have setups to match.
46. Hello Pumpkin Hand Lettering
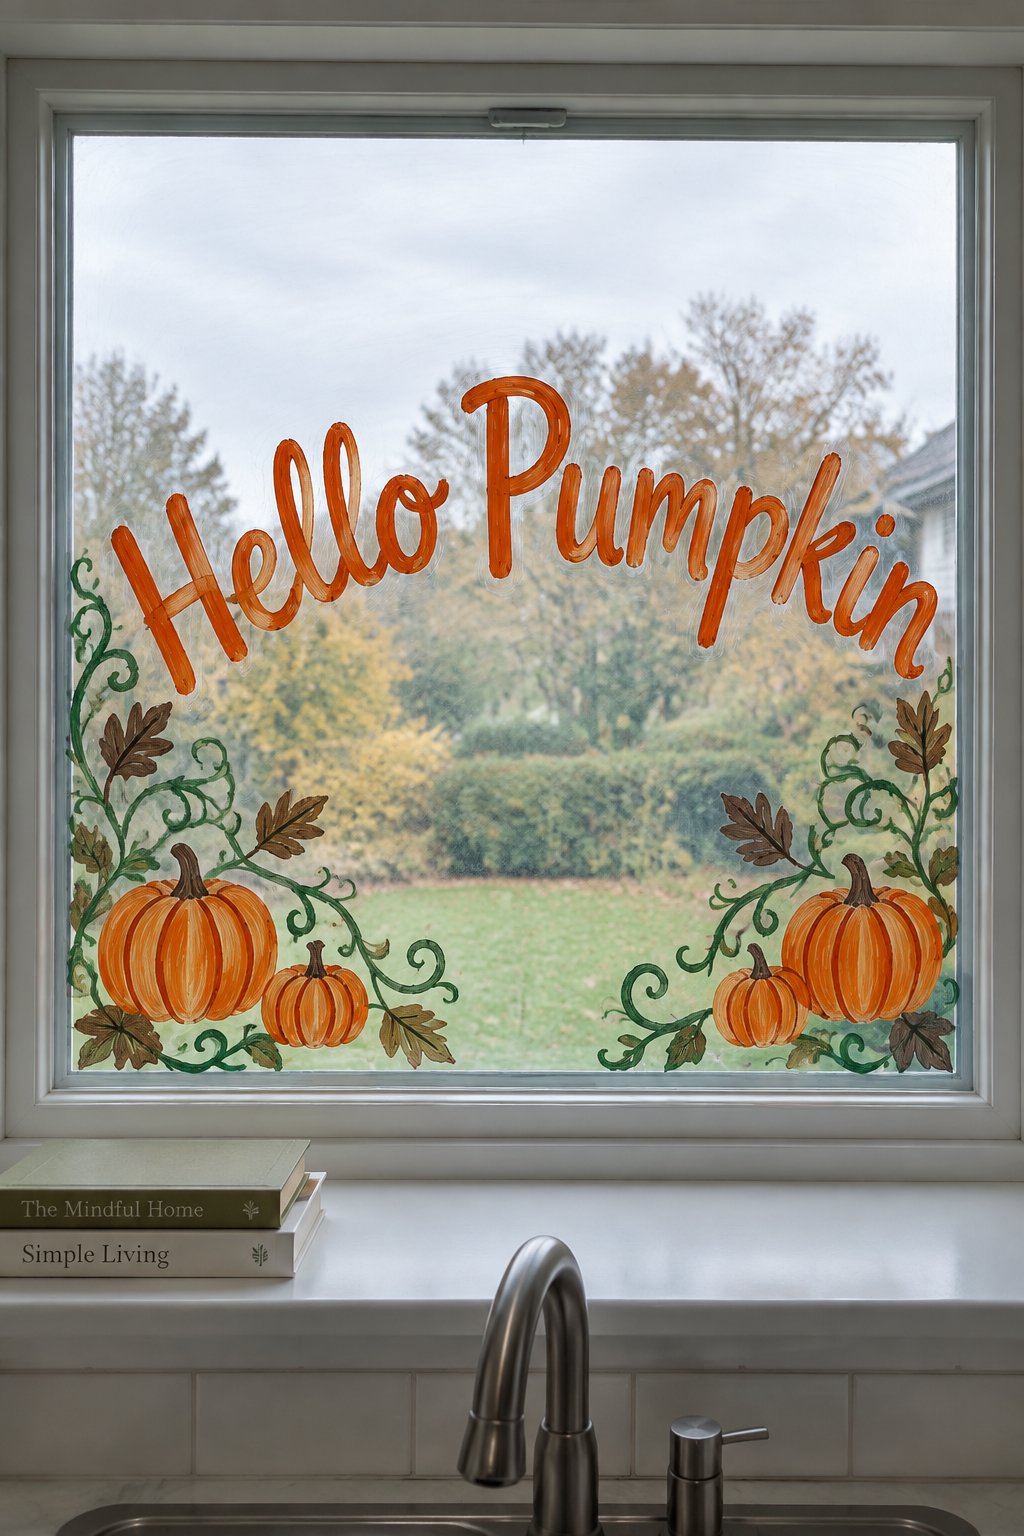
“Hello Pumpkin” curves across the center of a kitchen window over the sink in rust orange lettering. Green vines, brown leaves, and small orange pumpkins fill the lower corners around the words.
Choose rust orange, green, and brown paint markers, a lettering stencil, a fine brush, painter’s tape, and a ruler. Start with the tallest letters, then add the vines after the wording is dry.
Halloween Window Eyes and Monster Faces
47. Peeking Eyes in Every Pane
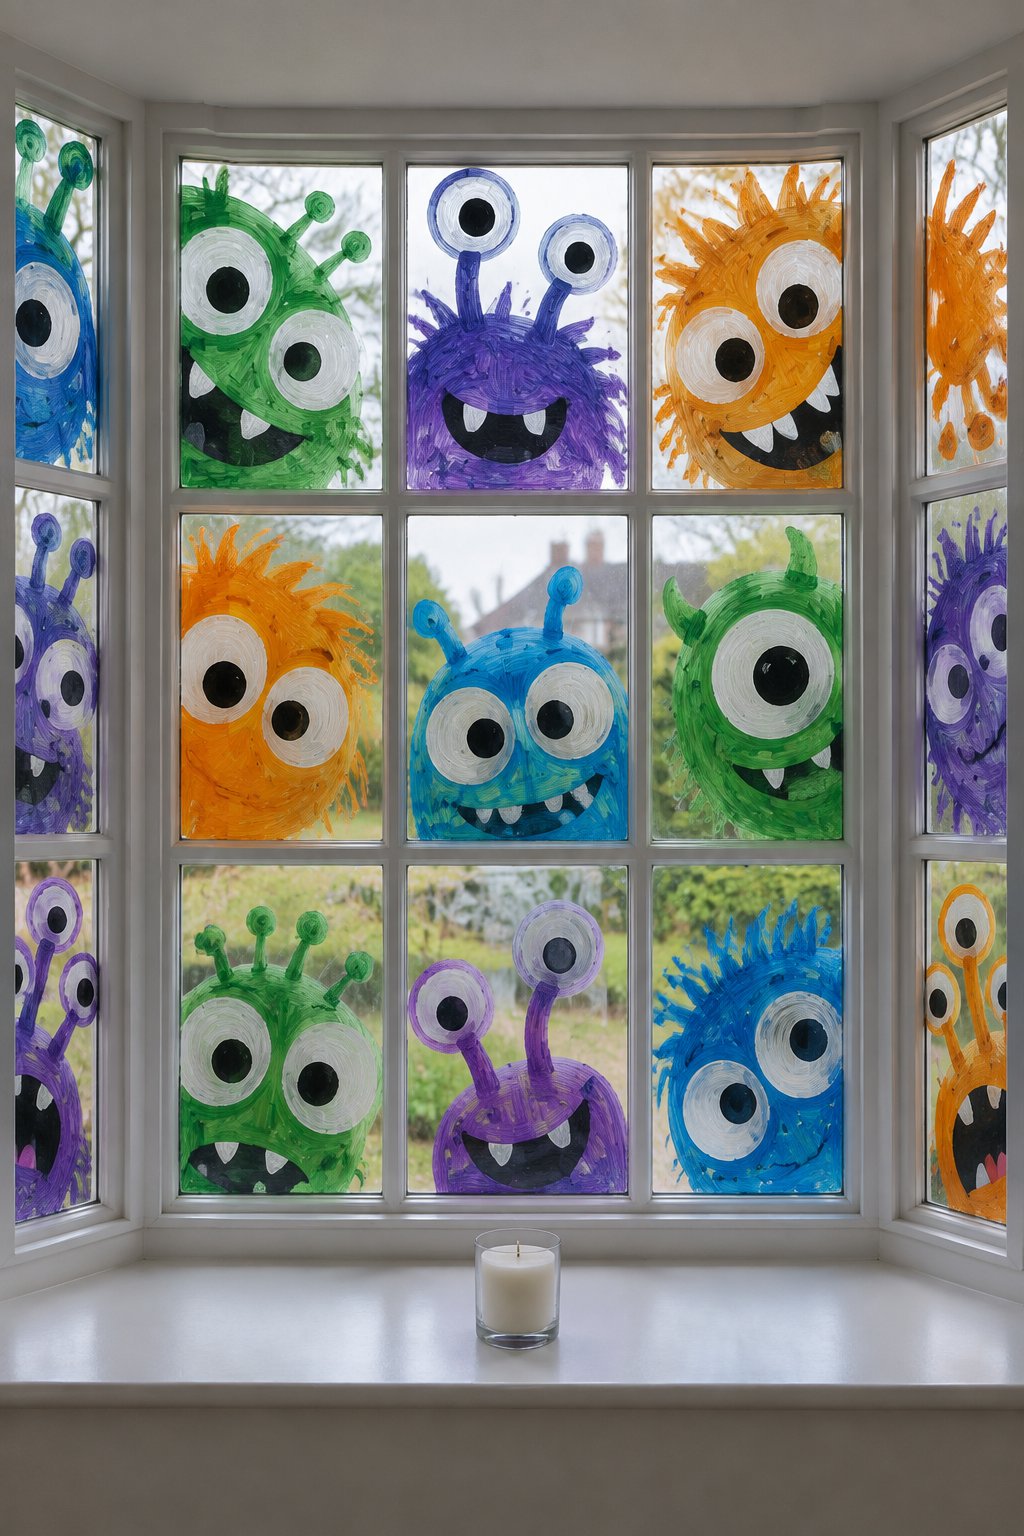
Wide eyes and colorful monster faces fill every pane of a bay window. Green, purple, orange, and blue faces peek from the glass, with black pupils sized from 1 to 3 inches.
Pick up green, purple, orange, blue, white, and black washable paint, round sponges, fine brushes, painter’s tape, and cotton swabs. Treat each pane as a separate face area so the expressions stay clear.
48. One-Eyed Monster Face
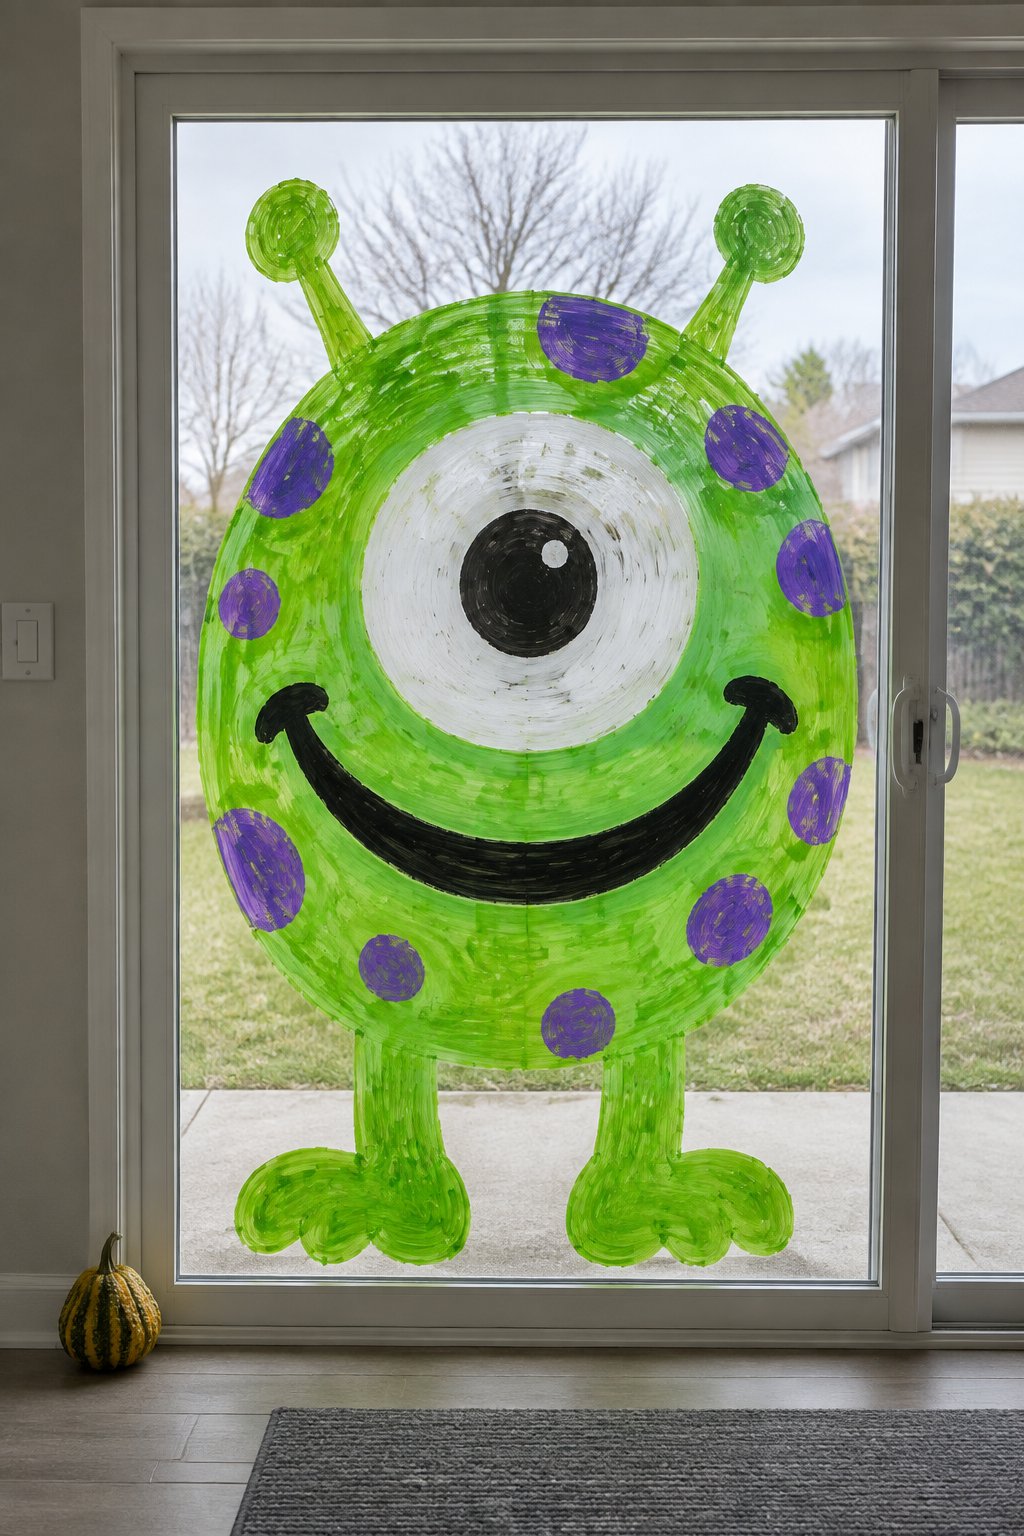
A bright green one-eyed monster fills the center of a sliding patio door. Its large white eye measures about 8 inches across, with purple spots and a wide black smile around the face.
Set out green, white, black, and purple washable paint, a large round stencil, a wide brush, a fine brush, and painter’s tape. Paint the green face in one smooth oval, then add the eye after the base dries.
49. Toothy Monster Grin on the Door Glass
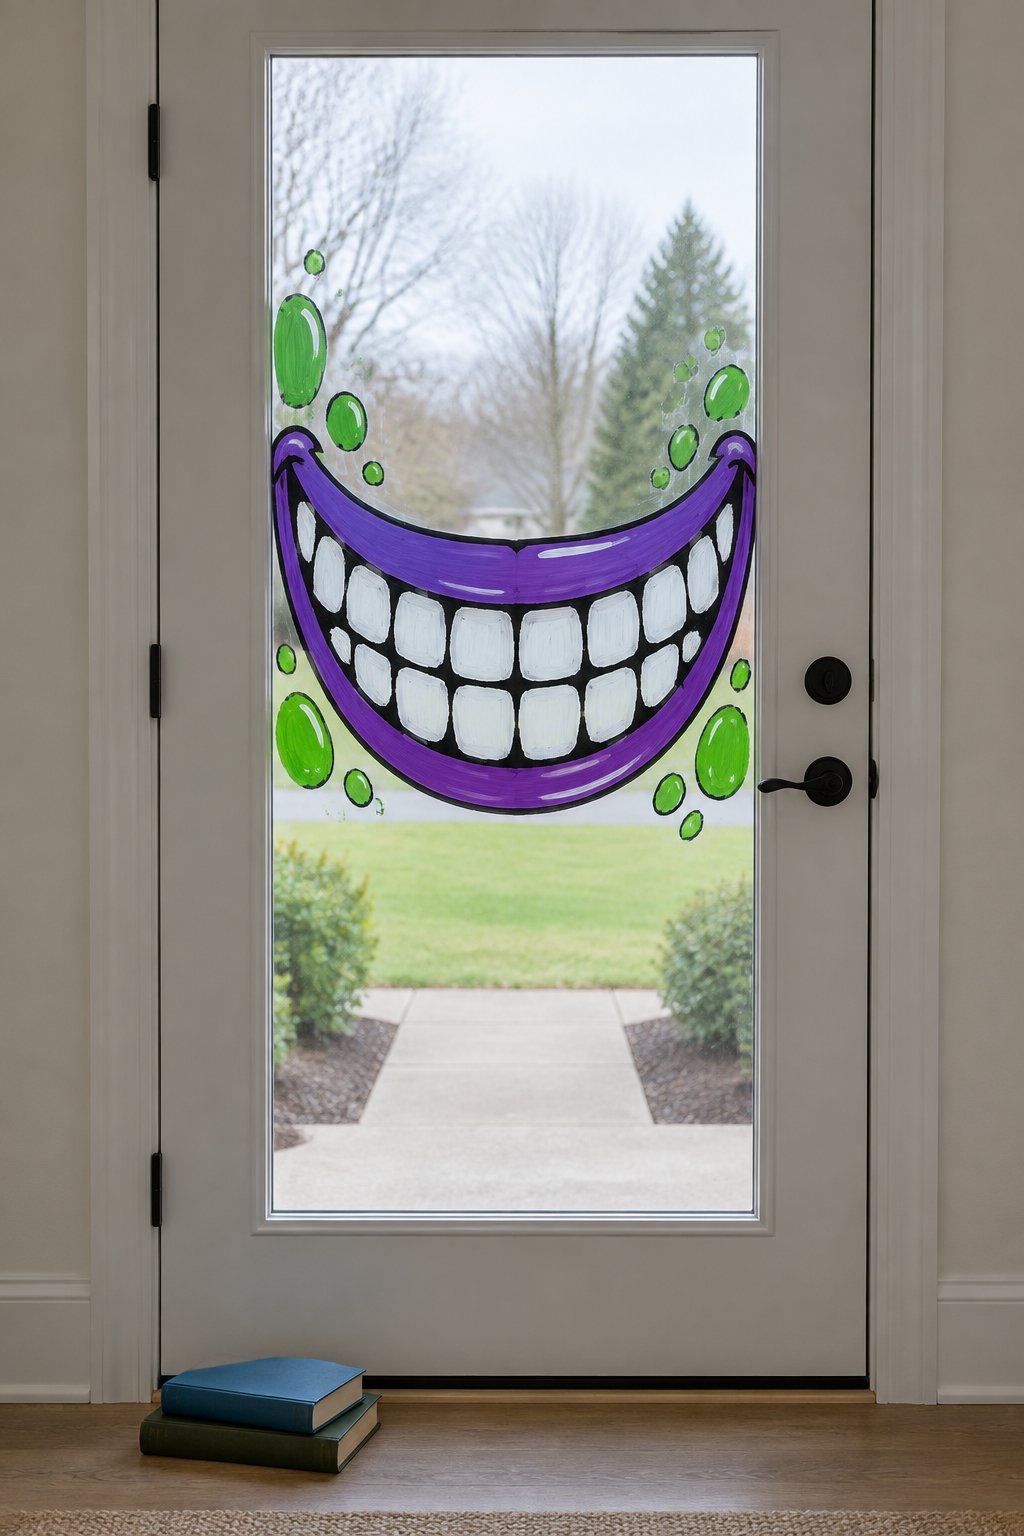
A wide purple monster grin stretches across the middle of a front door glass panel. White square teeth fill the 14-inch smile, with black gaps and green spots around the edges.
Use purple, white, black, and green washable paint, a flat brush, a fine brush, a ruler, and painter’s tape. Tape the top and bottom smile lines first so the teeth stay evenly spaced.
50. Giant Jack-o’-Lantern Face
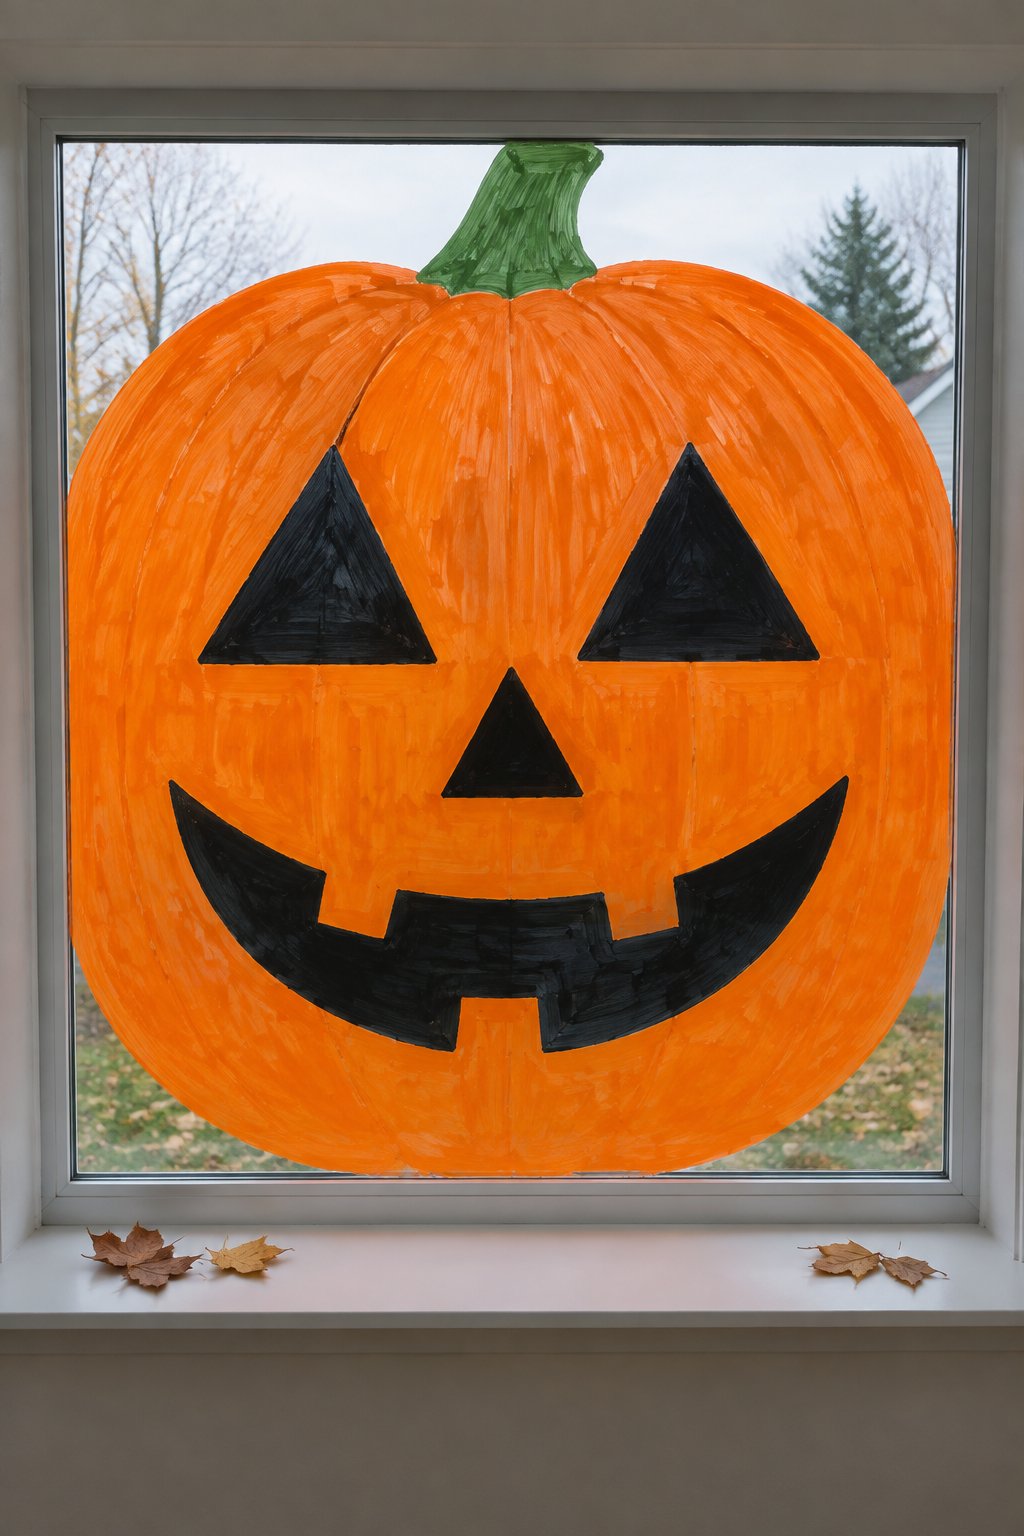
A giant orange jack-o’-lantern face fills a large picture window from edge to edge. Black triangle eyes, a small nose, and a curved grin create bold shapes that stay clear across the glass.
Pull together orange and black washable paint, a wide brush, a fine brush, painter’s tape, and a ruler. Sketch the face with tape before painting so both eyes match in size and height.
51. Googly-Eyed Monster Family
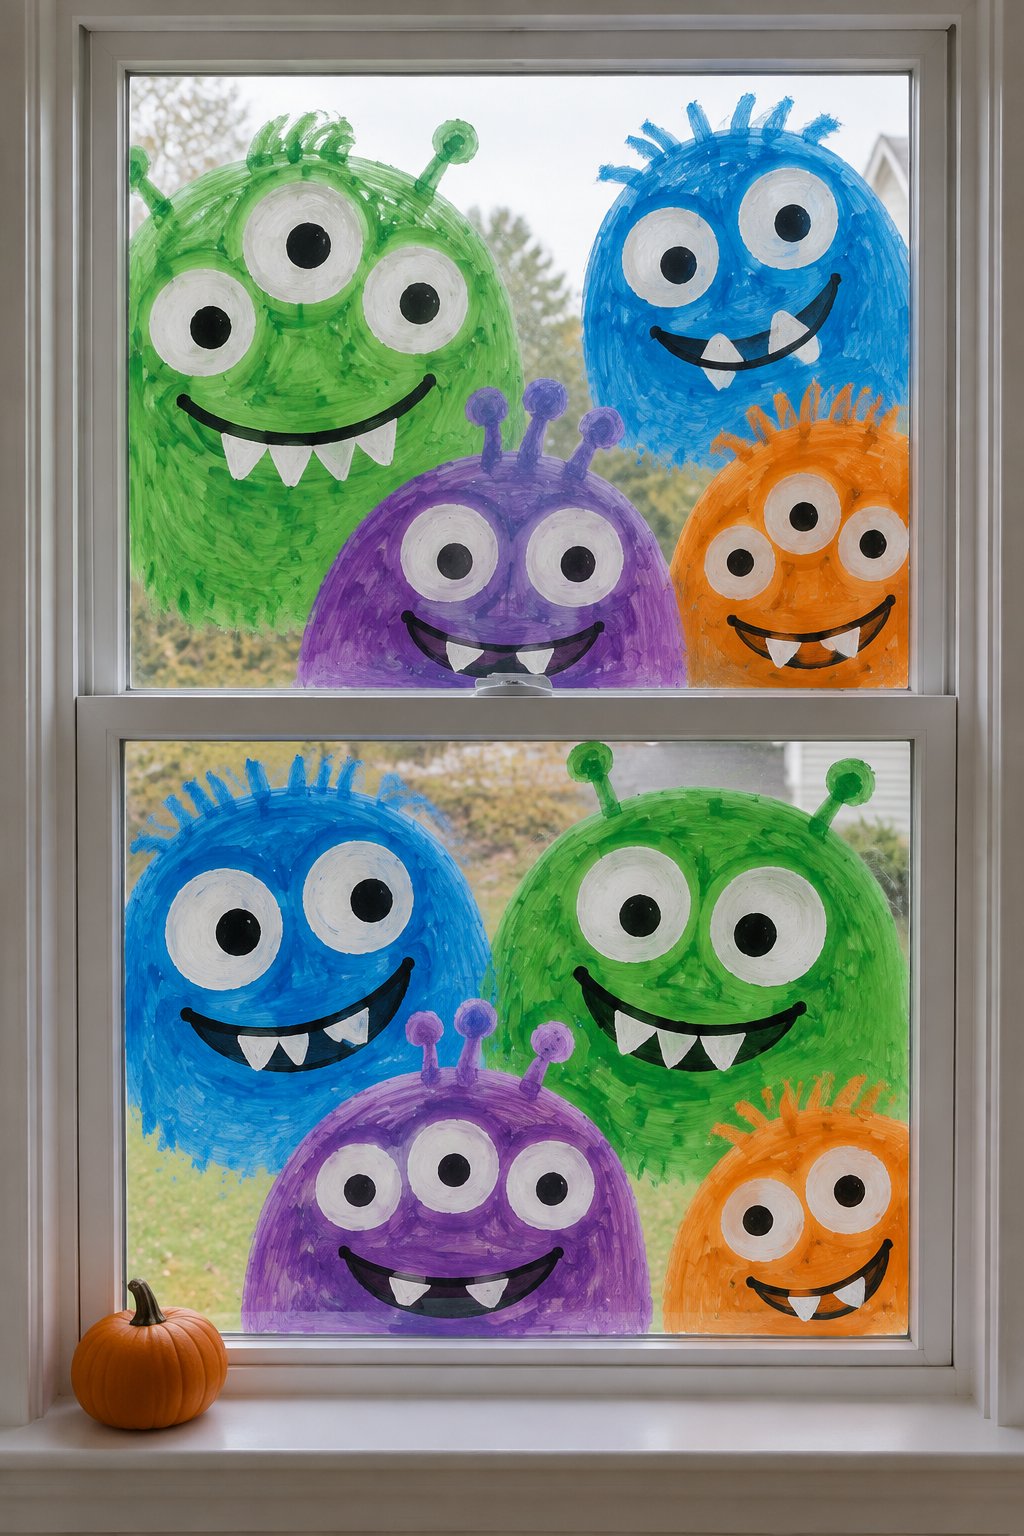
A family of green, blue, purple, and orange monster faces fills a double-hung living room window. Each face has two or three large white eyes, black pupils, and simple toothy smiles.
Gather four washable paint colors, white and black paint, round sponges, fine brushes, and painter’s tape. Stamp the colored heads first, then vary the eye count to give each monster a different look.
Spooky Halloween Window Painting Ideas
52. Slime Drips Along the Top Edge
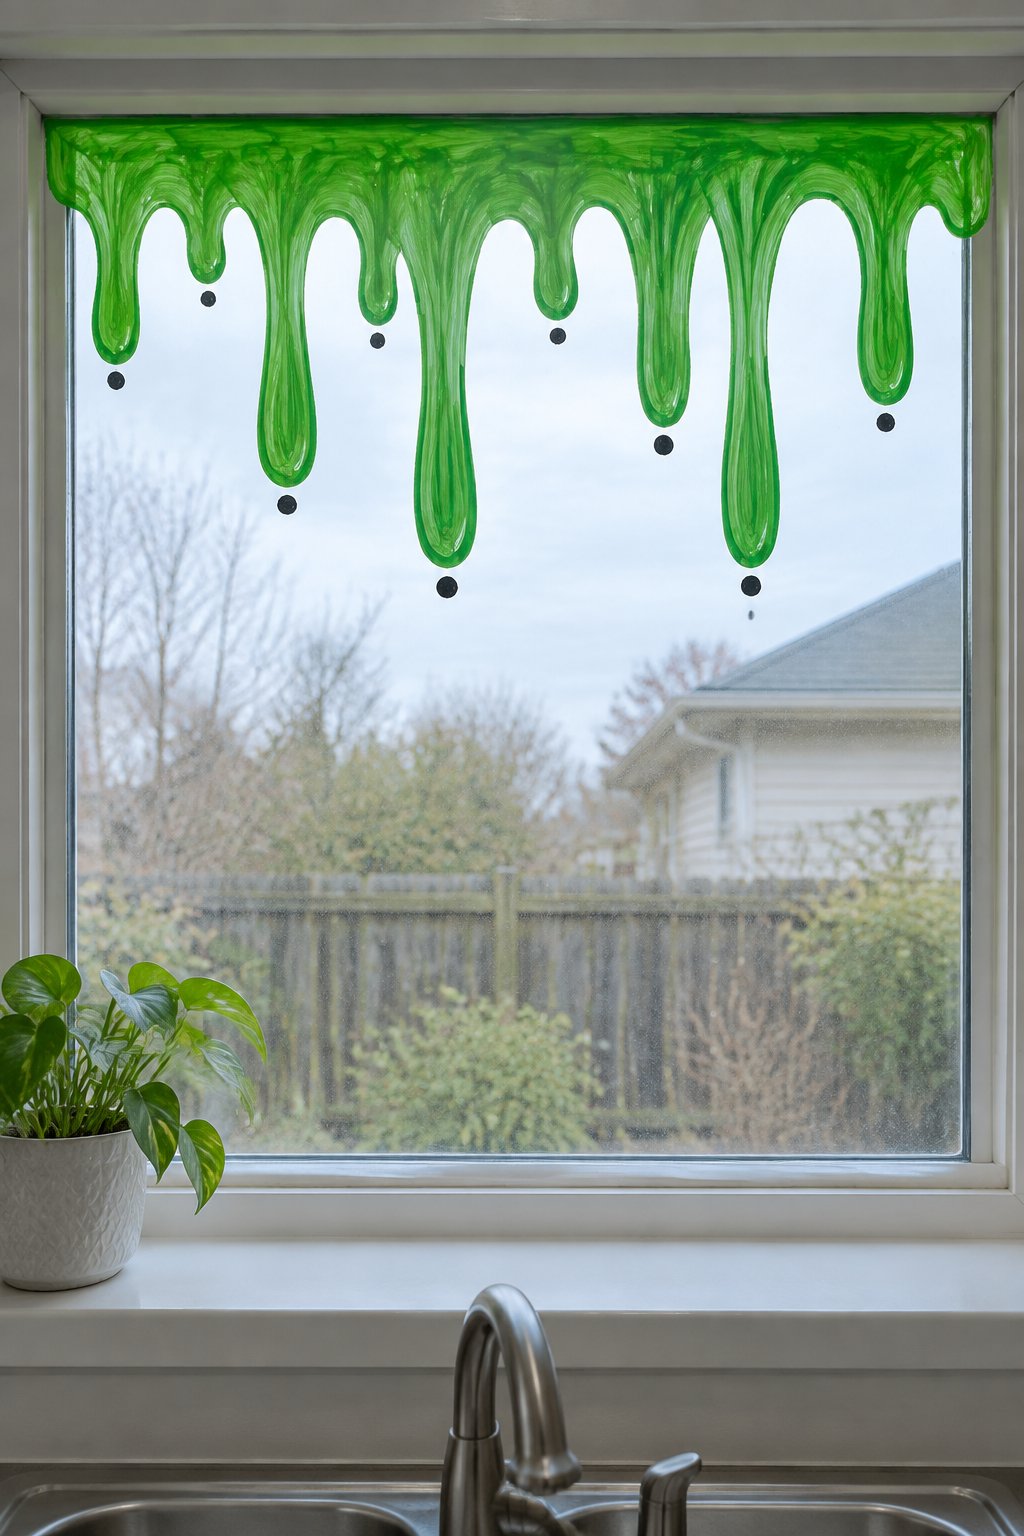
Glossy green slime drips along the top edge of a kitchen window over the sink. The drips range from 2 to 8 inches long, with rounded ends and small black dots beneath them.
You’ll want green washable window paint, black paint, a wide brush, a fine brush, painter’s tape, and cotton swabs. Tape the top border first, then pull each drip downward in one steady stroke.
53. Spiders Crawling Down the Glass
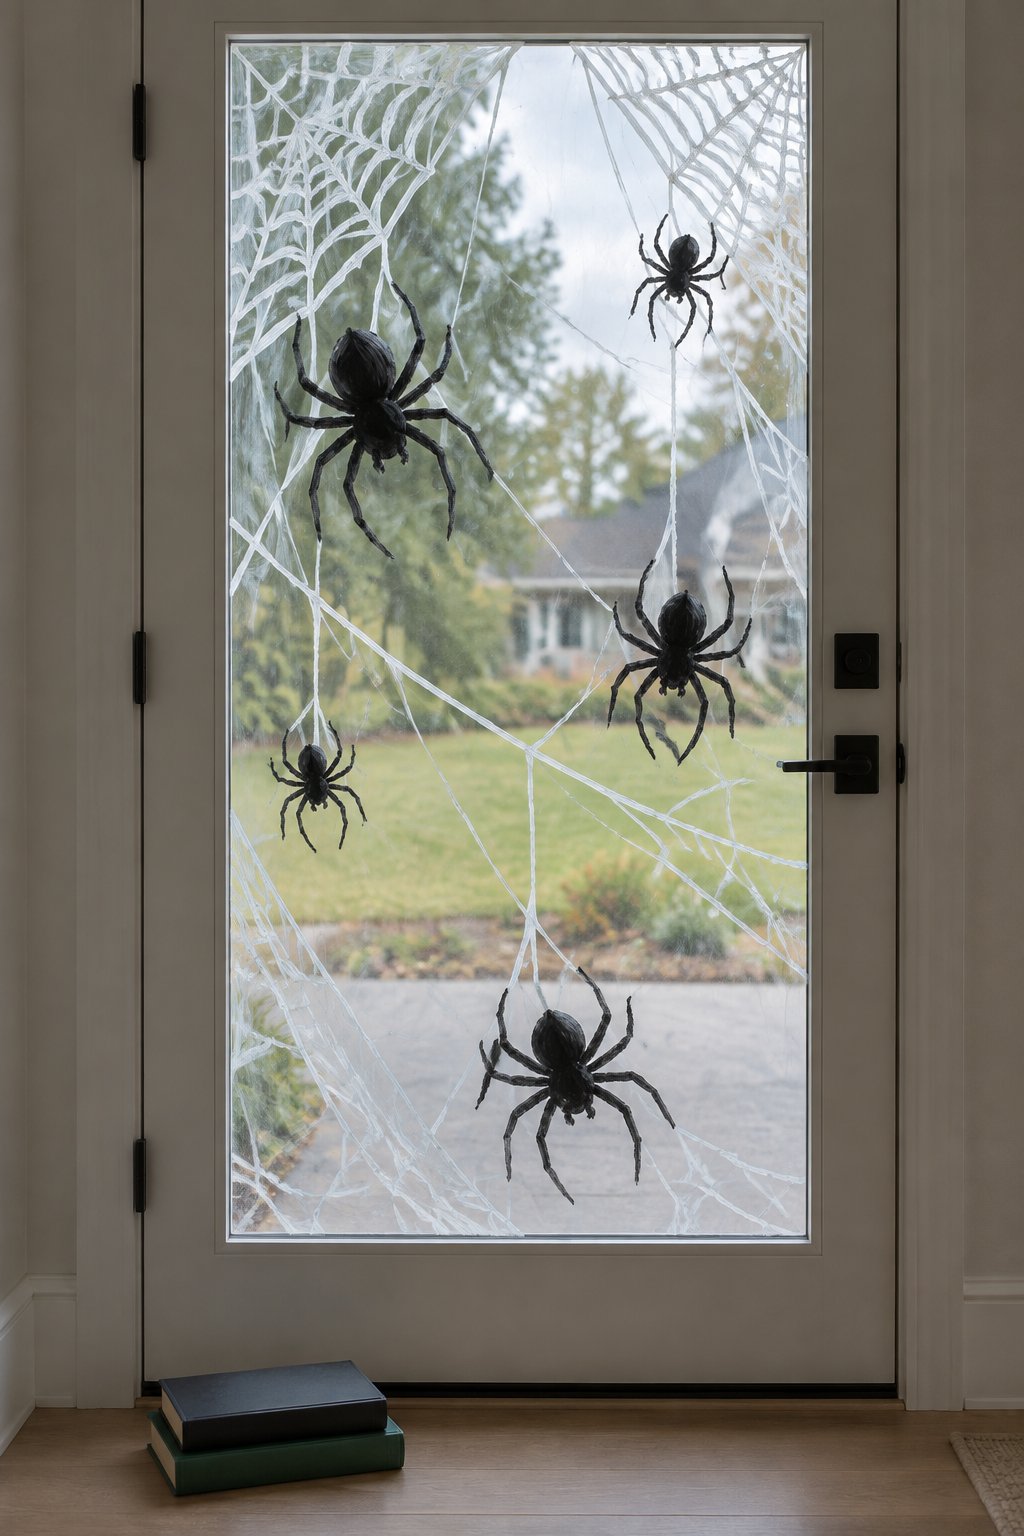
Black spiders crawl down a front door glass panel across white spider webs. The spiders range from 2 to 5 inches wide, with web strands spreading from the upper corners.
Use black and white washable paint, a fine brush, spider and web stencils, painter’s tape, and cotton swabs. Paint the webs first, then add the spiders so their dark bodies sit cleanly on top.
54. Raven on a Crooked Tombstone
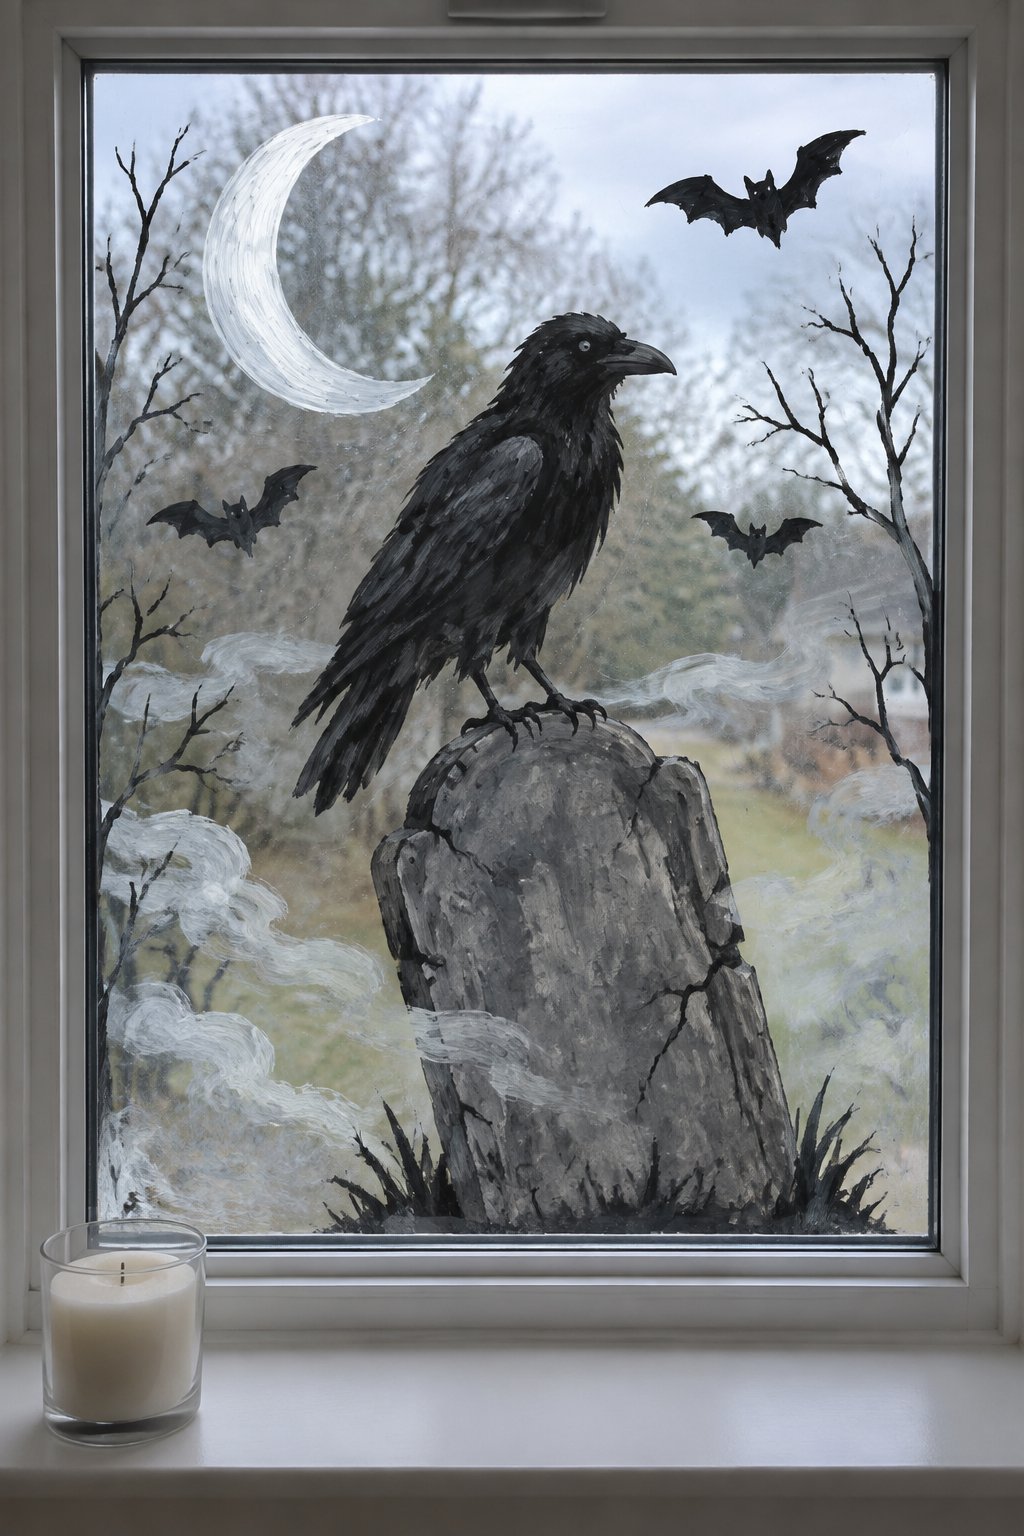
A black raven perches on a crooked gray tombstone across the lower half of a small bathroom window. A white crescent moon, thin branches, black bats, and pale fog fill the space around the 10-inch stone.
Start with black, gray, white, and yellow washable paint, a crescent stencil, fine brushes, painter’s tape, and cotton swabs. Paint the tombstone as a broad shape, then layer the raven and branches over it. For a table that matches the window, see our spooky tablescape ideas.
55. Bare Trees Under a Blood Moon
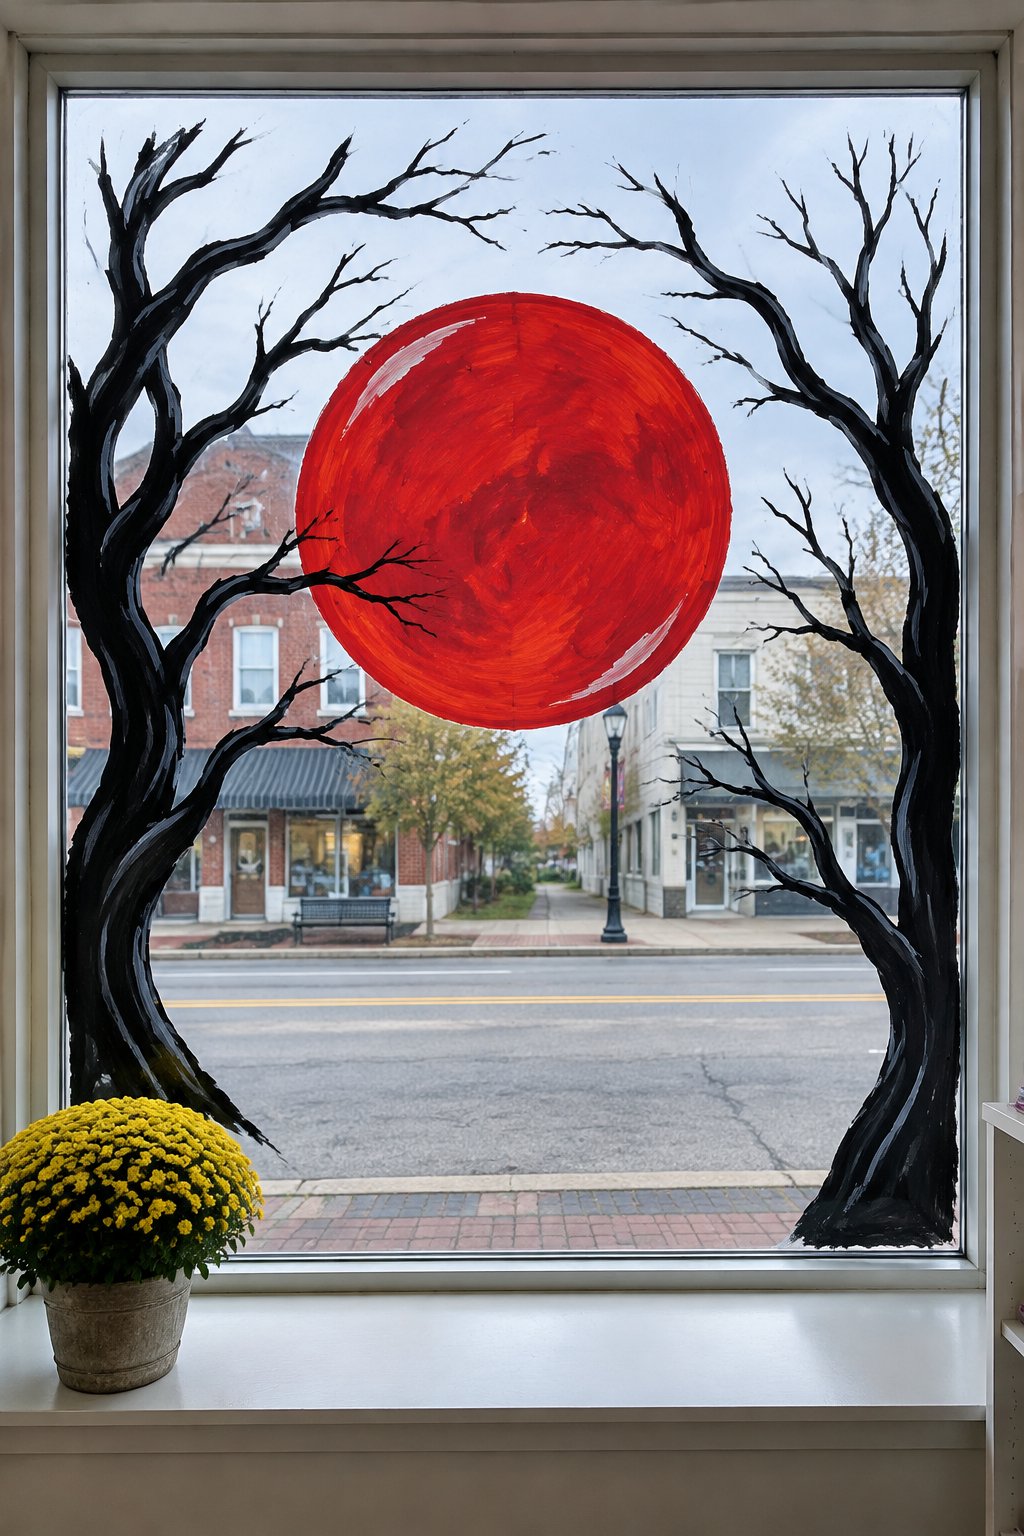
Twisted black, bare trees frame a large red full moon across a picture window. The moon measures about 18 inches wide, while thin branches reach inward from both sides.
Use red, black, and gray washable paint, a circle stencil, a wide brush, a fine brush, and painter’s tape. Paint the moon first, then build the trees from thick trunks into fine, tapering branches.
Halloween Window Painting Questions, Answered
What paint do you use to paint windows for Halloween?
Washable window paint, or tempera paint mixed with a little dish soap, is the easiest to clean off. Liquid chalk or paint markers are best for fine lines and lettering. Regular acrylic craft paint grips glass much harder and usually has to be scraped off.
How do you get window paint off the glass?
Most washable window paint lifts with warm soapy water and a sponge. For stubborn spots, wet the glass and hold a plastic or razor scraper flat against it. Test a small corner first on tinted or coated windows.
Should you paint on the inside or the outside of the window?
Inside is easier: the paint stays out of the rain and you can work from a step stool. Lettering painted on the inside reads backwards from the street, so trace a flipped template if you want words to face out.
How do you paint a window design without drawing freehand?
Tape a printed template to the other side of the glass and trace it with a paint marker, then fill it in with a brush. Painter’s tape gives you straight borders and clean edges in seconds.