Decorating a Christmas tree just feels more festive when we add ribbons.
They bring in color, texture, and a finished look that ornaments alone can’t always manage.

You don’t need to be a professional designer to make it look good. With the right ribbon and a few simple tricks, you can pull off a tree that’s both festive and balanced.
Whether you like a classic spiral wrap, waterfall strands, or tucked loops, ribbons really tie the whole look together.
Choosing the Right Ribbon for Your Christmas Tree
The ribbon you pick — type, color, and amount — can totally change how our tree turns out. Picking carefully helps you get a design that feels festive without being over-the-top.
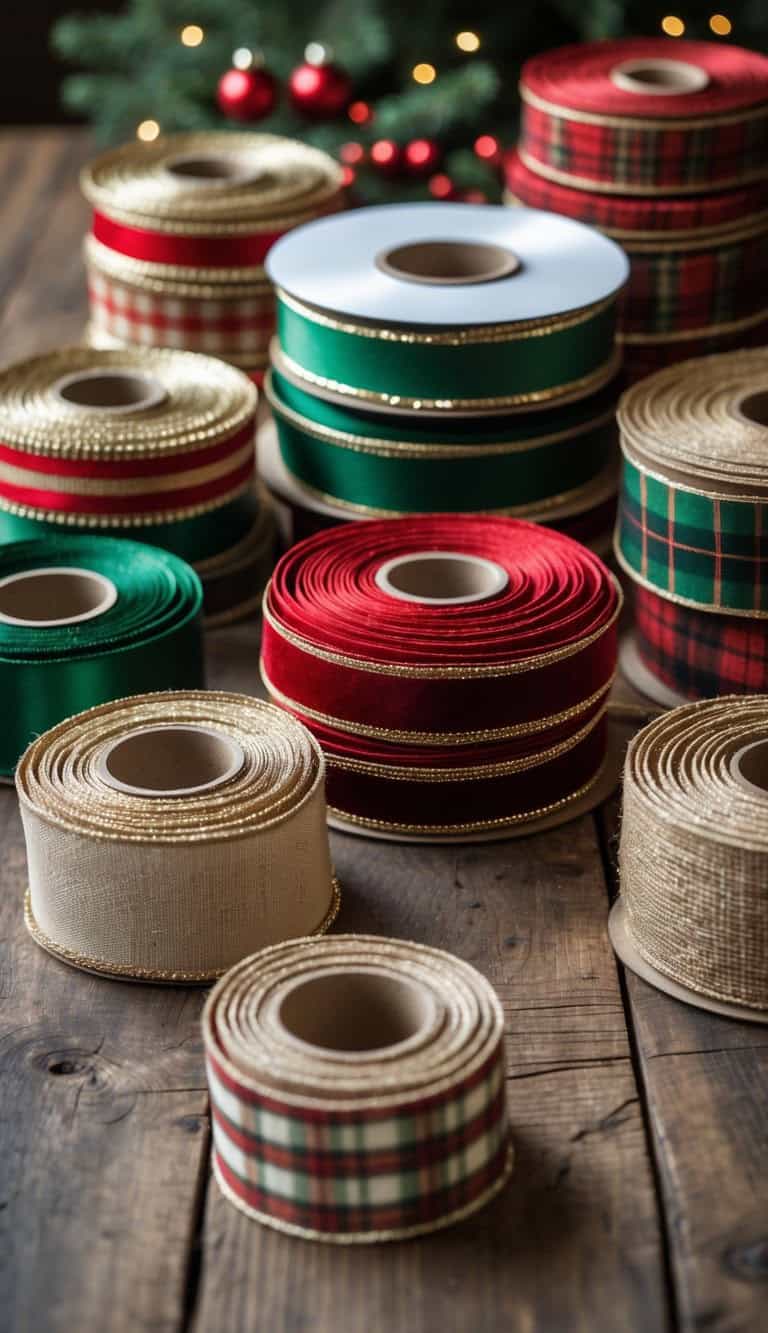
Types of Ribbon
Not all ribbons behave the same on a tree.
Wired ribbon is the easiest to shape since the edges hold their form. You can bend it to make full loops or soft drapes, and it won’t droop.
Satin ribbon has a shiny, smooth surface that catches the light, but it’s floppier unless it’s wired. It’s great for bows or smaller accents.
Velvet ribbon feels rich and adds a soft texture. It’s heavier, so it works best on bigger trees where it won’t pull the branches down.
Other options? Mesh ribbon adds volume, and sheer ribbon gives a lighter, airier look. Mixing a couple of styles can really add depth and interest.
Selecting Colors and Patterns for Holiday Decor
Color always sets the mood.
Red and gold ribbon feels classic and warm, while silver and blue brings a chill winter vibe.
Patterns matter too. Solid ribbons blend in more, while patterned ribbons stand out and can even steal the show.
For something playful, try plaid or stripes — they add a cozy, casual touch.
If you use a bold pattern, it’s smart to keep ornaments simple so things don’t get chaotic.
Here are some combos that just work:
- Red velvet + gold mesh for a rich, classic look
- Silver satin + white sheer for a clean, modern tree
- Green plaid + burlap for rustic holiday style
How Much Ribbon You Need for Your Tree
How much ribbon? It depends on tree size and how full you want it.
A good ballpark is about 9 to 10 feet of ribbon per foot of tree height if you’re weaving it in loops.
For example:
| Tree Height | Ribbon Needed |
|---|---|
| 6 ft | 54 to 60 ft |
| 7.5 ft | 68 to 75 ft |
| 9 ft | 81 to 90 ft |
It’s honestly safer to buy an extra roll — running out halfway is the worst.
If you’re just adding bows or small accents, you can use less. Mixing different ribbons can help stretch what you have and add variety.
Prepping Your Christmas Tree for Decorating

Getting the tree ready before adding ribbon makes everything easier. A prepped tree looks fuller, holds ribbon better, and keeps things from looking messy.
Fluffing Branches and Setting Up Lights
Always start by fluffing the branches. Pull the tips apart and spread them in different directions so the tree looks nice and full. Even fake trees need this. They can look flat out of the box.
Tip: Work from the bottom up, fluffing each layer before moving higher. That way, you won’t miss any spots.
Test the lights before putting them on. Seriously, finding a dead strand after wrapping the whole tree is just… ugh.
Next, add the lights. They go on before ribbon or ornaments so you’re not moving stuff around later.
Tip: Wrap lights around the inner branches first, then work outward. This gets the tree glowing from the inside out.
Planning Your Ribbon Placement
Ribbon looks best when you plan where it’ll go instead of just winging it. Decide if you want it running vertically, spiraling around, or in a loose zigzag.
Cutting the ribbon into shorter pieces instead of using one long strip makes it way easier to control.
Think about balance too. If one side has way more ribbon, the tree will look off. Step back every now and then to check if things look even.
Using different widths or textures can add depth. Pairing a wide mesh ribbon with a thinner satin one can make the tree feel layered, but still lets ornaments shine.
Popular Methods for Adding a Ribbon to a Christmas Tree
There are a couple of easy ways to style ribbon that totally change the tree’s vibe. Each method gives a different flow and feel, so it’s worth picking what fits your style.
Cascading Ribbon Technique
The cascading technique is all about letting the ribbon fall in soft waves from the top down. Instead of wrapping it tightly, tuck pieces into the branches so they weave in and out.
It creates a flow that feels natural and full, not stiff.
Wired ribbon works best — it holds its shape and gives those nice billows.
Here’s a step-by-step guide to do this method:
- Cut ribbon into strips, usually 3 to 4 feet long. Shorter pieces are easier to control and adjust.
- Start by securing one end near the top. Secure it deep inside the branches, not just on the surface.
- Angle the ribbon left or right as it goes down.
- Tuck the middle back into the branches.
- Let it pop back out for a loop, then tuck again.
- Repeat for that in-and-out movement.
- Add several cascading ribbons, spacing them around the tree.
If you use two different ribbons — like a wide solid and a narrow patterned one — it adds more depth and texture.
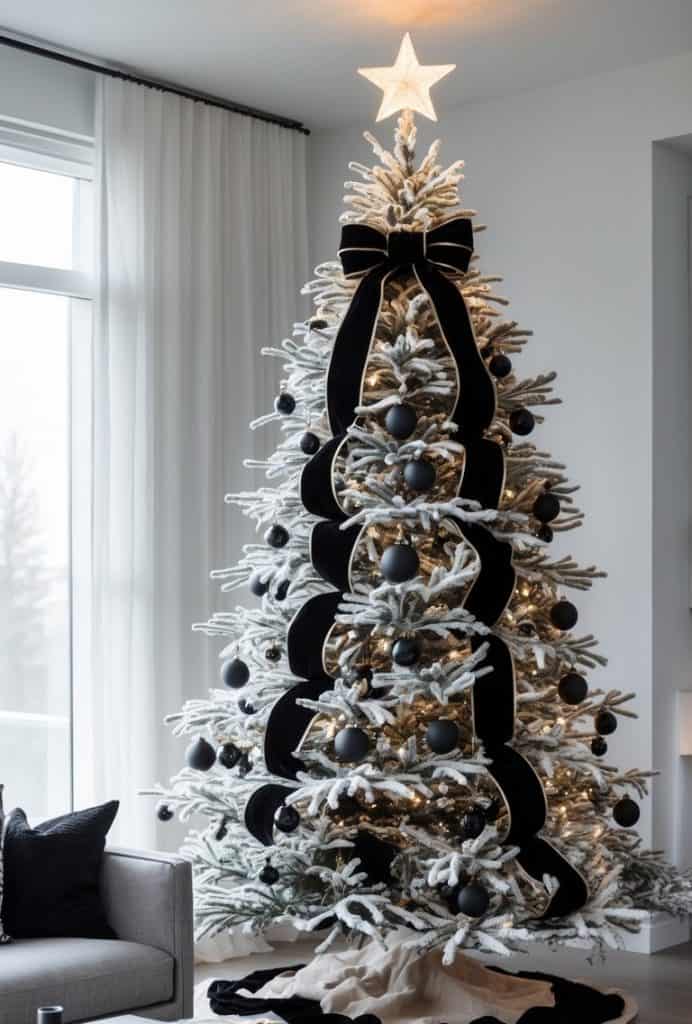
Ribbon Garland Wrapping Method
The garland wrapping method is more traditional. You wrap one long piece of ribbon around the tree in a spiral, working from the top down.
It’s a consistent look and works well if you want things neat and uniform.
- Start with a wide ribbon, around 3 to 4 inches, so it stands out.
- Start by securing one end near the top. Secure it deep inside the branches, not just on the surface.
- Wrap around the tree. Space each wrap about 8 to 12 inches apart, depending on tree size. On taller trees, you might want to space it out more so the ribbon doesn’t take over.
- Keep some slack so it drapes gently. Don’t pull it tight. A little looseness makes the garland look more natural.
This method is great if you want the ribbon to really set the color theme.
Creating Bows
The bow method is all about using individual bows as decorative accents instead of long ribbon strands. You can make them big, small, layered, or mixed with different ribbon styles.
It gives the tree a clean, polished look with defined focal points.
Wired ribbon works best — it keeps the loops full and helps the bows hold their shape.
Here’s a step-by-step guide to do this method:
- Cut ribbon into sections long enough to tie or fold into a bow. Around 18 to 24 inches works for medium bows.
- Form your bow by creating two loops and cinching the center tightly. Fluff the loops so they look even and round.
- Secure the bow with floral wire or twist ties. This keeps the shape stable when you attach it to the tree.
- Tuck the back of the bow deep into the branches. The loops should sit on the outside, not sagging or leaning.
This method is great if you want the ribbon to feel intentional and structured, rather than flowing or draped.
Finishing Touches: Tree Toppers and Ornament Placement

The last details really change the whole vibe. A ribbon topper draws the eye up, and the way you place ornaments helps balance things out.
Incorporating a Ribbon Tree Topper
A ribbon tree topper gives a polished finish without needing a heavy star or angel.
You can make a big bow with long ribbon tails that flow down the sides. Wired ribbon is the best for this — it holds its shape and you can fluff the loops.
- Cut a few long strips, form loops, and secure the center with floral wire or a twist tie.
- Attach it to the top branch and let the tails cascade down.
Some folks like one big bow, others prefer several smaller bows layered together. Either works, as long as the ribbon matches the rest of the tree’s colors.
Mixing textures helps too. Velvet ribbon with a metallic accent adds depth.
Balancing Ribbon with Ornaments and Other Decor
Once the ribbon’s in place, ornaments should highlight it, not fight for attention.
Hang bigger ornaments toward the inside of the tree to create some depth.
Use smaller ones on the outer branches so the ribbon doesn’t get buried. This layering keeps the ribbon visible and still gives the tree plenty of sparkle.
Spacing matters. If a spot looks overloaded with ribbon, try simple ornaments nearby to balance things out. If a section feels a bit plain, toss in a shiny ornament or two to make the ribbon pop.
Mix up finishes — matte, shiny, textured — so the ribbon doesn’t just blend in or look flat.
Creative Ideas for Using Ribbon in Holiday Decor
Ribbon isn’t just for filling gaps on a tree. The right color, texture, and placement can set a theme or spotlight your favorite ornaments.
It’s wild how much ribbon can add to that cozy holiday feeling at home.
Mixing Ribbon Styles for a Unique Look
Who says you have to choose just one ribbon? Combining different widths, colors, and textures makes the tree feel layered and interesting.
A wide velvet ribbon with a skinny metallic one? That’s a combo that really pops. Contrast adds depth but still keeps the tree looking balanced.
Patterns and textures matter too. A plaid ribbon gives off traditional vibes, while a sheer glittery one feels lighter and a bit modern.
Using both together makes the tree look personal and not overly matchy-matchy.
Try layering ribbons right on top of each other. Place a narrow ribbon over a wider one, then twist or fan them apart a bit. You’ll get a stacked effect that looks pretty polished without much work.
Or just alternate ribbon types around the tree. This kind of variety makes holiday decor feel thoughtful, but honestly, it’s not hard to pull off.
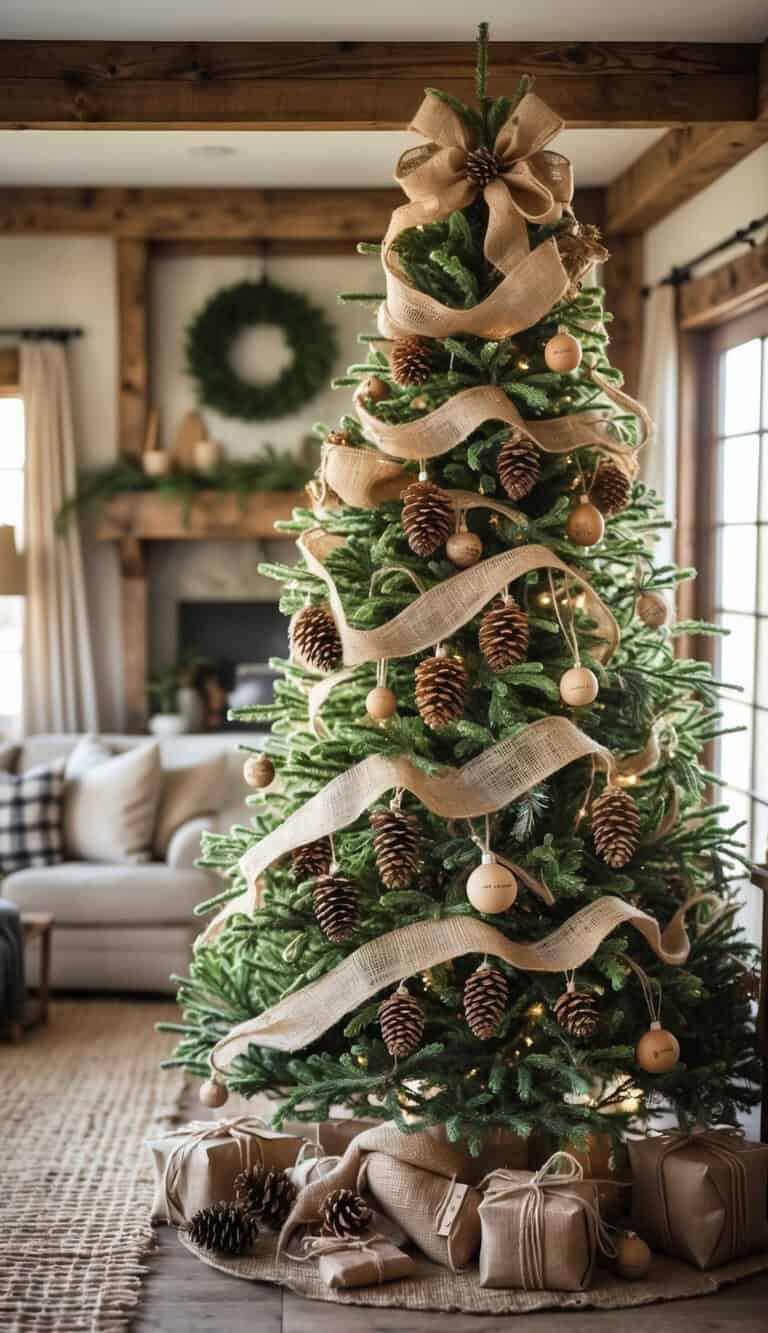
Personalizing Your Tree With Themed Ribbons
Ribbons are a quick way to tie your tree to a theme.
If you’re after a rustic holiday vibe, try burlap or gingham ribbons.
Prefer something a bit fancier for Christmas glam? Satin or metallic ribbons can really elevate the look. The material and design you pick set the tone right away.
Ribbons can also highlight family traditions. Maybe you use your favorite team colors, or match a ribbon to your annual ornament theme.
Another trick: coordinate ribbons with the rest of your holiday decor. If your stockings have gold trim, tossing some gold ribbon on the tree pulls the whole room together.
Choosing ribbons that reflect your style — playful, classic, minimal, or whatever feels right — makes the tree feel like it really belongs in your home. Isn’t that the point?